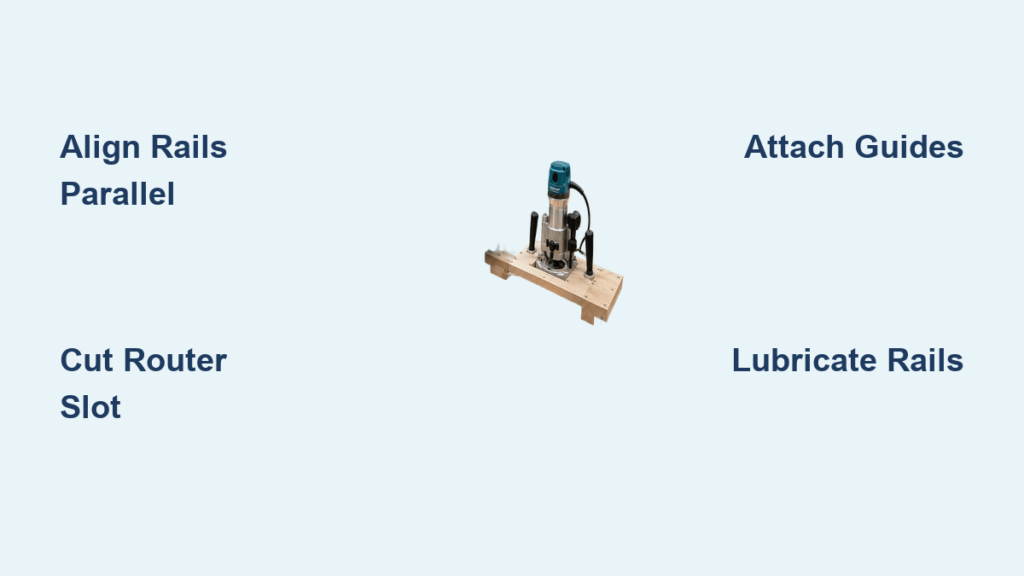
Struggling to flatten a warped live-edge slab often feels impossible when your planer is too small. A router sled solves this by turning your plunge router into a precision planing machine capable of handling massive widths.
This guide teaches you how to make a router sled using three proven designs ranging from scrap metal to industrial linear rails. You will learn exact material lists, alignment secrets, and safety steps to flatten wood faster than ever before.
Select the Right Router Sled Design

Choosing the correct architecture determines your build time and final accuracy. Each design serves a specific need based on your budget and available tools.
Angle-Iron and Pine Build
This design is the fastest way to start flattening wood today. It uses standard angle iron and a pine board to create a rigid bridge in under an hour.
- Best for: Beginners or occasional use
- Build time: Under 60 minutes
- Cost: Under $50
The structure mounts a 1×6 pine board between two lengths of angle iron. Side fences keep the sled aligned while bolts secure the assembly. Metal runners resist wear while pine remains easy to shape.
Plywood Box System
This popular DIY approach balances cost with performance using ¾-inch plywood. It creates a cradle that rides on parallel rails for excellent rigidity.
- Best for: Hobbyists and general shop use
- Build time: 2 to 4 hours
- Cost: Under $100
The frame features a central slot for the router and glides on plywood rail assemblies. A critical 1/16-inch dado cut into the rail base keeps everything aligned. Never glue these rail joints as moisture causes warping.
Precision Linear Rail System
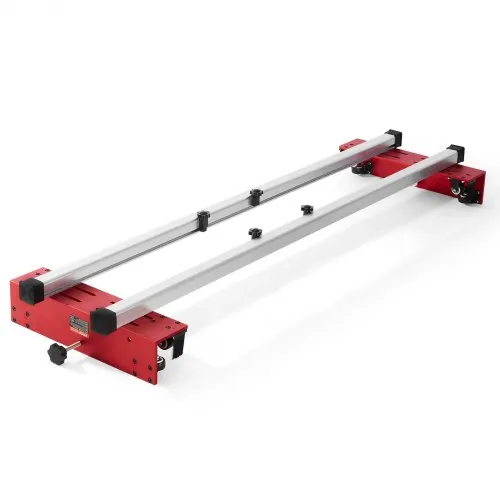
Upgrade to linear rails and bearings for professional results with zero friction. This system handles large 4×8 sheets with effortless movement.
- Best for: High-volume shops and large panels
- Build time: 4 to 6 hours
- Cost: Under $200
This design uses 79-inch long rails and 59-inch cross rails with 16 ball bearings. An aluminum angle frame prevents flex while oversized mounting holes allow micro-adjustments.
Gather Required Materials and Tools
You need specific parts based on your chosen design to ensure structural integrity. Sourcing quality materials upfront prevents binding later.
Material List by Design
- Angle-Iron: Two pieces of angle iron, 1×6 pine, bolts, nuts, and pine fences.
- Plywood Box: ¾-inch plywood sheets, wood screws, and pocket hole screws.
- Linear Rail: Two 79-inch rails, two 59-inch rails, 16 ball bearings, and aluminum angles.
All linear components are available online often as complete kits. Search for 20mm linear rails with 8mm bearings to find affordable options.
Essential Tools Checklist
- Miter saw: For accurate straight cuts on wood and metal.
- Table saw: Critical for cutting dados and the router slot.
- Drill or drill press: For precise pilot holes and countersinking.
- 2.5-inch hole saw: Creates clearance for dust ports and router bases.
- Calipers: Necessary for aligning bearings in linear systems.
A table saw is highly recommended for the plywood design. You can adapt with a circular saw but accuracy may suffer during slot cutting.
Construct Stable Rails First

The rails form the foundation of your entire flattening operation. If they are not parallel your sled will bind or gouge the wood surface.
Cut and Assemble Plywood Rails
Build two identical rail assemblies for the box sled design. Cut a base piece and two rail strips from ¾-inch plywood.
- Clamp inner and outer rails together with bottom edges aligned.
- Cut a 1/16-inch deep dado along the base using a flat-grind ripping blade.
- Pre-drill and countersink all screw holes before assembly.
- Secure parts with screws only and avoid using any glue.
Glue traps moisture in end grain which causes warping over time. Screws allow you to disassemble and re-flatten rails if needed.
Mount Linear Rails
Attach long rails to your workbench edges using mounting brackets for the precision system. Position short rails between them to support the carriage assembly.
Slide bearings onto the rails before final tightening of any components. Use oversized holes in the carriage frame to allow for alignment tweaking. Add end stiffeners to prevent lateral racking and bearing binding.
Align Rails for Parallel Movement
Parallelism is non-negotiable for smooth operation. Clamp one rail end to your table saw fence to establish a straight reference line.
Align the other end to an outfeed table or straight edge. Slide the sled back and forth to ensure it moves smoothly with no resistance. Loosen screws and re-clamp if you feel any binding at either end.
Cut the Router Slot Precisely
This slot allows your plunge router to travel across the wood safely. Precision here ensures stable travel and consistent cutting depth.
Measure and Mark Slot Boundaries
Measure your router base width where it contacts the sled material. Subtract 1/32 inch from this measurement to prevent binding during operation.
Bore 1½-inch holes at both ends of the intended slot path. Use a hole saw for clean circular ends that connect smoothly.
Cut Slot with Table Saw
Set your blade height to just above the sled thickness for safety. Use featherboards to hold the workpiece down and against the fence securely.
- Slide the base back and forth over the spinning blade.
- Lower the blade incrementally with each pass.
- Connect the two end holes smoothly without stopping.
- Repeat on the other side if extra width is required.
Secure the inner waist piece between holes to prevent dangerous kickback. Always keep your hands clear of the blade path using push blocks.
Attach Guides and Runners
Your sled needs smooth gliding surfaces to function correctly. Proper installation prevents friction and ensures even material removal.
Install Plywood Runners
Apply CA glue to the first guide before clamping it to the sled bottom. Use a ¾-inch plywood spacer to align the second guide flush with the first.
Screw both guides in place after the glue sets. Clean inside corners with a block plane to reduce friction points. This creates a smooth channel for the sled to travel.
Mount Angle-Iron Fences
Cut two pine strips four inches deep for the side fences. Drill pilot holes vertically into the angle iron perpendicular to the travel direction.
Clamp the fence in place and drill through to secure with flathead screws. Flathead screws will not catch on the workpiece during movement. This simple setup provides surprising stability for rough flattening.
Align Linear Bearings
Slide all bearings onto the rails before positioning the carriage. Place the aluminum and plywood frame onto the upper rails carefully.
Insert 16 bolts through the frame into the bearing mounts gradually. Tighten them slowly while checking for smooth travel throughout the entire range. This over-engineered approach eliminates flex completely.
Add Dust Collection Features
Dust control makes the flattening process cleaner and safer for your lungs. The linear rail design allows for integrated vacuum ports easily.
Install Vacuum Port
Drill a 2.5-inch hole in the sled base using a hole saw. This size accommodates standard shop vac hoses and router bushings perfectly.
Attach a shop vac adapter with a flange directly to the base. Seal joints with tape or a rubber gasket if needed for maximum suction. This system captures over 80 percent of dust during operation.
Create a Dust Skirt
Basic sleds can use a simple dust skirt made from plastic sheeting. Tape the plastic around the base to create a barrier against flying chips.
Run your vacuum before starting the router to prime suction power. Even a basic setup significantly reduces cleanup time after flattening sessions.
Execute the Flattening Process
Proper technique ensures a flat surface without damaging your tools or workpiece. Follow this workflow for professional results every time.
Secure Rails and Workpiece
Clamp rails to a stable surface like a workbench or dedicated MDF bed. Use magnetic clamps or hot glue to hold lightweight slabs in place.
Shim any rocking corners with playing cards or veneer strips. A stable workpiece prevents shifting that ruins flatness and damages bits.
Calibrate Router Depth
Find the highest point on your slab before cutting. Lower the router bit until it just touches that high spot gently.
Set your first pass depth to 1/16 inch maximum. Starting at the highest point ensures you do not waste time or risk gouging low areas.
Make Flattening Passes
Start at one end of the slab and move the sled back and forth. Advance the sled position by ¾ inch between passes to overlap cuts.
Apply slow and even pressure while moving. Rushing causes tipping and creates gouges in the wood surface. Listen for consistent router sound to know when you are near flat.
Flip the slab and repeat on the other side for balanced results. This prevents internal stress and warping after finishing.
Maintain and Troubleshoot Sled
Regular maintenance keeps your sled running smoothly for years. Addressing issues early prevents damage to your projects.
Lubricate Moving Parts
Avoid paste wax as it attracts sawdust and creates gunk over time. Spray Teflon-based dry lubricant on rails and runners instead.
Let the lube dry for two to three minutes before use. This method glides smoothly and repels dust effectively for multiple sessions.
Fix Common Binding Issues
Binding usually stems from wax buildup or misaligned rails. Switch to dry lube and realign rails using the clamping method described earlier.
Plane or sand inside corners of guides if they feel rough. Check bolt tension regularly and tighten after heavy use to maintain rigidity.
Frequently Asked Questions About Router Sleds
What router bit size works best for flattening slabs?
A 1½-inch diameter surfacing bit is highly recommended for efficiency. Larger bits remove more material per pass which reduces total routing time significantly.
Can I flatten a 4×8 sheet with a DIY sled?
Yes if you build the precision linear rail system with 79-inch rails. The plywood box design can also be scaled up but requires very long parallel supports.
How deep should each routing pass be?
Limit each pass to 1/16 inch depth to avoid straining your router. Deeper cuts cause tear-out and may damage the sled structure or bit.
Do I need a special router for this sled?
You must use a plunge router to adjust cutting depth mid-job. Fixed base routers cannot change depth easily while mounted in the sled.
Why do my rails warp after a few months?
Using glue in rail joints traps moisture and causes warping in thin plywood. Always use screws only for rail assembly to allow for wood movement.
Key Takeaways for Building Your Router Sled
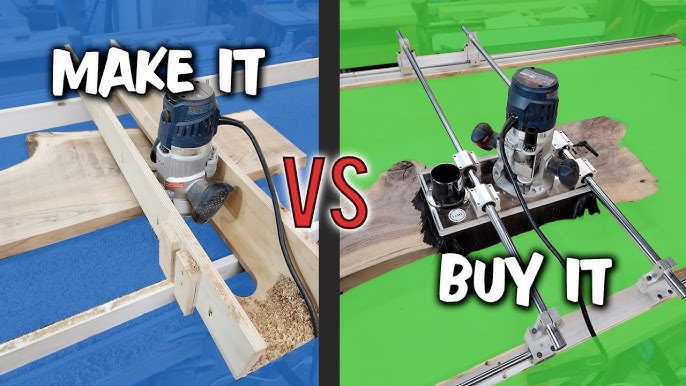
Building a router sled transforms your ability to handle large wood projects. Choose the angle-iron design for speed or the linear rail system for professional precision.
Focus on perfect rail alignment and dry lubrication for best results. Take light passes and secure your workpiece tightly to ensure safety and quality. Start gathering your materials today to flatten your next slab with confidence.