
You just unboxed a shiny new Netgear modem, plugged it in, and… nothing. No internet, just blinking lights. Sound familiar? The problem usually isn’t faulty hardware. It’s skipping a critical step most people don’t know about: registering your modem with your ISP before assuming everything works. This guide on how to set up a Netgear modem walks you through the entire process the right way.
Most users finish setup in under 20 minutes when they follow the correct sequence. You’ll learn how to connect hardware, activate service with Xfinity or Spectrum, log into routerlogin.net, and lock down security. By the end, you’ll have a fast, stable home network without the frustration.
Confirm Active Internet Service Before Setup
Verify Your Subscription Is Active
Before touching any cables, confirm your cable internet plan is active. Netgear modems only work when your ISP account is ready for a new device. Compatible providers include Xfinity, Spectrum, Cox, Comcast, and Charter.
If you’re switching from a rental modem or setting up for the first time, call your ISP to confirm service at your address. Without an active plan, all the cables in the world won’t deliver internet.
Check Modem Compatibility With Your ISP
Netgear cable modems are certified by CableLabs and tested by major providers. Models like the Nighthawk C7000 v2 and AX2700 work with most U.S. cable services. Confirm your model appears on your ISP’s approved device list before you begin.
Have your model number, serial number, and MAC address ready. This speeds up activation dramatically.
Connect the Coaxial Cable Properly
Locate the Wall Jack and Modem Port
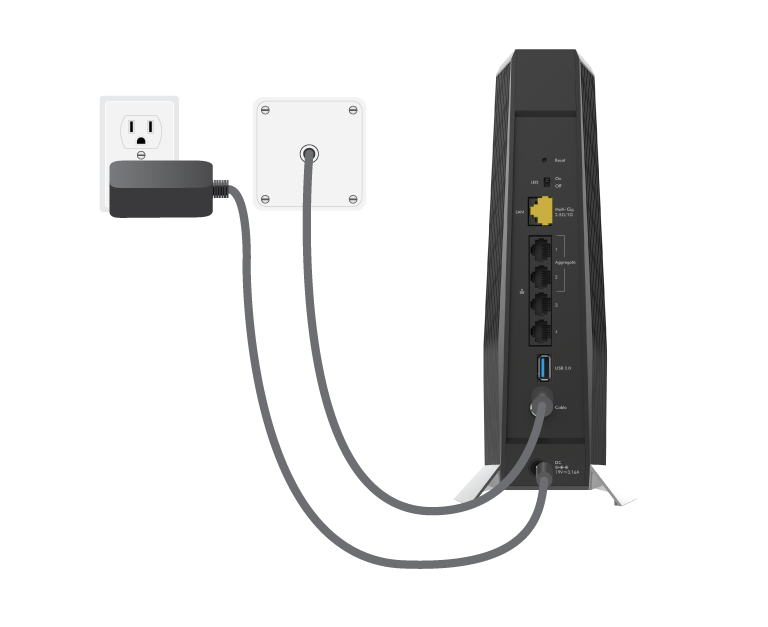
Find your coaxial wall outlet, typically labeled “Cable” or “Internet.” Connect one end of the coaxial cable to this jack. The other end plugs into the Coax or Cable In port on the back of your Netgear modem.
Turn the connector clockwise until snug. A loose connection causes signal loss and failed ISP sync. This port only accepts coaxial connectors, so it’s nearly impossible to plug in wrong.
Use a Quality Coaxial Cable
While most ISPs include a coaxial cable, damaged or low-quality ones degrade performance. For best results, use a quad-shield RG6 coaxial cable. Avoid bending or pinching the cable after installation.
If you’re reusing an old cable, inspect it first. Request a replacement from your ISP if it shows wear.
Power On and Wait for Stable Lights
Plug In and Boot the Modem
Connect the power adapter to the power port on the back of the modem. Plug it directly into a wall outlet, not a surge protector, during initial setup. Power strips can interfere with boot signals.
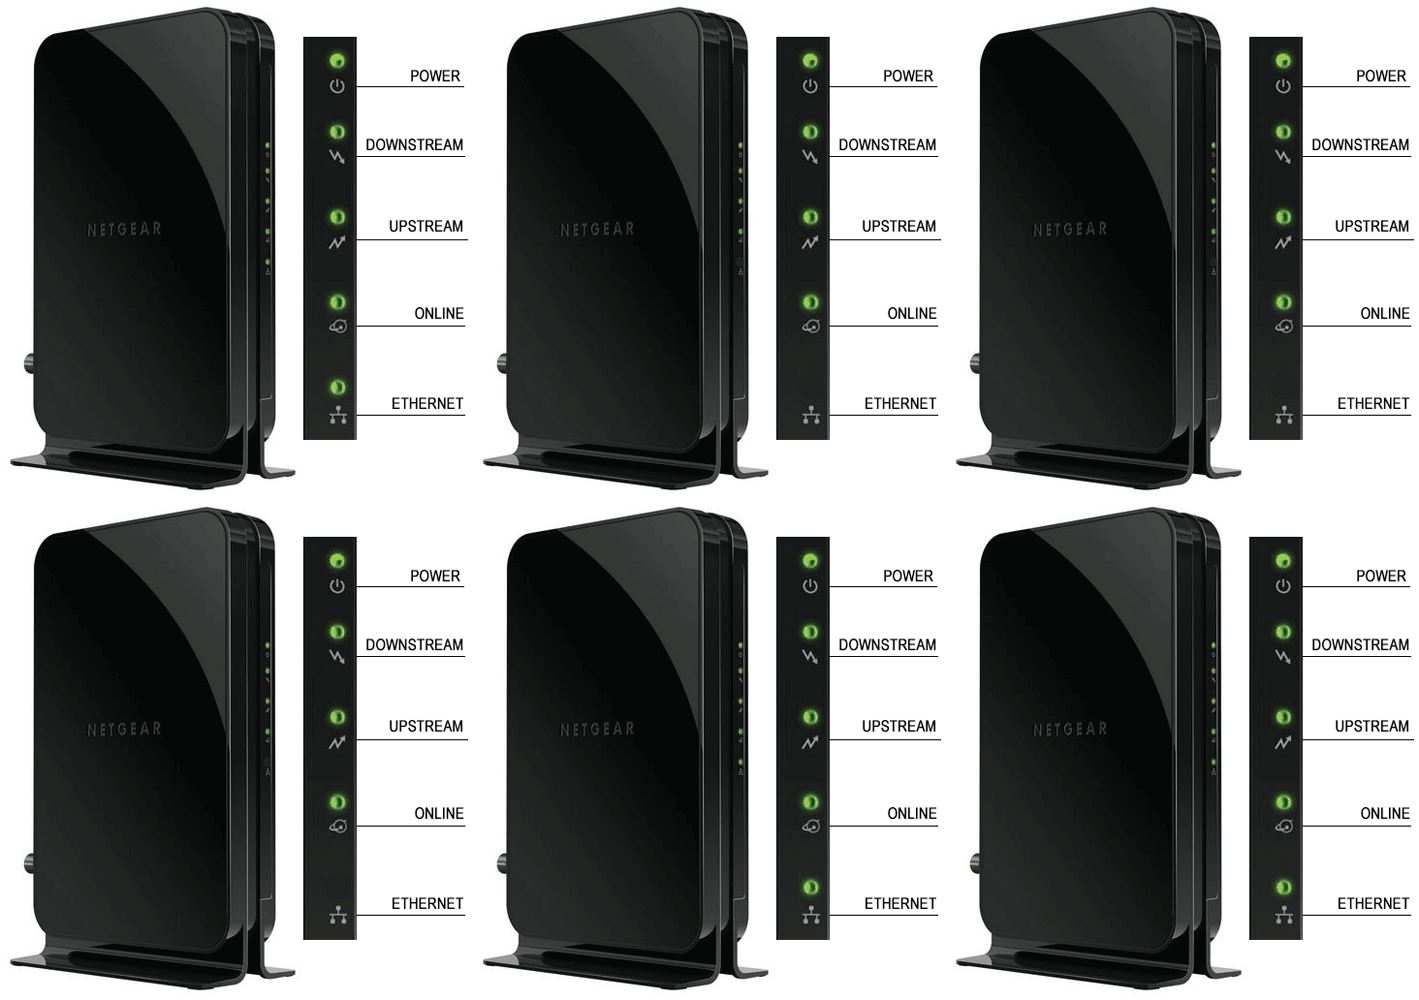
Once powered, the front panel lights will flash. This is normal. The modem is scanning for a signal from your ISP.
Interpret the Light Indicators
Wait 1–2 minutes for standard models, or up to 10 minutes for DOCSIS 3.1 devices like the C7000 v2. Watch for these key indicators:
- Power light solid green or blue means powered on
- Internet or Globe light solid green means connected to ISP
- Red or no light means a connection issue
Don’t proceed until the Internet light turns solid green. Flashing means the modem hasn’t synced yet.
Register Your Modem With Your ISP
Self-Activate Online
Most cable providers allow self-activation. Visit your ISP’s activation site, such as activate.spectrum.net for Spectrum, or use the Xfinity app or website for Comcast. You’ll need your modem model number, serial number, and 12-digit MAC address, all found on the device label.
Follow the prompts to register your device. The system may ask you to unplug and replug the modem to finalize activation.
Activate by Phone if Online Fails
If online activation doesn’t work, call your ISP using one of these numbers:
- Spectrum: 1-888-438-2427
- Xfinity: 1-800-COMCAST (266-2278)
- Cox: 1-888-556-1193
Tell the agent: “I’m installing a retail Netgear modem. Here’s the model and MAC address.” If they say your modem isn’t supported, ask to speak with a supervisor. Many frontline reps lack updated device lists.
Activate Through the Xfinity App
Xfinity users can activate directly through the app:
- Open the Xfinity app and log in
- Tap “Begin Activation”
- Select “My own modem”
- Choose “Manually enter MAC address”
- Enter the 12-digit MAC from your modem’s label
- Unplug the modem, then reconnect coax and power
- Confirm the device is online when prompted
Wait for confirmation. Your ISP may reset your account or push configuration remotely.
Connect Your Device to the Network
Join the Default Wi-Fi Network
After activation, your Netgear modem broadcasts default Wi-Fi networks. These names are printed on the device label:
- 2.4 GHz band, such as NETGEAR49
- 5 GHz band, such as NETGEAR49-5G
Use the 5 GHz network for faster speeds and less interference if your device supports it. The 2.4 GHz band offers better range and works with older devices.
Enter the Default Wi-Fi Password
The Wi-Fi password is also on the label, labeled “Password” or “Wi-Fi Password.” Type it carefully, as passwords are case-sensitive.
Use Ethernet for Reliable Setup
For the most stable initial configuration, connect a computer directly with the yellow Ethernet cable. Plug one end into a yellow LAN port on the modem and the other into your PC. This avoids Wi-Fi dropouts during setup.
Access the routerlogin.net Admin Page
Open Your Web Browser
On a connected device, open any browser. In the address bar, type one of these URLs:
- http://routerlogin.net
- http://192.168.0.1
- http://192.168.1.1
Check your device label for the correct default gateway.
Bypass the Security Warning
You’ll likely see a warning: “Your connection is not private” or “Dangerous site.” This is normal. Netgear uses self-signed SSL certificates.
Click “Advanced,” then “Proceed to routerlogin.net (unsafe)” to continue.
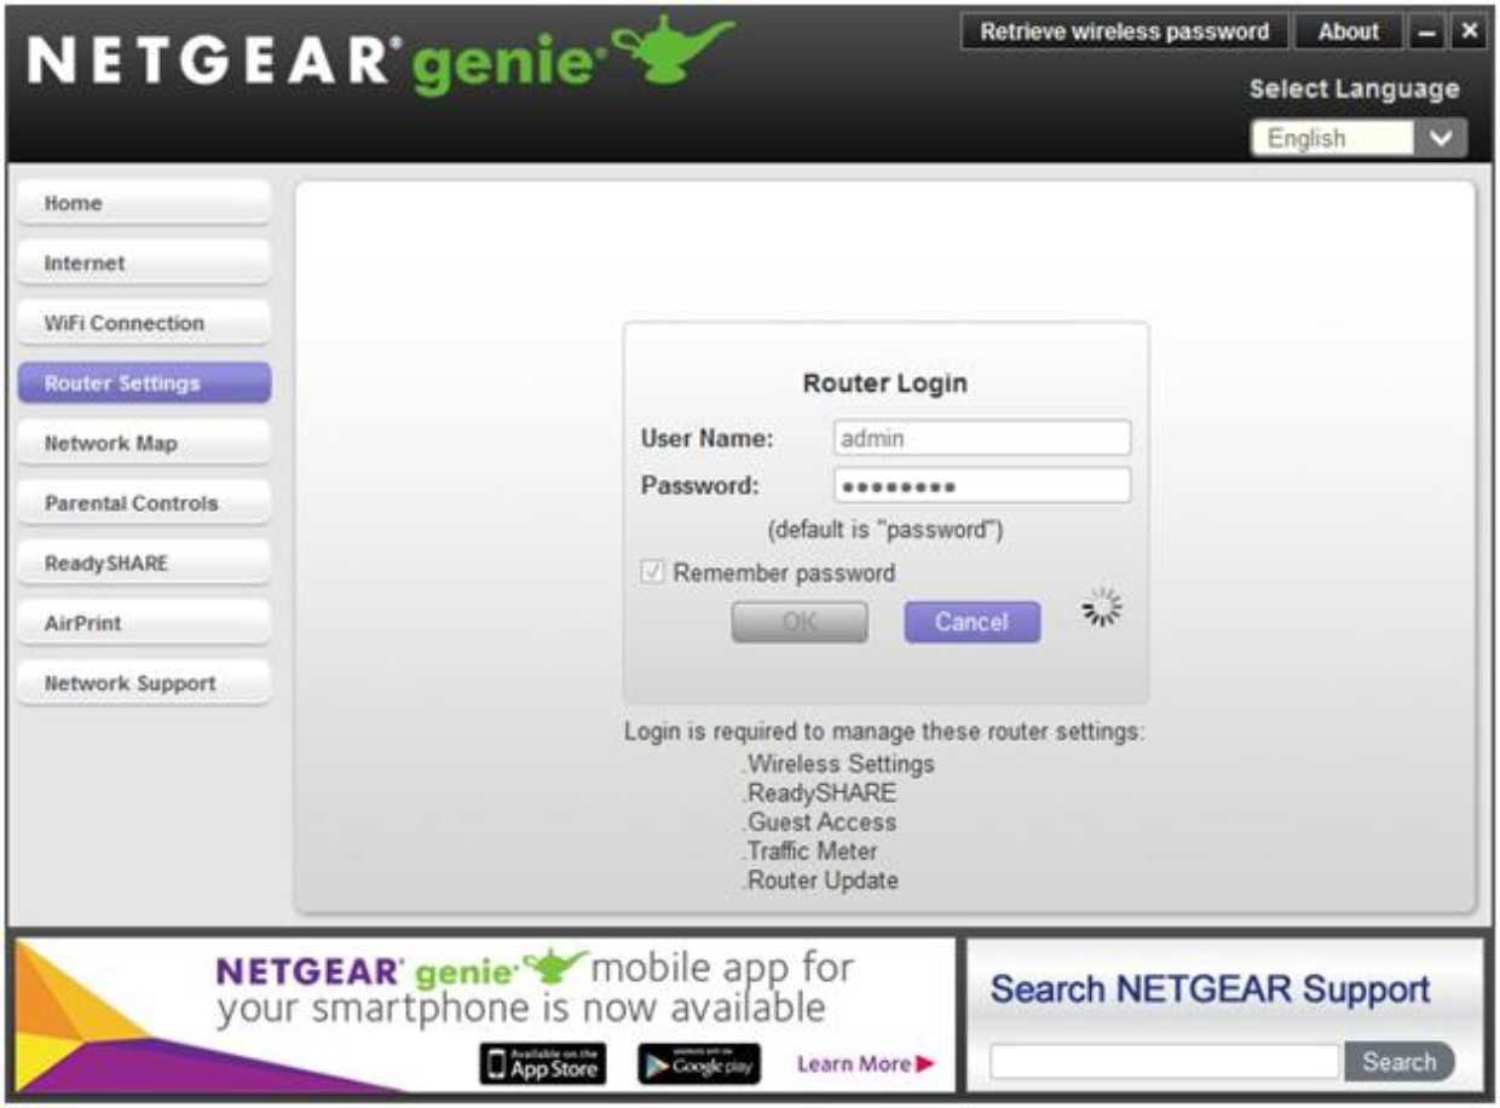
Log In With Default Credentials
Enter the default login:
- Username: admin
- Password: password (or check the label for a custom password)
Some models have unique default passwords printed on the sticker. If admin/password fails, refer to your device label.
Change the Admin Password Immediately
Set a Strong New Password
On first login, you’ll be prompted to change the default admin password. This step is critical. Leaving it as admin/password makes your network vulnerable to anyone who knows these defaults.
Create a strong, unique password such as MySecurePass!2025. Avoid common words or personal information.
Configure Security Questions
You’ll also be asked to set 2–3 security questions. These help recover access if you forget your password. Store your answers somewhere secure, as some questions can’t be changed later.
Why This Matters
The admin interface controls your entire network. Unauthorized access could let someone disable your internet, redirect traffic, or install malicious settings. Changing defaults is your first line of defense.
Run the Setup Wizard
Complete Initial Configuration
After logging in, the Setup Wizard launches automatically. It guides you through firmware updates, Wi-Fi network name customization, Wi-Fi password setup, security protocol selection, and optional guest network setup.
Follow each step carefully.
Update Firmware First
Go to Advanced > Firmware Update to check for the latest version. Updating ensures improved performance, security patches, and bug fixes.
Firmware updates take several minutes. Do not power off the device during this process.
Customize Your Wi-Fi Settings
In the wizard, you can rename both networks and set new passwords. For example:
- 2.4 GHz: HomeNet_2.4G
- 5 GHz: HomeNet_5G
Custom names make it easier to identify your network and improve security by hiding default SSIDs.
Secure Your Wireless Network
Choose WPA3 or WPA2 Encryption
In Wireless Settings, select your security protocol:
- WEP: avoid
- WPA: avoid
- WPA2-PSK (AES): minimum recommended
- WPA3: best for new devices
If all your devices support WPA3, use it. Otherwise, stick with WPA2-PSK (AES) for broad compatibility.
Rename SSIDs and Set Up a Guest Network
Go to Wireless > Basic Settings to rename your networks. Avoid personal information like “SmithFamilyNet.” Use something generic but identifiable.
Enable a guest network under Guest Network settings. This keeps your main network private and limits visitor access to connected devices. Set a unique password and turn it off when not in use.
Troubleshoot No Internet Connection
Check Light Status
If you have power but no internet, look at the lights. A red or blinking Internet light means sync failure. A solid green light means connected.
If red, ensure the coaxial cable is tight, ISP service is active, and the modem is registered.
Power Cycle the Modem
Unplug the modem from power and wait 5 minutes. This clears ISP cache and resets the connection.
Reconnect power and wait 2–10 minutes for full boot. Watch for a solid green Internet light.
Contact Your ISP for Offline Status
If the modem still won’t come online, call your ISP. Provide your MAC address and model number, then ask: “Is my modem visible on your network?”
If they say no, request an account reset or reactivation. Many issues are ISP-side, not hardware faults.
Maintain Optimal Performance
Schedule Firmware Updates
Check for updates monthly via Advanced > Firmware Update. Enable auto-updates if your model supports them. Updated firmware improves speed, stability, and security.
Run Speed Tests Regularly
Use speedtest.net to verify performance. Compare results to your plan’s advertised speeds. If speeds are low, reboot the modem, check for network congestion, or contact your ISP to test the line signal.
Monitor Connected Devices
In the admin interface, view Attached Devices to see what’s using your network. Look for unknown devices, which could indicate unauthorized access. You can block suspicious devices, set parental controls, and schedule device access times.
Frequently Asked Questions About Setting Up a Netgear Modem
How long does it take to set up a Netgear modem?
Most setups take under 20 minutes. The Nighthawk C7000 v2 typically completes in under 10 minutes, while the AX2700 takes 15–20 minutes. Delays usually come from ISP activation, not hardware configuration.
What if my ISP says the modem is not supported?
Ask to speak with a supervisor. Provide your model number and CableLabs certification info. Many frontline representatives lack updated device lists. Persistence often resolves this issue, especially with Xfinity or Spectrum.
Do I need to call my ISP before setting up the modem?
Yes. Confirming active internet service and modem compatibility with your ISP before setup prevents wasted time. Many setup failures stem from unregistered devices or inactive accounts.
Can I use my old coaxial cable with a new Netgear modem?
Yes, if it’s in good condition. Inspect for damage, kinks, or worn connectors. For best results, use a quad-shield RG6 coaxial cable, especially if the cable runs a long distance from the wall outlet.
What is the default admin password for a Netgear modem?
The default username is admin and the default password is password. Some models have unique default passwords printed on the device label. Change these immediately after first login.
Why is my Internet light red or blinking?
A red or blinking Internet light means the modem hasn’t synced with your ISP. Check that the coaxial cable is tight, confirm ISP service is active, and verify the MAC address is registered. Power cycling the modem often resolves sync issues.
Key Takeaways for Setting Up Your Netgear Modem
Three steps make the biggest difference in a smooth setup. First, confirm your ISP account is active and your modem model is on the approved device list. Second, register the MAC address with your ISP before assuming the modem is faulty. Third, change the default admin password and enable WPA2 or WPA3 encryption immediately after first login.
Most setup headaches trace back to skipped ISP registration or unchanged default credentials. Follow the sequence in this guide, and your Netgear modem will deliver fast, secure, and reliable internet for years. Start by checking your device label for the model number and MAC address, then call your ISP to confirm activation before you plug anything in.



