how to setup netgear wifi extender ac750 - mywifiext.net
How to set up a Netgear ac750 Wi-fi extender in your main network?
The setup process of the range extender includes the installation and the configuration process. During the installation process of the mywifiext.net device, a user has to perform the connection between the range extender and the router, the network of which you want to extend. After you get successfully connected to your router, you have to perform the configuration in your range extender through the web browser.
Steps to setup Netgear ac750 Wi-fi extender in your main network
- Power on your range extender by plugging it directly into an electric outlet.
- Turn on the Power switch with which you have connected the range extender then press the Power button on your range extender.
- Now, wait for a few minutes to allow the Power LED of your extender to turn amber then green.
- As soon as your Netgear ac750 range extender gets successfully turned on, start the connection process.
- To start the WPS connection method, press the WPS button located on the side of your range extender. The WPS signal LED starts blinking on your range extender.
- Now go to your router and press the WPS button of it within 120 seconds. In case, you fail to press the WPS button of your router within 2 minutes, you have to recreate the connection between your range extender and the router.
- When the connection between your range extender and the router gets established, the WPS signal LED on your extender turns solid green.
- Go to your computer and open the Wi-fi list from the title bar of the desktop screen.
- Connect to the default Network name given on the product label of your range extender. Type down the default Wi-fi password on the required field to get successfully connected to your range extender.
- When you successfully connect to the range extender, unplug your extender and move it to the location where you want to fix it.
Note: Before performing the WPS connection method to perform the mywifiext.net setup process, you need to check that the router with which you want to connect your extender is even having the WPS button or not. You won’t be able to establish the WPS connection if your router is not having the WPS button in it.
How to configure your Netgear ac750 range extender?
The configuration process of the extender includes adjusting the settings within your extender that allow a user to operate their device according to their requirements. The more optimal your configuration will be, the more will be the performance of your range extender. You need to interact with the mywifiext.net interface to perform the configuration process in your range extender.
Steps to configure the Netgear ac750 range extender through the web browser method
- Launch a browser on your computer with which you want to configure your Netgear ac750 range extender.
- Go to the address bar of your browser and type www.mywifiext.net as the URL of your browser. Hit the enter button the default Netgear extender login screen appears on the window.
- In case you are encountering an error when interacting with the setup wizard of your range extender, you can also type the LAN IP address of your range extender on the web address of your browser. The IP address of your range extender is 192.168.1.250.
- If it's the first time you are interacting with the interface of your range extender, the Extender setup page displays on your screen.
- To start the setup process, click on the New Extender setup option. To create your account click on the Create Account page.
- Complete the required fields for creating your account then click on the Next button.
- Now, select the country and region from where you want to operate your Netgear ac750 range extender.
- Click on the Next button then click on the scan button to start the scanning process for the available Wi-fi network near your computer.
- Select the Wi-fi network that you want to extend through the list being displayed on your screen. Click on the Next button.
- Do it to both the Wi-fi bands if you want to extend both the frequency bands of your network.
- Type down the existing Wi-fi password in the Network key field to connect to your local network.
- Click on the Next button. Set the wireless credentials on the next window for the new extender in your network. Type a unique SSID name and a Wi-fi password for the extended network then click on the Next button.
- You can also use the Wi-fi network manager to connect to the extended Wi-fi network. Click on the continue button to carry on the process.
- A message gets displayed on your screen that your extender is connected to the new extended network. Click on the Next option and the registration page displays on your screen.
- Complete the registration field then click on the Finish button to complete the setup process.
Note: To determine an optimal place for your range extender you can also use the signal LED of your device located on its side panel. If the signal LED turns amber it means your extender is in a sufficient range with the router, the network of which you want to extend. If the signal LED turns red it means you need to bring your extender closer to your router to provide better signals to your router.
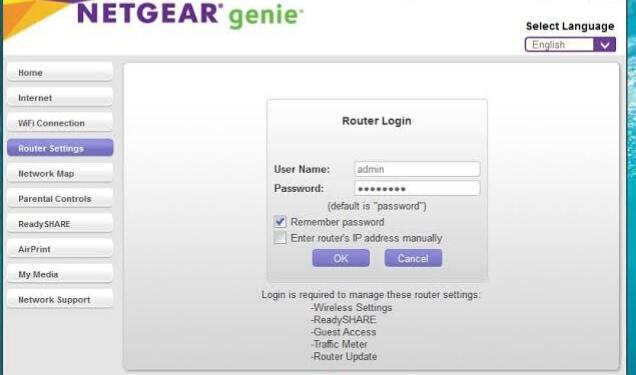
How do I login to my Netgear router?