
mywifiext local – Netgear Extender Setup
There are several options with which a user can interact with his Netgear Wi-fi extender. If a user is using his computer to operate or configure his extender, he can interact with the Netgear Wi-fi extender using the mywifiext.net interface. If a user wants to interact or configure his Netgear Extender remotely, he can use the mobile device to do it. With the help of the Netgear Genie, a user can access the various settings of his Netgear Wi-fi extender from any corner of the world.
connect to my Netgear Wi-fi extender
device, make sure you have downloaded the Netgear genie app from the app store of your device
- To connect to your Netgear extender, first, you need to open a web browser on your mobile device or computer connected to the network of your Netgear Extender.
- Go to the URL of your browser and type www.mywifiext.net on the address bar of the browser and hit the enter button. In case you encounter any kind of error while interacting with the default Netgear Extender login window, you can also type the LAN IP address of your range extender on the URL of the browser.
- The LAN IP address of the Netgear Range extender is 192.168.1.1 or 192.168.1.254
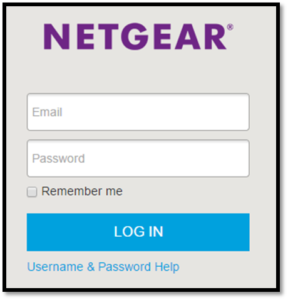
- As soon as you hit the enter button the login window of mywifiext.net appears on the screen.
- Mention the login credentials within their respective fields, type “admin” on the username field, and mention the admin password that you typed earlier while logging in to the web interface of the mywifiext.net window. In case you haven’t changed the default password type “password” as the default credential on the password tab.
- Both the login fields are case-sensitive, make sure you are holding the shift key while you want to type an alphabet in a capital one and release the shift key when you want to type an alphabet in a small one.
- After mentioning the credentials on the Netgear Extender login window, click on the login button and the browser will redirect you to the default home page window.
- From the main navigation panel of the mywifiext.net window, you can view or adjust various kinds of settings within the Netgear Wi-fi extender.
Note: If it’s the first time a user is interacting with the web interface of the Netgear extender, he will be automatically redirected to the main configuration page, the moment he hits enter after typing mywifiext.net on the web address of a browser. To increase your convenience, Netgear has also provided you with a Netgear genie application that you can utilize through a mobile device to access your Netgear extender remotely from any corner of the entire world.
Why does mywifiext local not work in Netgear Wi-fi extender?
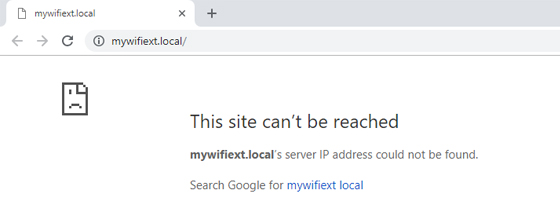
If a user is unable to access the mywifiext.local interface, he will be unable to perform various settings within his device. A user might receive a notification or error that gives the reason for denying you from accessing the web interface of the Netgear extender. Mywifiext.net is not a permanent internet website, that’s only a local address that a user uses to interact with his Netgear extender. Your computer or device must be connected to the internet with which you are trying to access the Netgear extender
Here are the troubleshooting steps to resolve the Mywifiext.local issue
- If you are a new user who is connecting to mywifiext local for the time being, users are mostly recommended to use the Netgear Installation assistant to help you with the connection issue.
- After your computer is successfully connected to the extender’s network, verify that the Link LED of your extender is solid white. You can also check the status of your connection through the Wi-fi connection manager and can check whether your device is still connected to the network of your extender or not.
- Type 192.168.1.250 on the address bar of the browser which is the LAN IP address of your Netgear extender and press enter. If the IP address of your range extender doesn’t work, it may be the reason that your extender’s IP address has changed. You can log in to the router with which your extender is connected to view the IP address of your range extender.
- Sometimes your browser gets piled up with the browsing history and caches a lot that it denies other websites to open in it. Clearing the cache memory and previous history of your browser might resolve the mywifiext local issue and you might be able to connect to your Netgear extender again.
- Check that the browser in which you are trying to access the mywifiext.net interface of your Netgear extender is approved by the policy of the device or not. Only the approved browsers are allowed to access the mywifiext.net window such as Internet Explorer, Google Chrome, Mozilla Firefox, and safari in case you are using the MAC.
- If your computer is using a static IP address then change it to a static one. Using the Dynamic IP address of the Internet can also be the reason that you may be denied access to the mywifiext local window.
- Before you change any settings of the network in your extender, note down the MAC address and default gateway your extender is using. Use the IP address and subnet mask i.e 192.168.1.249 and 255.255.255.0 respectively.
Note: If any of the above troubleshooting steps won’t work you can contact the technical team of Netgear to help you out with the above issue. You can fetch the contact number of the Netgear support team from its official support website.
Netgear Extender Firmware Update mywifiext local
The firmware version your Netgear extender is using also determines its efficiency and performance level. Users are advised to update the firmware regularly whenever a new firmware version for your extender is available. Users are advised to read the release notes before updating the firmware of their extender so that they come to know of the configuration settings that are going to be removed after the update process. You can create a backup of those settings and cant restore them after the Firmware update using the mywifiext.net interface.
- You must note down the model name and version number of your Netgear extender, the firmware of which you are going to download from the downloads section of the official support website of Netgear.
- Before visiting the browser, go to the official support website of Netgear to download available firmware for your extender.
- When you have downloaded the firmware for your extender, do not forget to keep the downloaded file in an extracted form. You can extract the file through WinRar or any other file extraction software available on your computer.
- Open a browser on your mobile device or the computer to which the home network is connected.
- Type www.mywifiext.local as the URL of the browser and if you encounter any error you also can type the IP address of the Netgear Extender. You can google out the IP address if you don’t know it.
- Press the enter button and you will be redirected to the default login window of mywifiext.net
- Type “admin” on the username tab as a default login username and mention “password” on the password tab as a default password tab. If you have changed the password after the Netgear Extender setup process, then mention it in place of the default credential on the Password tab.
- After mentioning the credentials, click on the login button and the default menu page of wifiext.net appears on the screen.
- Take your cursor to the Advanced tab, select the Advanced settings tab then click on the Firmware Update tab.
- When you click on the Firmware update tab, the page displays on your screen.
- If you want to manually update the firmware of your Netgear Extender then find the Browse button and click on it.
- Take your cursor to the location where you have downloaded the new firmware file. Select the new firmware file as soon as you find it. Users are recommended to keep the downloaded firmware file in an extracted form so that a user finds convenience in fetching the file and uploading it to the mywifiext.net interface.
- Select the file and click on the Upload button to initialize the firmware update process.
- Do not interrupt the update by performing any unnecessary activity within your computer. Avoid closing off the browser, Do not turn off the extender, avoid turning your computer into sleep mode, Avoid opening a new browser or opening a new tab in a current browser.
- Any activity within the computer during the update process may lead to failure in the Firmware update process.
- Wait for a while to let the update process complete and your extender will get uploaded with new firmware.
- Note: After the update process if you have created a backup of the configuration settings that are going to be removed after the update process, you can restore them using the mywifiext local window. Avoid downloading a default firmware version for your extender, as it may lead to permanent damage to your device and may also void the warranty of your range extender.
How to change the username and password of the Netgear Extender?
Username and password are those significant credentials of the Netgear Extender login window that allows a user to interact with the mywifiext.net window. Users who know the login credentials of the login window would only be able to adjust and configure various settings within the Netgear extender. The first time a user performs the login process, he has to use the default credentials on the login fields to get to the main configuration page of the mywifiext.net interface. After the setup process, a user can change the login credentials through the web interface of the Netgear extender
Steps to change the username and password of the Netgear extender
- Open a browser on your mobile device or the computer with which you are trying to interact with the Netgear extender.
- Make sure the device with which you are trying to interact with the Netgear extender is connected to the local network.
- Take your cursor to the address bar and type mywifiext.net as the URL of your browser. Press the enter button and you will be redirected to the default Netgear extender login window. In case you get encountered with an error type the LAN IP address on the address bar of your browser.
- Type login credentials on their respective fields. Mention “admin” on the username field and type the password that you have assigned during the setup process. If you haven’t changed the default password, mention “password” as the default credential.
- When you are done typing the login credentials of the Netgear Extender login window and click on the login button.
- The main menu of mywifiext local displays on your screen.
- From the main navigation panel, locate the main menu and when you do, click on it. The extender menu gets displayed on your screen.
- Select the Settings tab then go to the Password field. When you click on the Password settings tab, the Password settings page displays on your screen.
- To change the username and password of the Netgear Extender login window, go to the Username field and type down a new email address in it.
- To change the login password, take your cursor to the Password field. Type the password that you want to assign to the Netgear extender login window and retype it on the Verify password field.
- To create a backup of the login password so that in the future if a user forgets it he can easily recover it using the mywifiext local interface. For the backup process, you must assign the security questions, the answers of which you are going to provide during the recovery process of the login password.
- When you are done with configuring the settings, click on the Save button and the settings will get eventually saved.
Note: While assigning a security question during the backup process of the login password, make sure that the question and the answer is somehow relatable to you. It will increase the probability of giving the correct answer during the recovery process of the login password through the mywifiext.local interface. You can also note down the answers somewhere, which may also provide you the convenience of giving the correct answer to the security questions during the recovery process.