
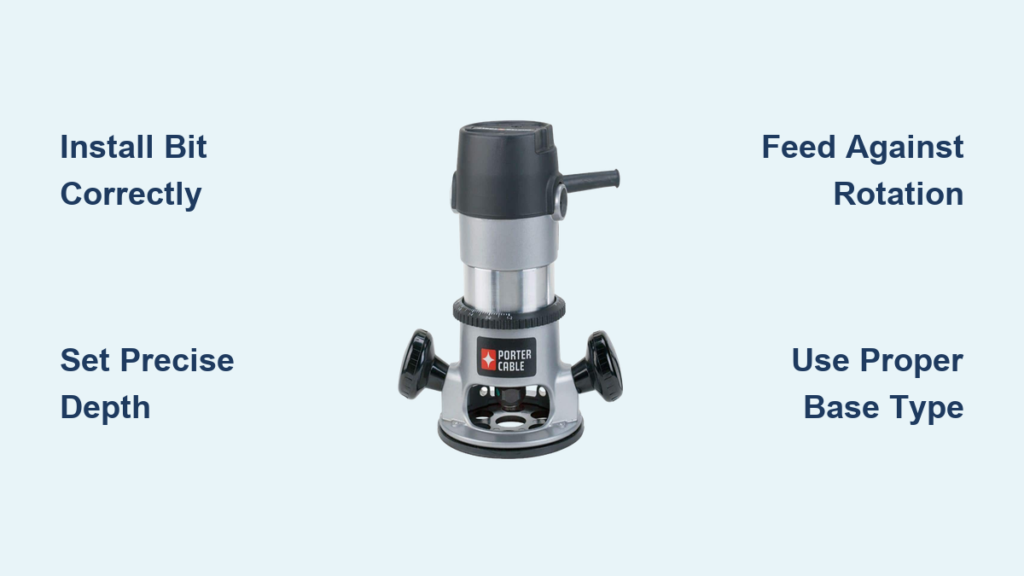
Wondering how to use Porter Cable router models like the 690 or 890 without burning wood or breaking bits? You need a clear plan that covers bit selection, depth settings, and safe feeding techniques to master these powerful tools.
This guide details exact steps for installing bits, setting precise depths, and executing clean cuts on various materials. You will learn specific tricks to prevent kickback and extend the life of your equipment.
Select the Correct Base Configuration for Your Project
Choosing the right base determines your control and the types of cuts you can make effectively. The 690 series offers a fixed base ideal for edge work, while the 890 hybrid system allows tool-free swapping between fixed and plunge bases.
Fixed Base vs Plunge Base Applications
- Fixed Base: Best for edge profiling, roundovers, and consistent depth cuts along a straight edge.
- Plunge Base: Essential for starting cuts in the middle of a board, such as dados, mortises, or sign carving.
- Hybrid System: The 890 series lets you switch motors between bases in seconds using a quick-release clasp.
When to Use Each Setup
- Use the fixed base for trimming laminate or shaping cabinet edges.
- Use the plunge base for cutting hinge recesses or interior grooves.
- Mount the fixed base in a router table for raised panels or complex joinery.
Always ensure the motor locks securely into your chosen base before powering on. Older models require checking set screws, while newer 890 units click firmly into place.
Install Compatible Router Bits Safely

Selecting the correct bit shank size is critical for safety and performance. Your Porter Cable router accepts either 1/4-inch or 1/2-inch shanks, and using the wrong collet causes dangerous wobble.
Match Bit Shank to Collet Size
- 1/4-inch bits: Standard for smaller profiles and light-duty work.
- 1/2-inch bits: Required for bits larger than 1 inch to handle higher torque.
- Collet Check: Verify your model includes both collet sizes, as the 890 series typically does.
Never force a smaller shank into a larger collet without a proper adapter. This mismatch leads to vibration and potential bit ejection.
Common Bit Types and Uses
- Straight Bit: Ideal for plunge cuts, dados, and general shaping.
- Flush Trim: Copies templates and trims edge banding perfectly flush.
- Chamfer: Creates beveled edges for decorative accents.
- Roundover: Softens sharp corners for a finished look.
- Roman Ogee: Produces elegant, traditional edge profiles.
- Plywood Bits: Specially designed to reduce tear-out on veneered surfaces.
Execute Proper Bit Installation Techniques
Installing a bit correctly prevents binding and ensures a secure grip during operation. Dust or debris in the collet can reduce holding power significantly.
Step-by-Step Installation Process
- Clean the collet and shaft with a dry cloth to remove all dust.
- Insert the bit fully into the collet until it bottoms out.
- Pull the bit back approximately 1/8 inch to create necessary clearance.
- Tighten the collet nut by hand first to hold the bit in place.
Leaving that 1/8-inch gap prevents the bit from binding due to thermal expansion. Ensure only the machined steel part of the shank is inside the collet, not the painted area.
Use the Squeeze Method for 690 Series
- Place both wrenches on the collet nuts close together.
- Squeeze the wrenches toward each other with one hand rather than twisting them apart.
- This action tightens the collet evenly and reduces strain on your wrists.
One-Wrench Changes on 890 Series
The 890 model features a spindle lock button for single-wrench operation. Press the button to lock the shaft, then tighten or loosen the collet with one wrench. This feature speeds up bit changes significantly when switching tasks frequently.
Set Precise Cutting Depths Accurately
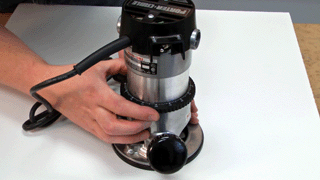
Accurate depth settings are the difference between a professional joint and a ruined workpiece. Different Porter Cable models use distinct mechanisms for this adjustment.
Adjust Depth on 690 Series
The 690 series uses a precision ring with 1/64-inch increments for fine tuning.
1. Place the router on the workpiece surface.
2. Lower the bit until it just touches the wood.
3. Lock the base and rotate the depth ring so zero aligns with the body groove.
4. Unlock the base and turn the ring to your desired depth mark.
Marking common depths with a colored sticker on the ring saves time during repetitive tasks. Keep this ring clean, as sawdust can jam the fine adjustment mechanism.
Configure Depth on Older Plunge Models
Older units rely on a depth rod and stop system for repeatable cuts.
1. Unlock the depth lever and lower the bit flush with the base plate.
2. Loosen the depth knob and lift the rod, then push it down to seat on the stop.
3. Set the scale to zero while the rod is seated.
4. Raise the rod to your target depth, such as 1/4 inch, and tighten the knob.
When you plunge, the rod hits the stop to guarantee the exact depth every time.
Utilize Micro-Adjust on 890 Fixed Base
For ultra-precise work like fitting joints, use the micro-adjust knob on the 890 fixed base. Set the coarse depth first, then use the micro-adjust for final tweaks down to 1/64 inch. This is particularly useful when the router is mounted in a table.
Master Correct Feed Direction and Speed
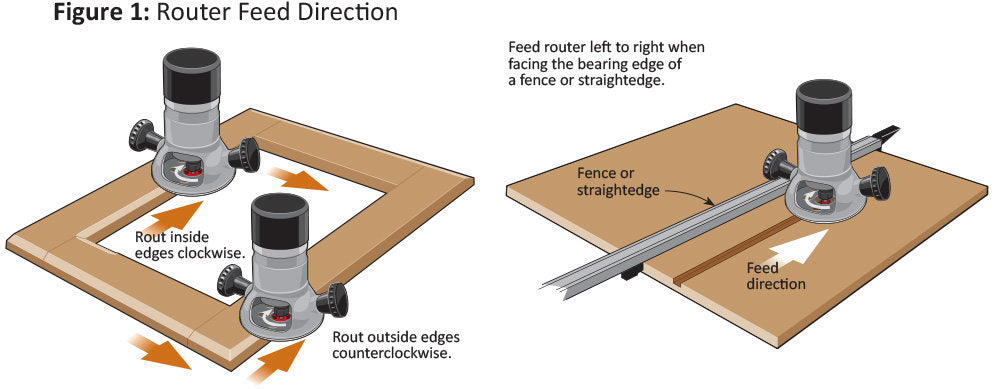
Feeding the router in the wrong direction causes violent kickback, while incorrect speed ruins the wood surface. Understanding rotation is vital for safety.
Follow Conventional Feed Direction
Always push the router against the rotation of the bit for maximum control.
* Outside Edges: Move left to right when viewing the cut from above.
* Inside Cuts: Move right to left for internal cutouts.
Avoid climb cutting where you push with the rotation, as the bit will grab the wood and throw the tool. Look at the bit spin direction to confirm your feed path before touching the wood.
Optimize Feed Speed for Material
- Hardwoods: Maintain a steady, moderate pace to prevent burning.
- MDF: You can take full-depth passes at a consistent speed without tear-out risks.
- Plywood: Use sharp bits and support the backside to prevent blowout.
Test your speed on scrap wood first. If the wood burns, you are moving too slowly. If the edge is rough, you are moving too fast.
Perform Common Routing Tasks Effectively
Specific techniques apply to different cuts like edge profiling, template work, and dado creation.
Edge Profiling Techniques
- Set the depth so only a small portion of the bit shoulder shows.
- Clamp a straight edge guide if the bit lacks a bearing.
- Start the motor and let it reach full speed before contacting the wood.
Flip the workpiece upside down before routing edges. This ensures any chipping happens on the bottom side, leaving the top face perfect.
Flush Trimming with Templates
- Attach a template collar to the router base.
- Install a bearing-guided flush trim bit.
- Clamp the template securely over the workpiece.
- Guide the router around the template so the bearing follows the pattern.
Use top-bearing bits for templates placed on top of the work and bottom-bearing bits for templates underneath.
Cutting Dados with a Plunge Base
- Install a 3/4-inch straight bit for standard shelving.
- Set the depth stop to 1/4 inch using the plunge rod.
- Position the router over the start line with guides clamped tight.
- Start the motor, wait for full speed, and plunge slowly.
- Move forward in a straight line along your guide.
Ensure your guides are extremely tight, as loose guides can shift under torque and ruin the cut. A properly cut dado allows a 1-inch shelf to slide in snugly without binding.
Maintain Control and Prevent Common Issues
Safety features and maintenance habits keep your workflow smooth and accident-free.
Leverage Safety Features
The 890 series includes dual switches on the top and handle, requiring two hands to operate. It also features an automatic shutoff if the router flips upside down while running. These features provide peace of mind during overhead work or complex maneuvers.
Troubleshoot Binding and Tear-Out
- Bit Binding: Caused by seating the bit too deep. Always leave 1/8 inch clearance.
- Tear-Out: Results from dull bits or wrong feed direction. Use plywood-specific bits and flip the workpiece.
- Stripped Knob: On older models, drill a small hole in the plastic depth knob and insert a finish nail to create a new lever.
Regularly clean dust from the collet and depth adjustment ring. A clean router runs cooler and maintains accuracy longer.
Frequently Asked Questions About Porter Cable Routers
What RPM should I use for large router bits?
Larger bits require slower speeds to reduce vibration and heat. Use 10,000 to 12,000 RPM for bits over 2 inches, while bits under 1 inch can run up to 27,000 RPM. The 890 variable speed dial helps you match these settings easily.
How do I prevent my router bit from slipping?
Clean the collet and bit shank thoroughly before installation. Insert the bit fully, pull it back 1/8 inch, and tighten using the squeeze method or spindle lock to ensure a secure grip.
Can I use a Porter Cable router in a router table?
Yes, the fixed base models like the 690 and the fixed base of the 890 hybrid are excellent for router tables. The 890 micro-adjust feature allows for precise depth changes even when the router is mounted.
Why does my router burn the wood during cuts?
Burning usually happens when you feed the router too slowly or use a dull bit. Maintain a steady, moderate feed rate and ensure your bit is sharp and appropriate for the material.
How do I fix a stripped depth adjustment knob?
On older plunge models, drill a small hole into the plastic knob and insert a finish nail. This creates a new grip point, allowing you to turn the knob without replacing the part.
Key Takeaways for Using Your Porter Cable Router
Mastering how to use Porter Cable router tools relies on proper bit installation, precise depth settings, and correct feed direction. Always pull the bit back 1/8 inch after seating it to prevent binding, and choose your feed direction based on the bit’s rotation to avoid kickback.
Regular maintenance and using the right base for each task will extend your tool’s life and improve your results. Start with a test cut on scrap wood to verify your settings before working on your final project.



