
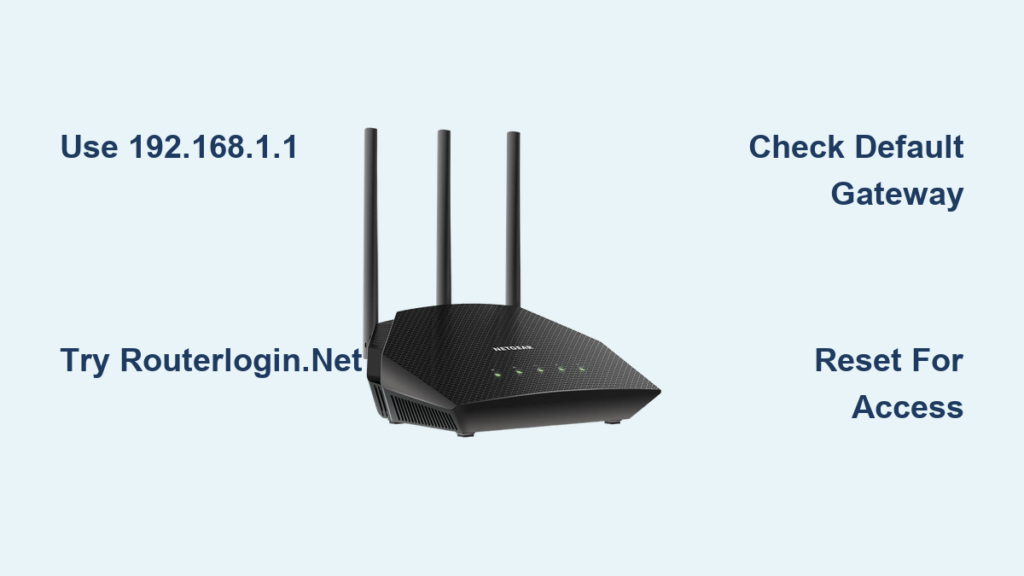
Your new NETGEAR router sits ready, yet you cannot change the Wi-Fi name or secure your network without the correct IP address. Many users struggle to reach the admin panel because they type the wrong numbers or use outdated apps like NETGEAR Genie.
This guide shows you exactly how to find your NETGEAR router IP configuration for any model. You will learn to access the admin panel via browser or mobile app, locate default gateways, and fix common login errors quickly.
Access Your NETGEAR Router Admin Panel
:max_bytes(150000):strip_icc()/003-52f2f2f681ce42efb9bfaeac94080e1e.jpg)
You have two reliable paths to manage your network settings effectively. Most modern users prefer the mobile app for speed, while power users often choose the web browser for advanced features.
Use the Nighthawk App for Quick Setup
The Nighthawk app is the primary tool for managing Nighthawk and WiFi 6 or 7 routers. This application replaces the discontinued NETGEAR Genie app and offers a streamlined interface for daily tasks.
- Download the app from the Apple App Store or Google Play Store.
- Connect your phone to the router Wi-Fi network.
- Sign in with your NETGEAR account credentials.
- Monitor devices and run speed tests instantly.
Pro Tip: The app automatically detects your specific IP address, so you never need to memorize numerical codes.
Log In Via Web Browser Interface
Use a web browser when you need deep configuration options like port forwarding or static IP assignment. This method works on any computer with Chrome, Firefox, Safari, or Edge.
- Connect your computer to the router via Wi-Fi or Ethernet cable.
- Open your preferred web browser window.
- Type
www.routerlogin.netor192.168.1.1in the address bar. - Enter your username and password when prompted.
The web interface provides full access to wireless settings, guest networks, and firmware updates.
Locate Your Specific NETGEAR Router IP Address
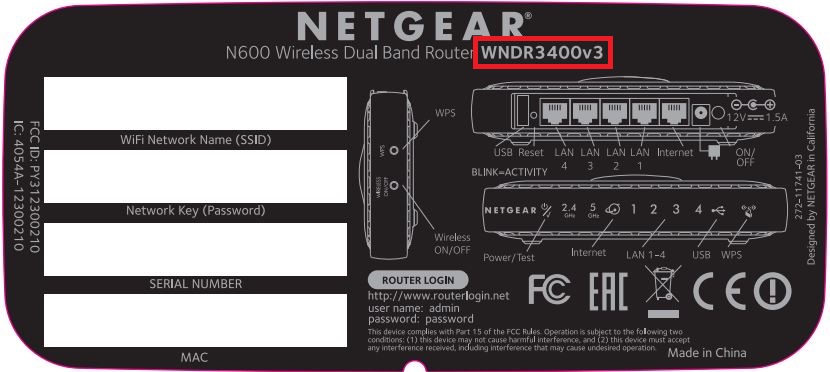
Not every device uses the same gateway number, so finding your specific address is crucial for successful connection. Using the wrong IP results in a timeout error or a search engine page instead of your router settings.
Check Default IP by Model Series
Most modern Nighthawk models use 192.168.1.1 as their standard gateway address. Older legacy units often utilize 192.168.0.1 instead. Orbi mesh systems typically respond to orbilogin.com but share the same numerical IP structure.
| Router Series | Default IP Address | Access URL |
|---|---|---|
| Nighthawk R6700/R7000 | 192.168.1.1 | routerlogin.net |
| Nighthawk R8000 | 192.168.1.1 | routerlogin.net |
| Orbi Mesh Systems | 192.168.1.1 | orbilogin.com |
| Legacy Models | 192.168.0.1 | routerlogin.com |
Find Gateway Using Computer Tools
If the default numbers do not work, your network likely uses a custom gateway setting. You can discover the active address using built-in operating system commands.
For Windows Users:
1. Press Win + R and type cmd then hit Enter.
2. Type ipconfig in the black window and press Enter.
3. Locate the Default Gateway line under your active connection.
For macOS Users:
1. Open System Settings and select Network.
2. Click your active Wi-Fi or Ethernet connection.
3. Select Details and then the TCP/IP tab.
4. The Router field displays your NETGEAR IP address.
Authenticate With Correct Login Credentials

Accessing the configuration page requires valid credentials that match your specific hardware generation. Newer security protocols often require unique passwords found only on the physical device.
Identify Default Username and Password
Older NETGEAR routers universally use admin as the username and password as the secret code. Newer models print a unique password on the bottom label to prevent unauthorized access from neighbors.
- Look for a sticker on the bottom or back of your router.
- Find the section labeled Router Login or Default Access.
- Use the listed username and password exactly as printed.
- Remember that these fields are case-sensitive during entry.
Recover Forgotten Admin Password
You must perform a factory reset if you changed the password and cannot remember it. This process erases all custom settings, so only use it when necessary.
- Locate the small Reset hole on the back panel.
- Press and hold the button with a paperclip for 7 to 10 seconds.
- Release when the router lights blink off and restart.
- Wait two minutes for the system to fully reboot.
Your router now reverts to the factory credentials printed on the label.
Configure Orbi Mesh Network Settings
Orbi systems require specific URLs and apps to manage satellite units and mesh topology effectively. Standard router addresses may not display the full mesh management interface.
Use Orbilogin.com for Mesh Systems
Access your Orbi dashboard by typing orbilogin.com into your browser address bar. This dedicated domain ensures you reach the mesh-specific configuration page rather than a generic router menu.
- The Orbi app is required for initial satellite setup.
- Use the web interface for advanced DNS or WAN settings.
- Monitor backhaul performance between units easily.
- Update firmware across all satellites simultaneously.
Troubleshoot Satellite Connection Issues
Poor signal between your main router and satellite units causes slow speeds throughout your home. You can diagnose these links directly within the Orbi interface.
- Open the Orbi app or log in to
orbilogin.com. - Navigate to the Network Map section.
- Check the signal bar count between router and satellite.
- Move the satellite closer if the signal shows only one bar.
Press the Sync button on both units to force a reconnection if moving them does not help.
Apply Advanced Network Configuration Changes
Once logged in, you can optimize your network for gaming, security, or parental supervision. These settings ensure your internet performs exactly how you need it to.
Change Wi-Fi Name and Security Mode
Updating your SSID and password is the first step to securing your home network against intruders. Always choose WPA3 or WPA2 encryption for maximum protection.
- Select Wireless Settings in the left menu.
- Type a new Network Name (SSID) in the provided field.
- Create a strong Password with mixed characters.
- Set Security Mode to WPA3-Personal or WPA2-PSK.
- Click Apply to save changes and reconnect devices.
Set Up Guest Network and Parental Controls
Isolate visitor traffic from your private files by enabling a guest network. You can also restrict internet access times for children using the built-in parental control suite.
- Go to Advanced > Guest Network to enable visitor access.
- Create a separate SSID and password for guests.
- Enable AP Isolation to block guest access to local devices.
- Navigate to Parental Controls to set time limits and content filters.
These features let you manage who accesses your network and what they can view.
Troubleshoot NETGEAR Router IP Access Issues

Failure to load the login page usually stems from connection errors, cache issues, or incorrect addresses. Follow these diagnostic steps to restore access immediately.
Resolve Page Load Failures
Ensure your device is connected to the correct NETGEAR network and not cellular data. Typographical errors in the address bar are also a frequent cause of connection failure.
- Verify you are connected to the router via Wi-Fi or Ethernet.
- Check for typos in
192.168.1.1orwww.routerlogin.net. - Use
http://instead ofhttps://if the page refuses to load. - Try accessing the page using Incognito or Private browsing mode.
Clear Browser Cache and Reboot Router
Stale cookies often block the login script from executing properly. Clearing your browser data forces a fresh connection attempt with the router server.
- Open browser settings and clear history, cookies, and cache.
- Restart the browser completely before trying again.
- Unplug your router power cable for 10 seconds.
- Plug the router back in and wait for lights to stabilize.
A simple reboot resolves most temporary glitches preventing admin access.
Prevent Future Login and Access Problems
Documenting your settings and using stable connection methods reduces future frustration. These habits ensure you can always regain control of your network when needed.
Document Your Network Credentials
Write down your router IP, admin password, and Wi-Fi details immediately after setup. Store this information in a secure password manager or a safe physical location.
- Record the specific IP address used by your model.
- Save the admin username and unique password.
- Note the current firmware version for update reference.
- Bookmark
www.routerlogin.netin your browser favorites.
Having these details ready saves valuable time during emergencies or upgrades.
Maintain Firmware for Compatibility
Outdated firmware can cause security holes and browser compatibility errors. Regularly check for updates via the Nighthawk app or the admin panel to ensure smooth operation.
- Open the Nighthawk app and tap your router image.
- Select Settings and then Firmware Update.
- Download and install any available updates immediately.
- Do not power off the router during the update process.
Frequently Asked Questions About NETGEAR Router IP Configuration
What is the default IP address for most NETGEAR routers?
Most modern NETGEAR routers use 192.168.1.1 as the default IP address. Older legacy models may use 192.168.0.1 instead. You can verify the exact address on the label located on the bottom of your device.
How do I log in if I forgot my NETGEAR admin password?
You must perform a factory reset using the small pinhole button on the back of the router. Hold the button for 7 to 10 seconds until lights blink, then use the default credentials on the device label.
Why will not routerlogin.net load in my browser?
This issue often occurs due to browser cache conflicts or incorrect network connections. Try clearing your browser cache, using Incognito mode, or ensuring your device is connected to the router network.
Can I use the NETGEAR Genie app to configure my router?
No, the NETGEAR Genie app is no longer supported and should not be used. Download the Nighthawk app for Nighthawk routers or the Orbi app for mesh systems to ensure compatibility.
What should I do if 192.168.1.1 does not work?
Your router may use a different gateway address like 192.168.0.1 or a custom IP. Run the ipconfig command on Windows or check Network Settings on macOS to find the active Default Gateway.
Key Takeaways for NETGEAR Router IP Configuration
Mastering your NETGEAR router IP configuration gives you complete control over your home network security and performance. Remember that most models use 192.168.1.1 or www.routerlogin.net, but checking the physical label is always the most reliable method.
Use the Nighthawk app for quick daily management and the web interface for advanced tasks like port forwarding. If you ever lose access, a factory reset restores your ability to log in using the default credentials.
Start by checking your router label today and bookmarking your login URL. This simple preparation ensures you can manage your network confidently whenever the need arises.



