You just bought your first router or pulled one from storage, and the sheer power in your hands feels intimidating. The high-pitched whine and spinning bit demand respect, but mastering how to use a router tool unlocks incredible precision for your projects.
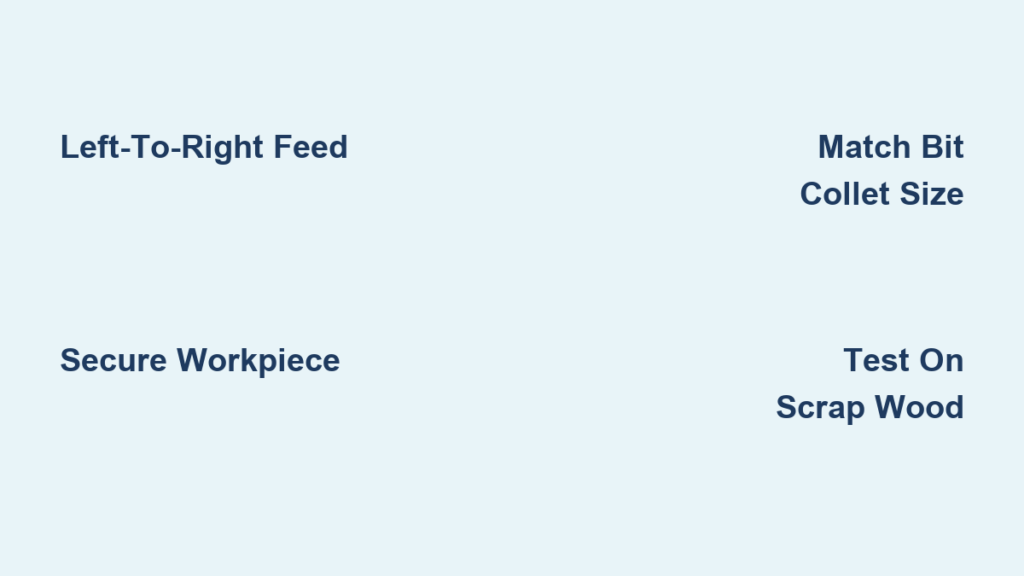
This guide walks you through safe operation, bit selection, and the critical left-to-right feeding rule. You will learn to distinguish between fixed-base and plunge models while avoiding common mistakes that ruin wood or cause injury.
Choose Between Fixed-Base and Plunge Routers

Selecting the right machine type depends entirely on your specific cutting needs. Understanding the mechanical difference ensures you buy the correct tool for your intended projects.
Fixed-Base Router Capabilities
A fixed-base router locks the bit depth before you start the cut. This stability makes it ideal for edge profiling like rounding over table corners or cutting consistent rabbets. The motor stays stationary relative to the base, offering predictable results for beginners.
Plunge Router Applications
A plunge router features a spring-loaded base that lets you lower the spinning bit into the material mid-operation. This mechanism is essential for cutting mortises, internal grooves, or sink openings where you cannot start from an edge.
Matching the Tool to the Task
Use a fixed-base model when trimming edges or following a template along a perimeter. Choose a plunge router for dados inside a board or hinge pockets in the center of a workpiece.
Match Router Bits to Collet Sizes Correctly
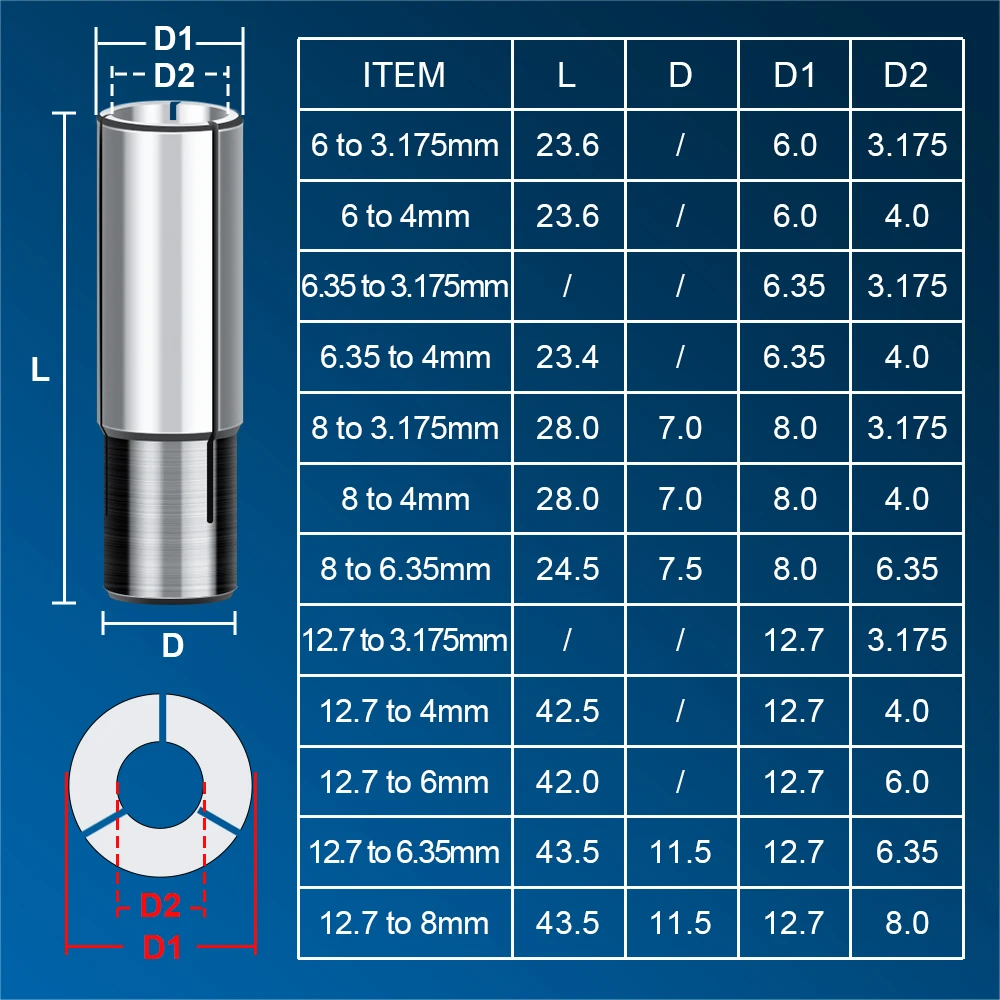
The collet secures the bit shank, and mismatching sizes creates dangerous vibration or bit ejection. Always verify compatibility before installation.
Understanding Collet Constraints
Compact routers typically use 1/4-inch collets and only accept bits with matching shanks. Larger models often feature 1/2-inch collets that can hold both 1/2-inch and 1/4-inch bits using an adapter. Never force a large shank into a small collet.
Safe Bit Installation Steps
- Clean the collet interior and bit shank to remove all dust or resin.
- Insert the bit fully, then pull it back about 1/8 inch so the collet grips only machined metal.
- Tighten the nut finger-tight first to hold the bit in place.
- Use both wrenches to squeeze the nut tight, ensuring maximum torque and safety.
Avoid gripping the painted portion of the shank, as this leads to slippage during operation.
Set the Correct Speed for Your Bit Diameter

Running a router at the wrong speed causes burning, vibration, and potential tool failure. Larger bits require slower rotation to maintain control.
Why RPM Matters for Safety
Small bits under one inch can run at full speed, often reaching 27,000 RPM. Large diameter bits generate excessive centrifugal force at high speeds, so you must reduce RPM to between 10,000 and 23,000.
Preventing Wood Burning
Burning occurs when the bit lingers too long in one spot or spins too fast for its size. Increase your feed rate, take lighter passes, or reduce the RPM setting to fix this issue immediately.
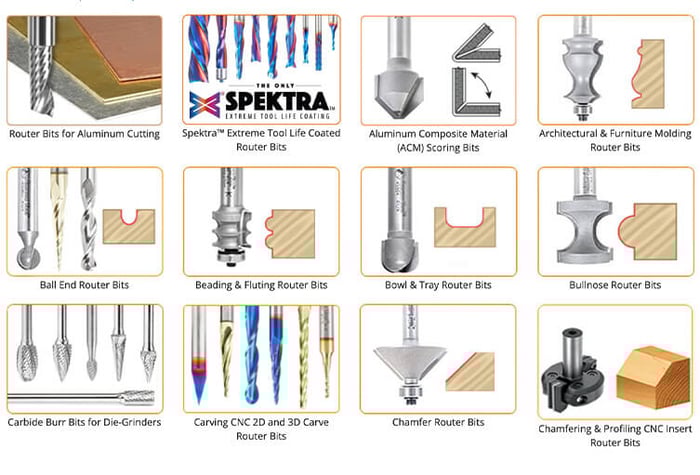
Select the Right Bit for Your Project
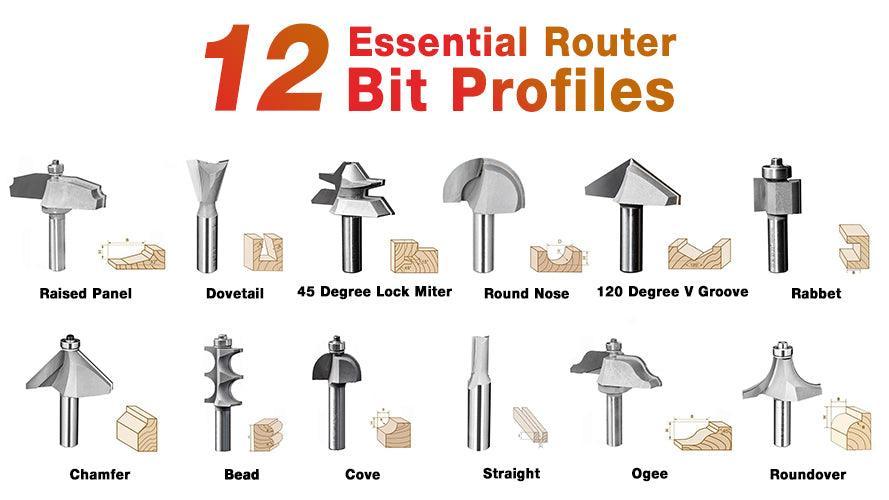
Choosing the correct profile determines the success of your cut. Each bit type serves a specific function in woodworking.
Essential Bit Types
- Straight Bit: Cuts grooves, dados, and plunge holes for signage.
- Roundover Bit: Softens sharp edges with a convex curve.
- Rabbeting Bit: Creates stepped edges for cabinet backs.
- Cove Bit: Carves decorative concave profiles.
- Chamfer Bit: Cuts 45-degree beveled edges.
- Flush-Trim Bit: Copies templates or trims laminate flush.
Using Bearings and Guides
Flush-trim bits often include pilot bearings that ride along a template edge or the workpiece surface. Template collars also allow straight bits to follow intricate patterns for signs and inlays.
Feed the Router in the Correct Direction
Feed direction is the most critical safety factor when learning how to use a router tool. Moving the wrong way causes violent kickback.
The Left-to-Right Golden Rule
Router bits spin clockwise when viewed from above. You must move the tool from left to right against the rotation. This push cut provides resistance that stabilizes the tool and prevents it from jumping forward.
Dangers of Climb Cutting
Moving right to left is called climb cutting, where the bit pulls the tool forward. This technique reduces tear-out on difficult grain but requires extreme caution. Only attempt climb cuts with light passes and a securely clamped workpiece.
Execute Smooth Cuts Around Corners

Corners present a high risk for chipping or bit binding if you move too quickly. Proper technique ensures clean transitions.
Slowing Down at Transitions
Ease off feed pressure as you approach a corner. Turning too fast causes uneven profiles and can snap the bit. Maintain a smooth, controlled arc rather than a sharp pivot.
Preventing End-Grain Blowout
Clamp a scrap backer board beyond the end of your workpiece. Letting the bit exit into the scrap wood supports the fibers and prevents tear-out at the exit point.
Adjust Depth in Multiple Stages
:max_bytes(150000):strip_icc()/4_43_RoutingAccurate-050316ce591747e7827b4a3436942a9f.jpg)
Attempting to cut full depth in one pass overloads the motor and ruins the cut quality. Incremental adjustments yield professional results.
Setting Initial Depth
Place the router base flat on the workpiece and adjust the depth stop. Align the cutting edge with your marked line or the base edge for accuracy.
Making Incremental Passes
For deep cuts like a half-inch dado, make three or four shallow passes. Increase the depth slightly with each pass to let the bit remove material gradually without burning or stalling.
Test Your Setup on Scrap Wood

Never make your first cut on your final project piece. Validation prevents costly errors and builds confidence.
Validating Depth and Speed
Cut a test piece of scrap wood to check your depth setting and feed rate. Adjust the speed or depth if the cut looks rough or burns the wood surface.
Inspecting for Vibration
Listen for unusual noise or feel for excessive vibration. If the tool shakes, turn it off immediately to check bit tightness and collet cleanliness.
Secure the Workpiece Before Cutting
:max_bytes(150000):strip_icc()/SmallParts-4755344c757940e89bc2f232b6a5dd75.jpg)
A moving workpiece leads to inaccurate cuts and serious injury. Stability is non-negotiable.
Clamping Strategies
Never hold the wood with one hand while routing with the other. Use clamps, a vise, or hold-downs to secure the stock firmly to your bench.
Using Fences for Accuracy
Attach a straightedge fence or use a dado jig for repeatable straight cuts. This ensures the router base rides smoothly and keeps your cut line perfectly straight.
Follow Essential Safety Rules Every Time
Protective gear and disciplined habits prevent accidents when using high-speed tools.
Required Protective Gear
- Safety glasses: Protect eyes from flying chips.
- Hearing protection: Routers exceed safe noise levels.
- Dust mask: Minimize inhalation of fine sawdust.
Operational Discipline
Keep the base flat on the work and use both hands at all times. Let the bit reach full speed before contact and wait for it to stop before setting the tool down.
Troubleshoot Common Routing Problems
Identifying issues quickly saves time and improves your final result.
Fixing Burning and Tear-Out
Burning usually means you are feeding too slowly or using a dull bit. Tear-out often results from wrong feed direction or incorrect grain orientation.
Reducing Vibration
Excessive shaking often indicates a loose collet or dirty shank. Clean the collet and tighten the bit securely to restore balance.
Maintain Your Router for Longevity
Regular cleaning keeps your tool running smoothly and safely for years.
Cleaning the Base and Collet
Wipe the base plate with mineral spirits to remove resin buildup. Remove and clean the collet periodically to prevent bit runout and slippage.
Storing Bits Properly
Keep bits in a case or rack to protect their edges. Clean them with degreaser after use to remove pitch and maintain sharpness.
Master the Fundamentals First
Start with simple projects to build muscle memory before attempting complex joinery.
Starting Simple
Begin by rounding over shelf edges or trimming laminate with a flush-trim bit. These tasks teach you control without high risk.
Learning One Bit at a Time
Master the roundover bit first, then move to chamfers and straight bits. Each bit teaches different aspects of feed control and setup.
Frequently Asked Questions About Using a Router Tool
What is the safest direction to move a handheld router?
Always move the router from left to right along the edge. This pushes against the clockwise rotation of the bit, providing control and preventing dangerous kickback.
Can I use a 1/4-inch shank bit in a 1/2-inch collet?
Yes, most 1/2-inch collets accept 1/4-inch bits using an adapter or by switching to the smaller collet insert included with the tool.
Why does my router burn the wood while cutting?
Burning happens if you feed the tool too slowly, use a dull bit, or run a large bit at too high an RPM. Increase your feed speed or reduce the RPM setting.
When should I use a plunge router instead of a fixed-base?
Use a plunge router when you need to start a cut in the middle of a board, such as for mortises or internal grooves, without drilling an entry hole first.
How deep should I cut in a single pass?
Avoid cutting full depth at once. Make multiple shallow passes, increasing depth incrementally to prevent motor strain and ensure a clean cut.
Key Takeaways for Mastering How to Use a Router Tool
Knowing how to use a router tool transforms your woodworking with precise edges and complex joinery capabilities. Remember to always feed left to right, secure your workpiece with clamps, and wear proper safety gear.
Start with simple projects on scrap wood to build confidence before tackling large furniture pieces. With the right bit selection and safe techniques, you will achieve professional results safely.