

You just bought a trim router, a compact tool perfect for finishing touches, but staring at its small frame might leave you unsure where to begin. Whether you are trimming laminate countertops or softening sharp edges on a cutting board, knowing how to use a trim router safely is the key to professional results.
This guide provides clear steps for bit installation, speed selection, and feed direction to help you avoid common mistakes. You will learn specific techniques for flush trimming, edge profiling, and freehand carving with total confidence and control.
Secure Your Trim Router Setup for Safety
Proper setup prevents accidents and ensures your cuts remain accurate from the very first pass. Skipping these initial checks can lead to loose bits or unstable workpieces that ruin your project.
Power Down Before Adjusting Bits
Always unplug the cord or remove the battery before changing bits or adjusting depth settings. This simple step prevents accidental starts that cause serious injury. Never attempt to install a bit while the tool is connected to power.
Install Bits Correctly in the Collet
- Loosen the collet nut using the included wrench or tool-less mechanism.
- Insert a 1/4-inch shank bit about 3/4 of the way into the collet.
- ✅ Do: Leave a tiny gap between the bit shoulder and collet face.
- ❌ Don’t: Bottom the bit out against the back of the collet.
- Tighten the collet securely and tug the bit gently to ensure it is locked.
Critical Warning: Bottoming the bit prevents proper tightening and can cause the bit to slip or fly out during operation.
Set Precise Cutting Depths
Use the depth adjustment ring or lever to control how far the bit extends below the base. For roundover bits, expose only the cutting edge, usually around 1/8 inch to 1/4 inch. Always test your depth setting on a scrap piece of wood before cutting your final workpiece.
Match Router Speed to Bit and Material
:max_bytes(150000):strip_icc()/sm-chart-eecb71c6ca0849818caefa94afc840b3.jpg)
Adjust RPM for Bit Diameter
Most trim routers offer variable speed settings ranging from 8,000 to 30,000 RPM. Matching speed to bit size prevents burning and ensures a smooth cut.
* Small bits (under 1/4 inch): Use high speeds between 20,000 and 30,000 RPM.
* Larger bits (over 1/4 inch): Reduce speed to 12,000–18,000 RPM to prevent overheating.
* Hardwoods: Lower speeds with slower feed rates work best for dense species like oak.
* Softwoods: Higher speeds allow for steady feeds on pine or poplar.
Pro Tip: Let the bit do the cutting work. Applying excessive pressure generates heat, dulls bits quickly, and increases the risk of kickback.
Master Feed Direction for Clean Cuts
Feed Against the Bit Rotation
Router bits spin clockwise, so you must move the tool against this rotation for control. This technique, known as a push cut, uses the bit’s force to push the router away from you rather than pulling it toward you.
* Outside edges: Move the router counterclockwise around the perimeter.
* Inside cutouts: Move clockwise around the opening.
Following this rule gives you better control and significantly reduces tear-out on your wood fibers.
When to Use Climb Cutting
A climb cut involves feeding the router with the rotation, moving in the same direction the bit spins. This technique reduces tear-out on difficult grain like end grain but carries higher risk.
* The router wants to pull itself forward, which can cause loss of control.
* Only use this method for light finishing passes on stubborn grain.
* Maintain a firm grip and moderate speed to stay safe.
Execute Flush Trimming on Laminate
Select the Right Flush Trim Bit
Flush trimming matches two surfaces perfectly using a bit with a bearing guide. The bearing rides along the template or substrate edge while the cutter removes excess material. This is ideal for trimming plastic laminate flush with particleboard or sizing tray bottoms.
Perform the Flush Cut
- Clamp your workpiece firmly to a stable surface.
- Start routing on the end grain first to minimize chipping at the corners.
- Move counterclockwise around outside edges while keeping the bearing against the guide.
- Make one light pass, as sharp bits often leave a sanded-smooth finish.
Expert Note: Place a scrap wood block behind your exit point to prevent blowout as the bit leaves the material.
Create Decorative Edge Profiles
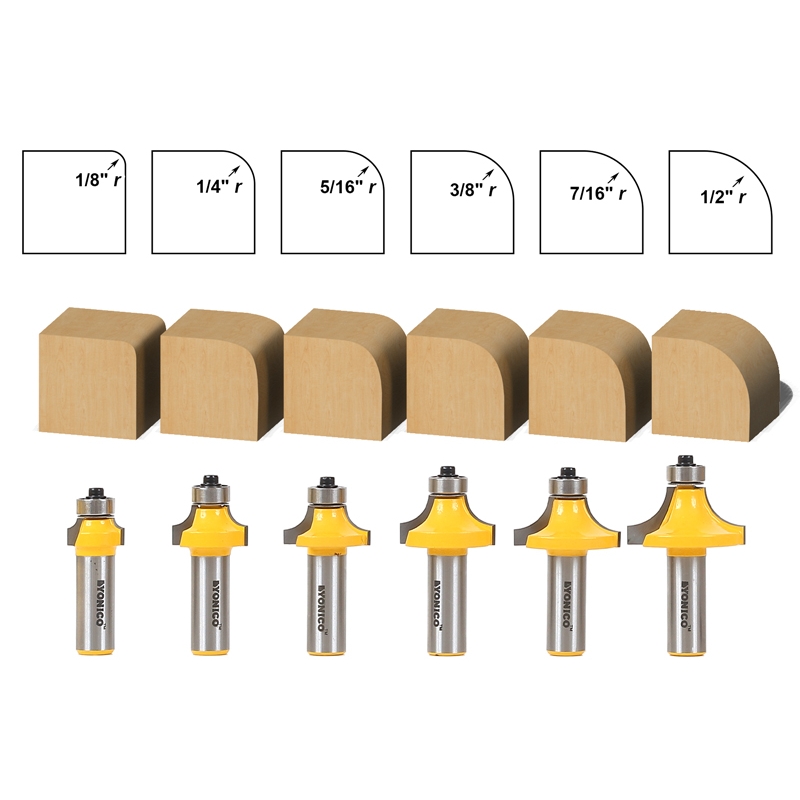
Choose Roundover or Chamfer Bits
Transform sharp, dangerous corners into elegant profiles with specific bits. A 1/8-inch roundover offers subtle softening, while a 1/4-inch roundover creates a more pronounced curve common in furniture. A chamfer bit cuts a clean 45-degree bevel for a modern look.
Route with the Grain
Insert the bit so only the cutting edge extends below the base. Adjust the depth until the pilot area is covered by the router base.
* Always route with the grain when possible to avoid splintering.
* Use an edge guide for long, straight runs to maintain consistency.
* Take multiple shallow passes if you need a deeper profile.
Carve Signs with Freehand Techniques

Use V-Bits for Lettering
Freehand carving turns your router into a precision engraving tool. Use a 60-degree or 90-degree V-bit to create crisp “V” shapes for names, dates, or custom designs. These bits excel at cutting sharp lines that stand out clearly.
Transfer and Trace Your Design
- Print your text or image at full size on standard paper.
- Tape the paper directly onto the workpiece surface.
- Carefully trace over the lines with the V-bit, letting the paper guide your hand.
Pro Tip: Hold the router like a pencil for maximum control. Let the bit move naturally through the wood without forcing sharp turns.
Route Vertical Surfaces Effectively
Applications for Upright Work
Trim routers shine where big tools struggle, especially on vertical surfaces. Common uses include trimming laminate on vertical countertop edges, profiling upright cabinet doors, and adding detail to wall-mounted shelves.
Maintain Stability Against Gravity
Rest the base flat against the vertical surface before starting the motor. Support the router with one hand on the grip and the other stabilizing the base. Move slowly and steadily since gravity works against you in this position.
Build Templates for Precision Copies
Use Guide Bushings for Repetition
Reproduce identical parts easily by attaching a guide bushing to the router base. The bushing follows the template edge while the bit cuts the workpiece below. This offset allows you to create duplicate cutouts for inlays or rounded corners on trays.
Calculate Template Offsets
You must account for the distance between the bit and the bushing wall.
* Cutting depth equals template offset plus bit diameter.
* Example: A 1/4-inch bit with a 1/4-inch bushing creates a 1/2-inch offset from the template.
This method ensures every piece you cut matches your original design perfectly.
Troubleshoot Common Routing Problems
Fix Burn Marks on Wood
Dark scorching means friction overheated the wood fibers during the cut.
* Too slow feed rate: Keep moving and never stop while the bit touches wood.
* Dull bit: Replace or sharpen bits that feel rough.
* Wrong speed: Lower RPM for large bits and increase for small ones.
* Deep cut: Make two or three light passes instead of one deep one.
Stop Tear-Out and Chipping
Rough edges ruin clean work and require extra sanding to fix.
* Cut with the grain whenever possible to support wood fibers.
* Use sharp carbide-tipped bits for cleaner cuts.
* Add a backer board behind the exit point to support fibers.
* Try a light climb cut on stubborn end grain sections.
Eliminate Depth Inconsistencies
Uneven cuts often mean your setup needs checking before you continue.
* Loose depth lock: Tighten the mechanism before starting your cut.
* Dirty base: Clean the base with isopropyl alcohol to ensure flat contact.
* Tilting: Use both hands or a fence to maintain stability during the cut.
Reduce Wobble and Vibration
Vibration leads to poor cuts and an uncomfortable user experience.
* Loose collet: Tighten the collet or replace it if worn.
* Damaged shank: Inspect bits for nicks or bends that cause imbalance.
* Uneven pressure: Practice consistent hand control to stabilize the tool.
Maintain Your Router and Bits
Clean and Store After Use
Wipe down the base and motor housing after each use to remove dust. Blow out dust from vents and the collet area to prevent buildup. Store bits in a dedicated case to protect their sharp cutting edges from damage.
Sharpen or Replace Dull Bits
Dull bits cause burning and require more force to cut effectively. Replace your bits when cuts feel rough, smoke appears even at correct speeds, or the finish requires excessive sanding. Clean resin buildup with commercial bit cleaner or acetone to extend bit life.
Choose the Right Accessories
Boost Accuracy with Edge Guides
An edge guide is essential for straight grooves, consistent rabbets, and parallel cuts. Attach it to the router base and adjust the distance from the bit to your desired measurement. This simple accessory ensures straight lines every time.
Consider a Router Table Upgrade
Turning your handheld tool into a benchtop machine offers safety for small parts. A router table provides better dust collection and allows use with a fence and miter gauge for repeatable cuts. Beginner-friendly models often start under $200.
Attach Dust Collection Systems
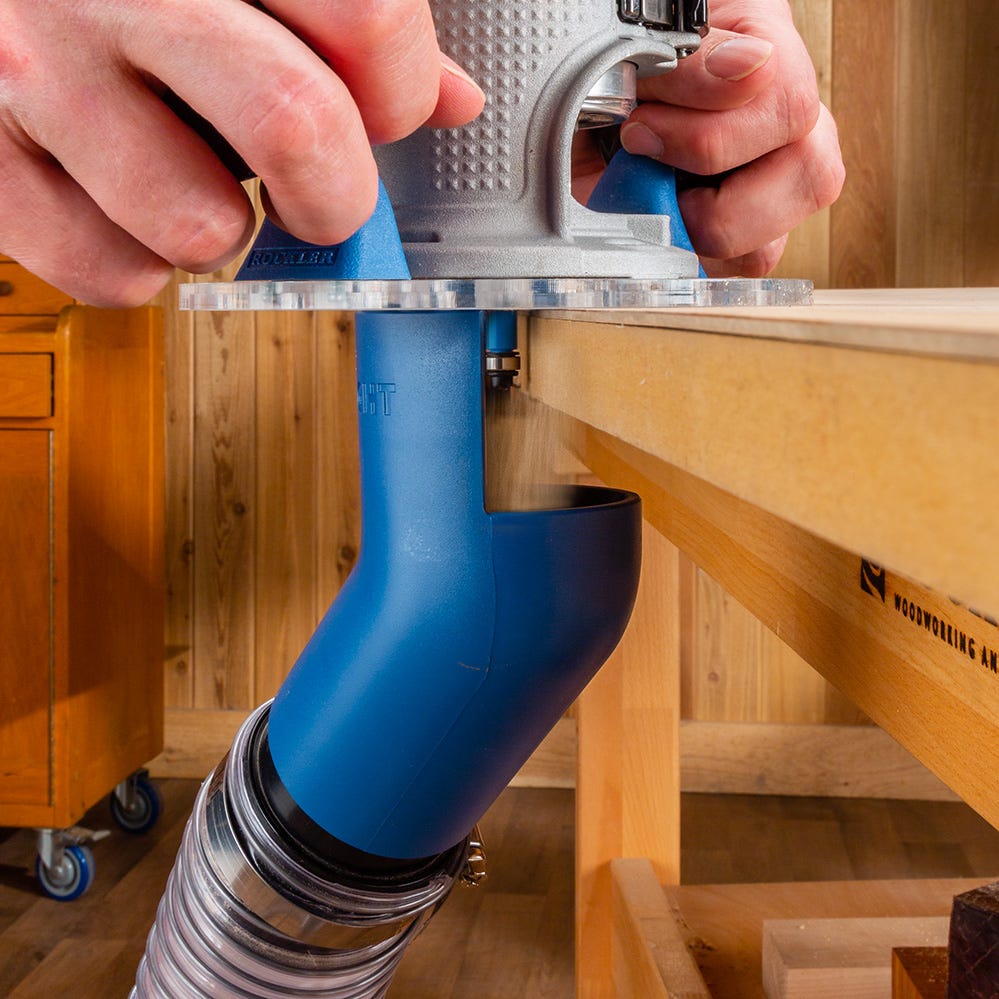
Attach a shop vac or dust extractor to your router base or table. This improves visibility, reduces cleanup time, and protects your lungs from fine wood particles. Good dust management is vital for health and shop cleanliness.
Know When to Use a Full-Size Router

Compare Trim and Full-Size Models
| Feature | Trim Router | Full-Size Router |
|---|---|---|
| Weight | Light (1–3 lbs) | Heavy (4–8 lbs) |
| Handheld Use | One-handed | Two-handed |
| Bit Shank | 1/4″ only | 1/4″ and 1/2″ |
| Depth Capacity | Shallow | Deep |
| Best For | Detail work | Heavy joinery |
Use a trim router for:
* Flush trimming laminate
* Edge profiling on furniture
* Freehand carving and signs
* Vertical work on countertops
Use a full-size router for:
* Deep mortises and dados
* Large crown molding profiles
* Heavy material removal
* Plunge cuts into solid stock
Many professionals own both tools to handle every type of job efficiently.
Start with These Beginner Projects
Rounded-Edge Picture Frame
Cut four pieces of 1×2 pine and assemble them into a frame. Use a 1/8-inch roundover bit to route all outer edges counterclockwise. This simple project teaches you feed direction and depth control.
Personalized Wooden Coaster
Engrave initials on a square of cherry wood using a 60-degree V-bit. Tape printed letters to the wood and trace over them with the router. Finish with food-safe oil for a perfect gift.
Flush-Fit Tray Bottom
Glue up tray walls slightly oversized and place the bottom inside. Use a flush trim bit to cut the bottom perfectly flush with the walls. This demonstrates the power of bearing-guided bits.
Frequently Asked Questions About Trim Routers
What size bits fit a trim router?
Most trim routers exclusively accept 1/4-inch shank bits. Larger 1/2-inch shank bits are designed for full-size routers and will not fit the smaller collet of a trim model.
Can I use a trim router for heavy duty work?
No, trim routers are designed for light to medium tasks like edging and trimming. Heavy joinery or deep cuts require a full-size router with more power and a larger collet.
Why does my router burn the wood?
Burning usually happens when you feed the tool too slowly or pause while cutting. Maintain a steady movement and ensure your bit is sharp to prevent friction heat.
How do I prevent tear-out on end grain?
Start your cut on the end grain first or use a sacrificial backing board. You can also try a very light climb cut, but exercise extreme caution with this technique.
Is a trim router good for beginners?
Yes, the lightweight design and lower power make trim routers approachable for beginners. They are less intimidating than full-size routers while teaching essential routing skills.
Key Takeaways for Using Your Trim Router
Mastering how to use a trim router opens up endless possibilities for detail work and fine finishing. Focus on safety by unplugging before bit changes, matching speed to bit size, and always feeding against the rotation. These core principles will help you avoid burn marks, tear-out, and accidents.
Start with simple projects like rounding picture frame edges or trimming laminate to build your confidence. With practice, this compact tool will become your go-to solution for adding professional, flawless touches to every woodworking project.



