You have installed smart cameras and sensors, but you cannot access them when you leave your local network. Your router blocks outside connections by design to keep your data safe from hackers. This protection creates a barrier that stops you from managing your devices remotely without specific configuration steps.
This guide explains exactly how to use remote manage IoT behind router settings securely and effectively. You will learn to configure port forwarding, set up dynamic DNS, and establish reverse tunnels for reliable access. We will cover safety measures to ensure your network stays protected while you gain full control.
Evaluate Secure Remote Access Methods for IoT Devices
Selecting the right access method depends on your technical skills and security needs. Some options offer ease of use while others provide maximum protection for your data. You must weigh the risks of exposing devices directly against the convenience of instant access.
Compare Port Forwarding and Tunneling Security
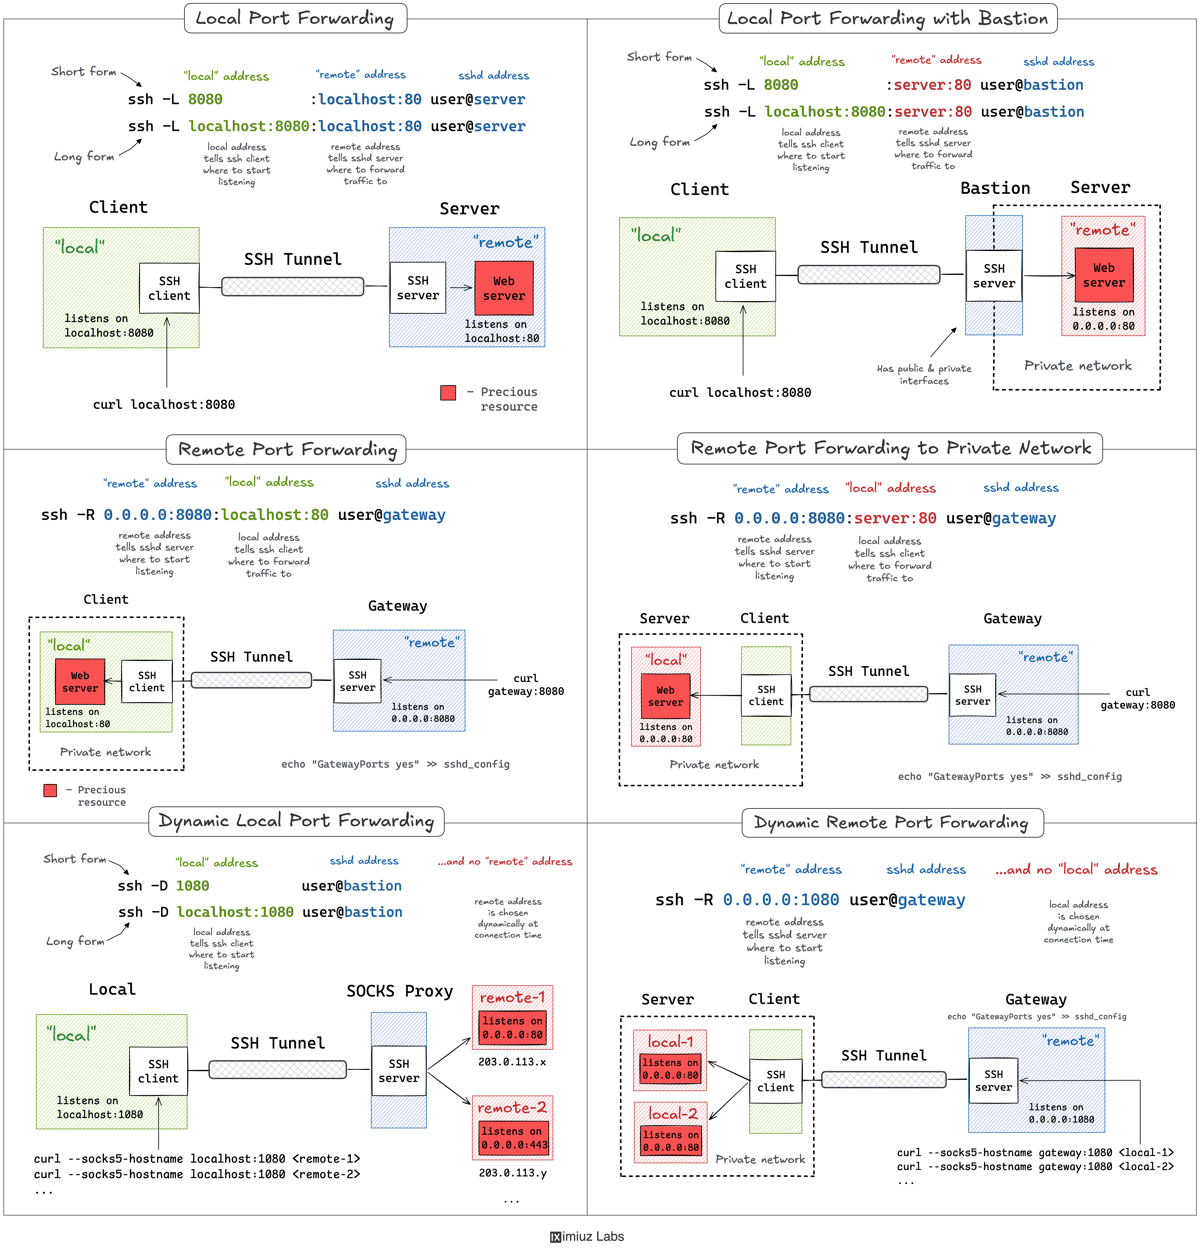
Port forwarding opens a direct door through your router firewall to a specific device. This method is simple to set up but increases your attack surface if not managed carefully. Tunneling creates an encrypted path that keeps your devices hidden from the public internet entirely.
- Port Forwarding: Best for single devices needing direct access with low latency.
- Reverse Tunneling: Ideal for multiple devices or when strict firewall rules exist.
- Cloud Intermediaries: Suitable for users who want zero configuration on the router itself.
Configure Port Forwarding for Direct Device Access
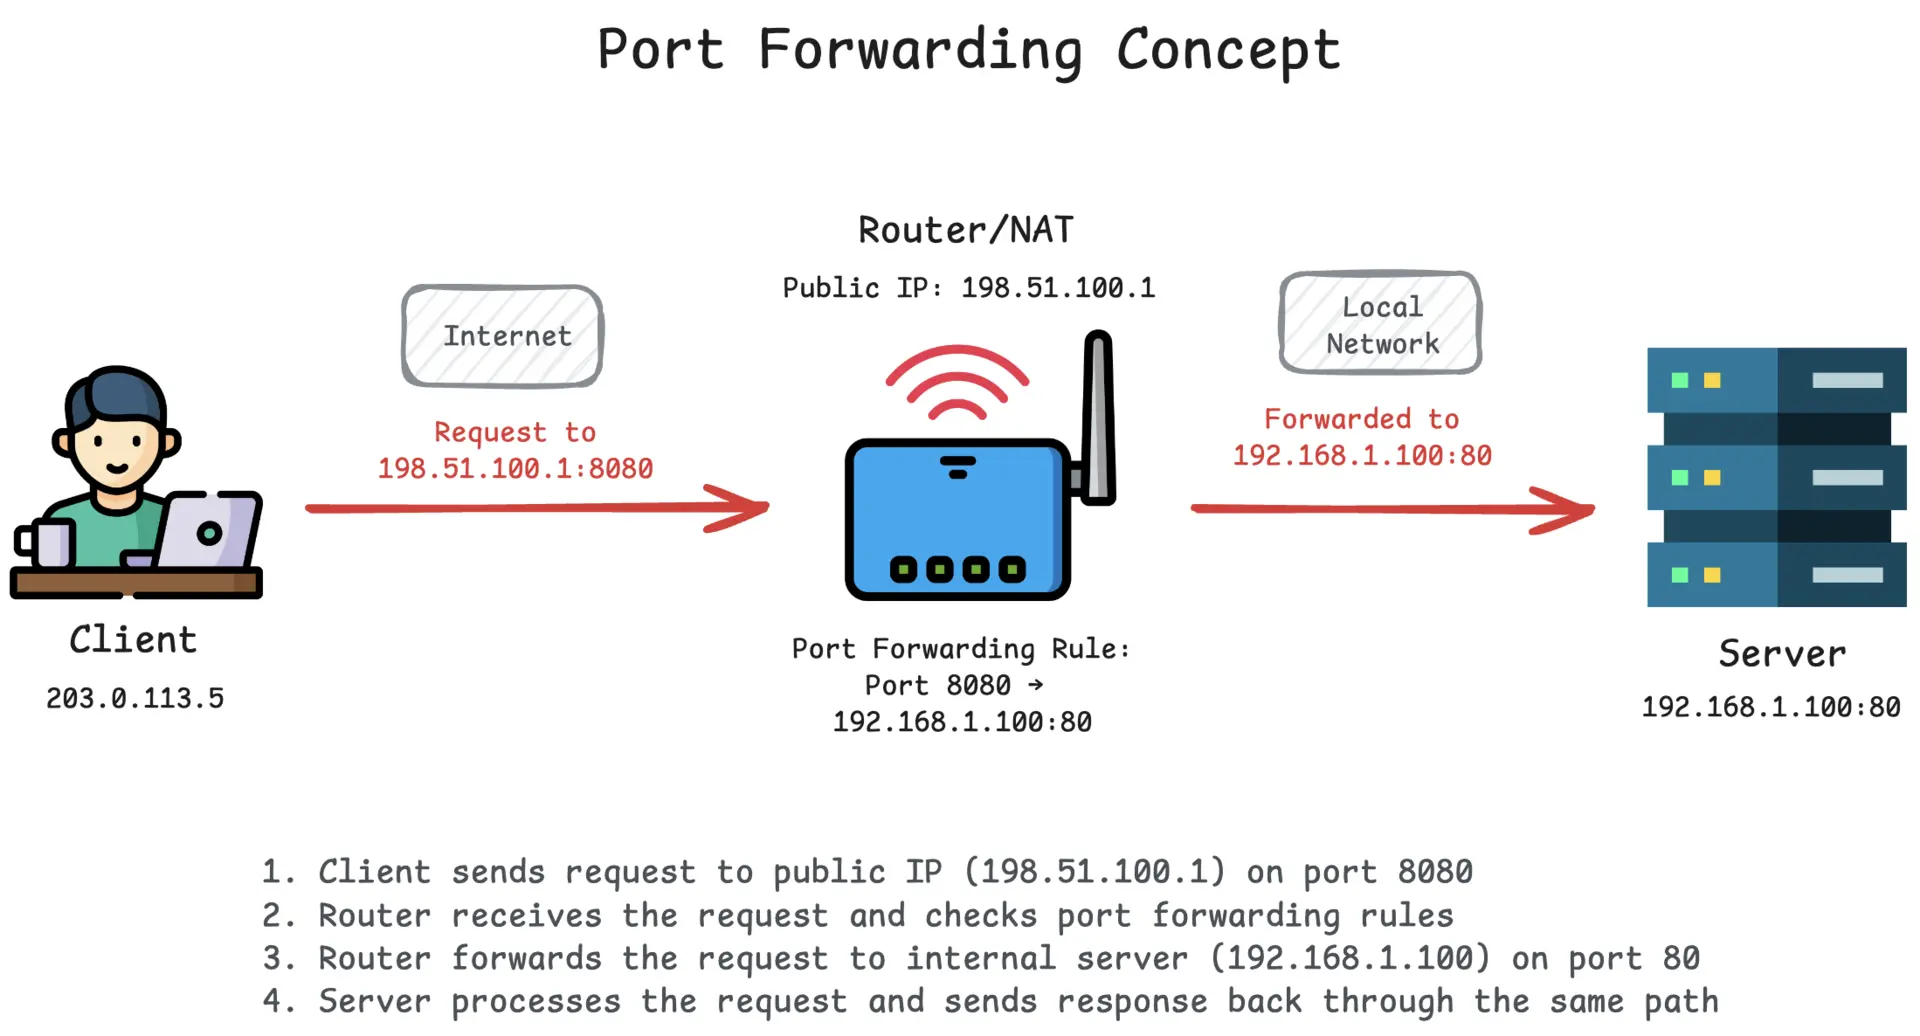
Port forwarding tells your router to send external internet requests to a specific internal device. You define which port number triggers the connection and where that traffic should go inside your network. This process requires knowing the exact IP address of your target IoT gadget.
Step-by-Step Port Forwarding Setup
- Log into your router admin panel using its gateway IP address in a web browser.
- Locate the Port Forwarding or Virtual Server section in advanced settings.
- Create a new rule specifying the external port and the internal IP address of your device.
- Select the correct protocol, usually TCP or both TCP and UDP, then save changes.
⚠️ Warning: Never forward ports for devices with weak default passwords as they become immediate targets.
💡 Pro Tip: Use a non-standard external port number to reduce noise from automated bot scans looking for common services.
Implement Dynamic DNS for Changing Public IP Addresses
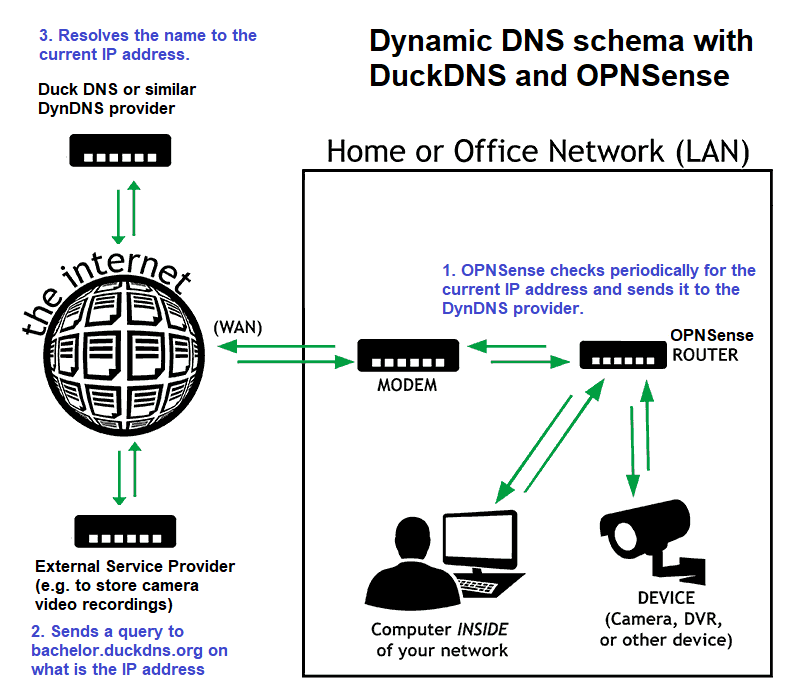
Most home internet connections receive a new public IP address periodically when the modem restarts. This change breaks remote connections because your device address no longer matches what you use to connect. Dynamic DNS (DDNS) solves this by linking a fixed domain name to your shifting IP.
Configure Automatic IP Updates
- Register for a free or paid DDNS service like No-IP or DuckDNS online.
- Create a unique hostname such as
myhome-iot.ddns.netwithin your account dashboard. - Enter your DDNS credentials into the router built-in DDNS client settings.
- Verify the status shows “Success” or “Updated” to confirm automatic syncing works.
Now you can access your system using a consistent URL instead of memorizing numerical IP addresses. This setup ensures your connection string remains valid even after power outages or ISP resets.
Establish Reverse SSH Tunnel for Firewall Bypass
A reverse SSH tunnel allows your internal IoT device to initiate a secure connection to an outside server. Since the connection starts from inside your network, the router firewall allows it without special rules. You then connect to that outside server to reach back into your local device securely.
Deploy Reverse Tunnel on Linux Based Devices
- Rent a cheap virtual private server with a static public IP address from a cloud provider.
- Install SSH on your IoT device and generate a key pair for password-less authentication.
- Run a command on the device to connect to the server and open a remote port forward.
- Connect to the cloud server port from anywhere to access your local IoT interface safely.
This method is highly secure because no ports on your home router need opening to the public internet. It works excellently for Raspberry Pi projects or industrial controllers running Linux operating systems.
Utilize Cloud Intermediary Platforms for Easy Management
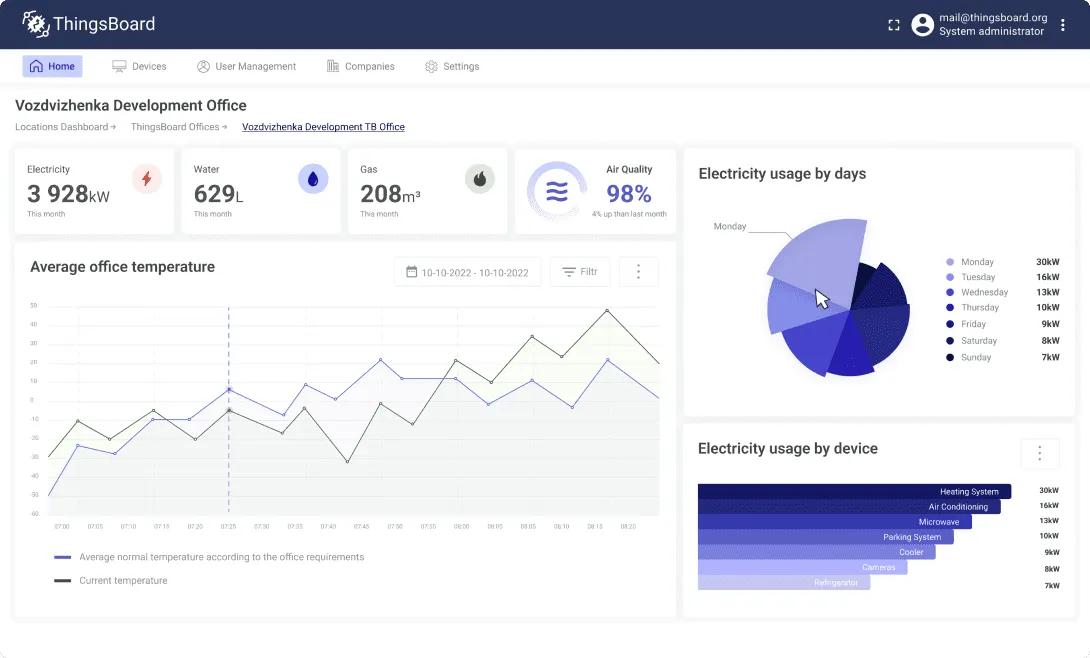
Cloud platforms act as a middleman so your device connects out to a central hub you control. You log into the cloud dashboard to send commands which the device then receives and executes. This approach eliminates complex networking knowledge and works behind almost any router configuration.
Connect Devices to Cloud Dashboards
Many modern IoT manufacturers build this functionality directly into their firmware updates. You simply scan a QR code or enter a token to link your device to their global network. Your phone or laptop talks to the cloud, and the cloud talks to your device.
- Pros: No router configuration required and works on mobile data instantly.
- Cons: Relies on the third-party service staying online and profitable long term.
- Privacy Note: Ensure the cloud provider uses end-to-end encryption for all data transmission.
Harden Security for Remote IoT Connections

Exposing any device to the internet invites scrutiny from malicious actors scanning for vulnerabilities. You must take extra steps to ensure that remote access does not become a backdoor for attackers. Strong authentication and regular updates are your first line of defense.
Essential Security Practices
- Change all default passwords to complex, unique strings before enabling remote features.
- Disable unused services like Telnet or unencrypted HTTP on your IoT devices.
- Keep device firmware updated to patch known security holes exploited by hackers.
- Use a separate VLAN or guest network for IoT gadgets to isolate them from main computers.
Troubleshoot Common Remote Access Failures
Connection issues often stem from incorrect IP assignments or firewall rules blocking traffic. You need a systematic way to identify where the connection chain breaks between your phone and the device. Checking logs and verifying settings usually reveals the configuration error quickly.
Diagnose Connectivity Problems
- Verify the internal IP address of your device has not changed due to DHCP renewal.
- Test the connection from inside the local network using the internal IP first.
- Check router logs to see if external requests are being dropped or rejected.
- Confirm your ISP is not blocking incoming ports on residential connection plans.
Assigning a static IP address to your IoT device prevents it from losing its designated spot on the network. This simple step solves many issues where port forwarding rules stop working after a router reboot.
Frequently Asked Questions About Remote IoT Management
Is port forwarding safe for IoT devices?
Port forwarding carries risk if the device has weak security or outdated software. You should only forward ports for devices with strong passwords and updated firmware. Using non-standard ports and limiting access to specific IP addresses adds necessary layers of protection.
Why does my remote connection fail after a power outage?
Your public IP address likely changed, breaking the link you used to connect remotely. Setting up Dynamic DNS ensures your domain name always points to the correct current IP address. This prevents connection loss even when your internet service provider assigns a new address.
Can I manage IoT devices without opening router ports?
Yes, you can use reverse SSH tunnels or cloud-based intermediary platforms to avoid opening ports. These methods let the device initiate the connection outward, bypassing firewall restrictions naturally. This approach is often safer and more reliable for non-technical users.
What is the best way to handle changing internal IP addresses?
Configure your router to assign a static DHCP lease based on the device MAC address. This ensures your IoT gadget always receives the same internal IP address every time it connects. Consistent addressing is critical for port forwarding rules to function correctly.
Do all routers support remote management features?
Most modern consumer routers support port forwarding and Dynamic DNS updates natively. However, some ISP-provided modems may lock these features or require bridge mode to function. Check your specific router documentation or consider installing custom firmware for advanced control.
Key Takeaways for Remote IoT Router Configuration
Successfully managing IoT devices behind a router requires balancing accessibility with strict security protocols. You now understand how to use port forwarding carefully, implement Dynamic DNS for stable addresses, and utilize reverse tunnels for maximum safety. Each method offers distinct advantages depending on your specific network environment and technical comfort level.
Start by securing your devices with strong passwords and static IP assignments before attempting any remote configuration. Choose the access method that fits your needs, whether it is the simplicity of cloud platforms or the control of manual port forwarding. Take action today by auditing your current router settings and applying these security best practices to protect your smart home.