Your router has run out of Ethernet ports just as you need to connect your gaming console, smart TV, and work PC. This bottleneck forces you to choose between devices or suffer through unstable Wi-Fi connections. The solution to expand your wired network is simple. You need to learn how to connect a network switch to a router effectively.
This guide provides the exact steps to plug in and configure your hardware for maximum speed. You will discover the difference between switch types and how to avoid common wiring errors. Follow these instructions to create a stable, high-performance home office or entertainment setup.
Choose Between Unmanaged and Managed Switch Types

Selecting the correct hardware determines your setup complexity and control level. You must decide if you need basic expansion or advanced network management features.
When to Use an Unmanaged Switch
Unmanaged switches offer plug-and-play simplicity for most home users. These devices require zero configuration and work immediately upon connection.
* Best for expanding ports for consoles, PCs, and smart TVs.
* No software installation or login credentials needed.
* Cost-effective models start around twenty dollars.
* Auto-sensing ports allow you to use any port for the uplink.
When to Use a Managed Switch
Managed switches provide full network control for advanced users and businesses. They allow you to create VLANs, prioritize traffic, and monitor bandwidth usage.
* Ideal for home labs, IP camera systems, or VoIP phone setups.
* Requires configuration via a web interface or command line.
* Features include SSH access, port mirroring, and Power over Ethernet.
* Prices range from one hundred to over five hundred dollars.
Pro Tip: Most users only need an unmanaged Gigabit switch. Choose a managed model only if you specifically require VLANs or remote traffic monitoring.
Gather Required Equipment for Installation
You need specific components to ensure maximum speed and reliability during installation. Using the wrong cables or missing parts can cause connection failures.
Essential Hardware Components
- Network Switch: Select Gigabit speed or Multi-Gig based on your router capabilities. Match the port count to your device needs.
- Router with LAN Port: Ensure at least one free LAN port exists. Do not use the WAN or Internet port.
- Ethernet Cables: Use Cat 5e for 1 Gbps networks. Choose Cat 6 or Cat 6a for faster 2.5G or 10G networks.
- Power Outlet: Place the switch near an electrical outlet for its power adapter.
Warning: Never use an Ethernet splitter. It halves your bandwidth and lacks the intelligence of a real switch. Always use a dedicated network switch.
Connect Switch to Router Step by Step
Follow these sequential steps to physically integrate your switch into your existing network infrastructure. Proper connection ensures all devices communicate correctly.
Step 1: Power Off Devices for Safety
Turn off your router and unplug the switch before connecting cables. This prevents rare electrical issues even though modern gear supports hot-plugging.
1. Switch off the router power.
2. Unplug the network switch from the wall.
Step 2: Link Switch to Router LAN Port
This is the most critical step in the process. You must connect to the correct port on your router to avoid isolation.
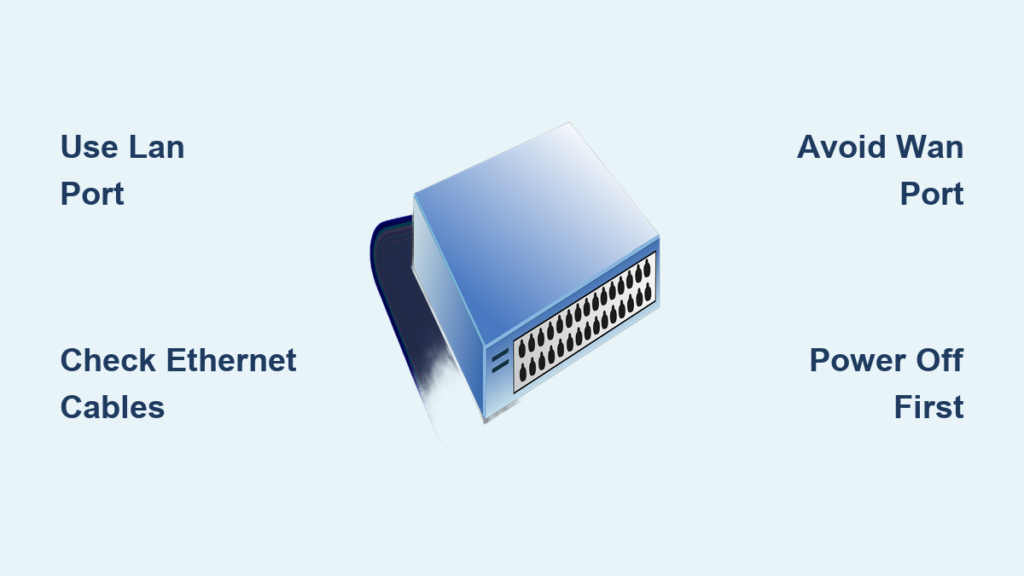
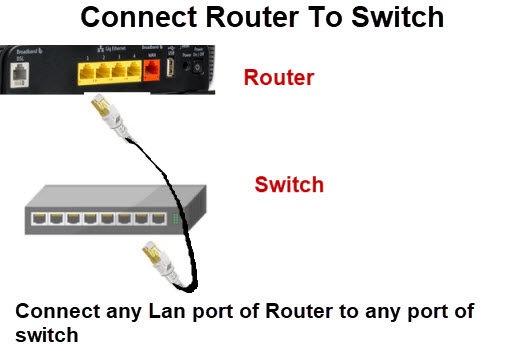
* Plug one end of an Ethernet cable into any LAN port on the router.
* Plug the other end into any port on the switch.
* Do not use the WAN or Internet port on the router.
Note: Modern switches use auto-MDI/MDI-X technology. You can use any port on the switch without needing a special uplink port or crossover cable.
Step 3: Power On and Wait for Stabilization
Restore power to your devices and allow them to boot up completely. This ensures all internal systems initialize before data transfer begins.
1. Plug the switch into power and turn it on.
2. Power on the router if it remains off.
3. Wait thirty to sixty seconds for lights to stabilize.
Step 4: Connect Devices to the Switch
Attach your wired devices to any open port on the new switch. Your gaming console, desktop PC, and smart TV can now access the network.
* Plug Ethernet cables from devices into the switch.
* No configuration is needed for unmanaged switches.
* Devices automatically receive IP addresses from the router.
Verify Connection and Test Performance

Confirm your network is functioning correctly after physical installation. Testing ensures you are getting the expected speeds and stability.
Check Physical Link Lights
Inspect the LED indicators on the front of your switch. These lights provide immediate visual feedback about the connection status.
* Solid or blinking lights indicate an active link.
* No light means the cable is loose or the device is off.
* Reseat the cable if the light remains off.
Confirm Network and Internet Access
Test a connected computer to ensure it can reach the internet. The device should behave as if it were plugged directly into the router.
1. Look for the Ethernet icon in your system tray.
2. Open a browser and visit a website like google.com.
3. Run a speed test to verify you are getting expected speeds.
Test Internal Network Speed
Transfer a large file between two devices connected to the switch. This tests the local network performance independent of your internet speed.
* Expect transfer speeds near 100 to 120 MB/s on Gigabit networks.
* Slow speeds may indicate poor cable quality or outdated hardware.
* Upgrade to Cat 6 cables if speeds remain low.
Avoid Common Wiring Mistakes
Small errors can break your entire network. Understanding these pitfalls helps you maintain a stable and fast connection.
Using the Router WAN Port
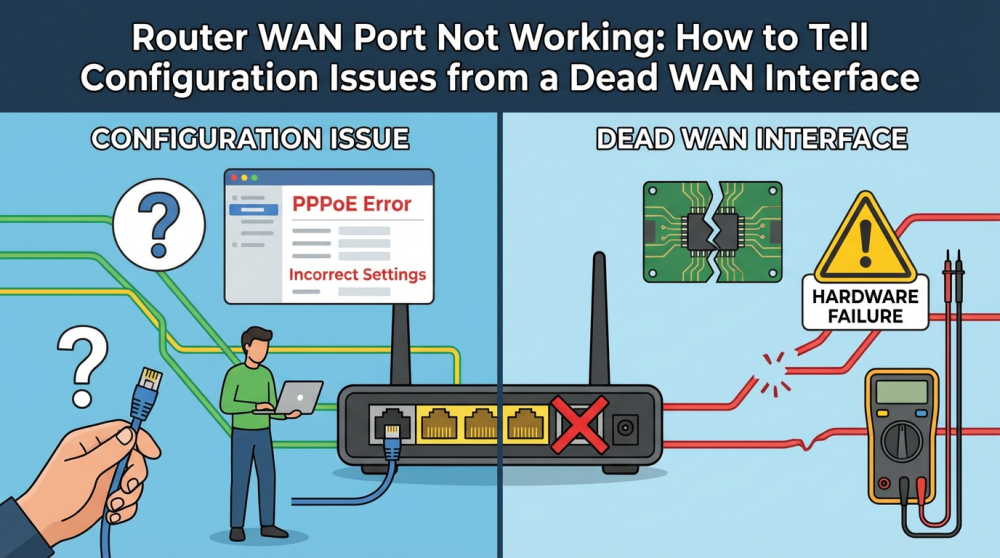
Connecting the switch to the WAN port isolates it from your local network. Devices will fail to get internet access or see other computers.
* Problem: The WAN port is reserved for the modem connection.
* Result: Complete loss of connectivity for switch devices.
* Fix: Always use a numbered LAN port on the router.
Creating a Network Loop
Connecting two cables between the same switch and router causes a broadcast storm. This crashes the network and stops all data traffic.
* Problem: Multiple paths create infinite data loops.
* Result: Total network slowdown or crash.
* Fix: Use only one cable between the switch and router.
Mixing Cable Types or Speeds
Using old Cat 5 cables limits your entire network to 100 Mbps. This bottleneck affects gaming, streaming, and file transfers significantly.
* Problem: Older cables cannot support Gigabit speeds.
* Result: Laggy gameplay and buffering video streams.
* Fix: Replace all cables with Cat 5e or Cat 6 standards.
Troubleshoot No Connection or Slow Speeds
Use this checklist if devices fail to connect or performance feels sluggish. Most issues have simple fixes involving cables or power cycles.
No Link Light on Switch
A missing light usually points to a physical layer issue. Check the cable seating and device power status first.
* Reseat the Ethernet cable at both ends firmly.
* Try a different known-working cable.
* Ensure the connected device is powered on.
Devices Cannot Access Internet
If lights are on but no internet exists, the issue may be with IP assignment. Restarting the router often resolves DHCP glitches.
1. Restart the router to refresh IP addresses.
2. Verify the switch connects to a LAN port.
3. Run ipconfig on Windows to check for a valid IP address.
Slow Network Performance
Poor speeds often result from mismatched hardware or bad cables. Ensure every component in the chain supports your desired speed.
* Check if the switch is only 10/100 Mbps instead of Gigabit.
* Replace old cables with Cat 6 for better performance.
* Avoid daisy-chaining too many switches together.
Advanced Managed Switch Setup Options
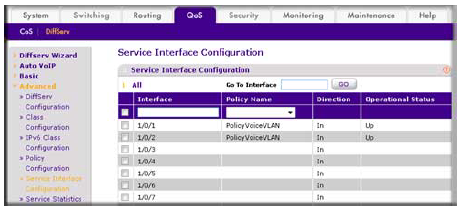
Advanced users can configure managed switches for specific network needs. This section covers basic setup concepts for VLANs and security.
Access the Switch Interface
Connect to the switch using a console cable or web browser. You need this access to change default settings and enable features.
* Use PuTTY for command line access.
* Enter the default IP address in a web browser.
* Check the manual for default login credentials.
Configure VLANs and QoS
Create Virtual LANs to segment traffic and improve security. Quality of Service settings prioritize critical applications like gaming or video calls.
* Assign specific ports to different VLANs.
* Enable QoS to prioritize voice or video traffic.
* Save your configuration to prevent data loss.
Optimize for Gaming Streaming and Office Work
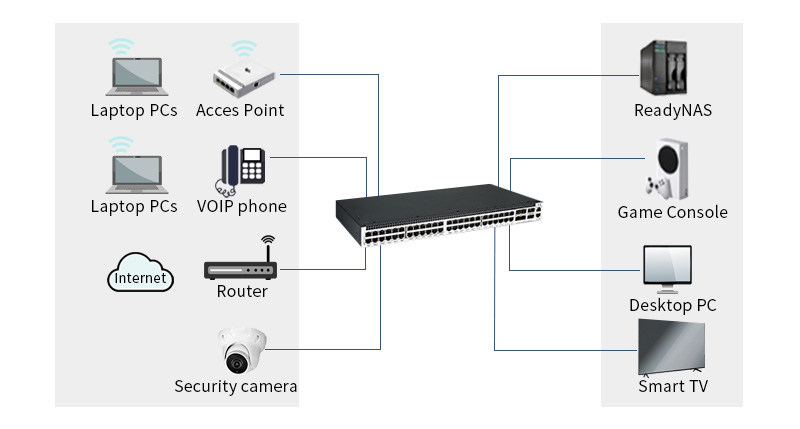
A wired switch improves performance for specific high-demand activities. Learn how to leverage your new setup for better results.
Gaming Eliminate Lag and Jitter
Wired connections cut latency significantly compared to Wi-Fi. This stability is crucial for competitive online gaming.
* Ethernet reduces latency to under 1 millisecond.
* No interference from microwaves or neighbor networks.
* Connect consoles directly to the switch for best results.
Streaming Without Buffering
High-definition video requires consistent bandwidth to play smoothly. Wired connections prevent the buffering common on crowded Wi-Fi networks.
* 4K streaming needs consistent speeds above 25 Mbps.
* Ethernet delivers uninterrupted streams reliably.
* Connect smart TVs and streaming sticks via the switch.
Reliable Home Office Calls
Video conferencing tools demand stable upload speeds to function well. A wired connection prevents audio dropouts during important meetings.
* Prevents frozen video on Zoom or Teams calls.
* Ensures seamless productivity for desktop computers.
* Connects printers and scanners for easy sharing.
Future Proof Your Network Setup
Build a network that lasts for years by choosing the right components today. Planning ahead avoids costly upgrades later.
Use Cat 6 or Cat 6a Cables
Higher grade cables support faster speeds over longer distances. Investing in better cabling now saves money in the future.
* Cat 5e supports up to 1 Gbps speeds.
* Cat 6 supports 2.5G and 5G networks easily.
* Cat 6a handles full 10 Gbps speeds over 100 meters.
Choose Multi-Gig Switches for WiFi 7
New WiFi 7 routers can exceed 1 Gbps on wired backhauls. A multi-Gig switch ensures your wired network does not bottleneck wireless speeds.
* Select 2.5G or 5G switches for modern routers.
* Avoid bottlenecks with high-speed internet plans.
* Prepare for future device upgrades easily.
Frequently Asked Questions About Connecting Network Switches
Can I connect a switch to any LAN port on my router?
Yes, you can use any available LAN port on your router. Modern switches have auto-sensing ports that detect the connection type automatically. You do not need a specific uplink port on most modern hardware.
Will connecting a switch slow down my internet speed?
No, a Gigabit switch will not slow down your internet. Speed only drops if you use old cables like Cat 5 or a switch with slower 10/100 Mbps ports. Ensure all components match your internet speed tier.
Do I need to configure anything for an unmanaged switch?
No configuration is required for unmanaged switches. They are plug-and-play devices that work immediately after you connect the power and Ethernet cables. Your router handles all IP addressing automatically.
How many switches can I connect to one router?
You can connect multiple switches by daisy-chaining them together. However, avoid creating loops where two cables connect the same switches. Each added switch adds a tiny amount of latency but expands port availability.
What is the difference between WAN and LAN ports on my router?
The WAN port connects to your modem and brings internet into your home. LAN ports connect your local devices like computers and switches. Connecting a switch to the WAN port will prevent your devices from working.
Key Takeaways for Connecting Your Network Switch
Connecting a network switch to a router expands your wired network capacity instantly. Remember to always use a LAN port on your router rather than the WAN port. Use Cat 5e or Cat 6 cables to ensure you get full Gigabit speeds without bottlenecks.
Most home users should choose an unmanaged switch for simple plug-and-play operation. Devices connected to the switch will automatically receive IP addresses from your router. This setup provides the stability needed for gaming, streaming, and remote work.
Take action today by gathering your Ethernet cables and powering down your router. Follow the steps above to install your switch and enjoy a faster, more reliable network. Your devices will thank you for the stable connection.