You bought NordVPN to protect your privacy, but your smart TV and gaming console remain exposed. Installing the app on every single device is impossible, so learning how to connect NordVPN to your router is the smart solution.
This guide shows you exactly how to secure your entire home network with one setup. You will learn to check compatibility, configure firmware, and troubleshoot connection issues without needing a degree in computer science.
Verify Router Compatibility Before You Start
Not every router can run a VPN client directly out of the box. You must confirm your hardware supports the necessary protocols before attempting any configuration changes.
Check for Native NordVPN Support
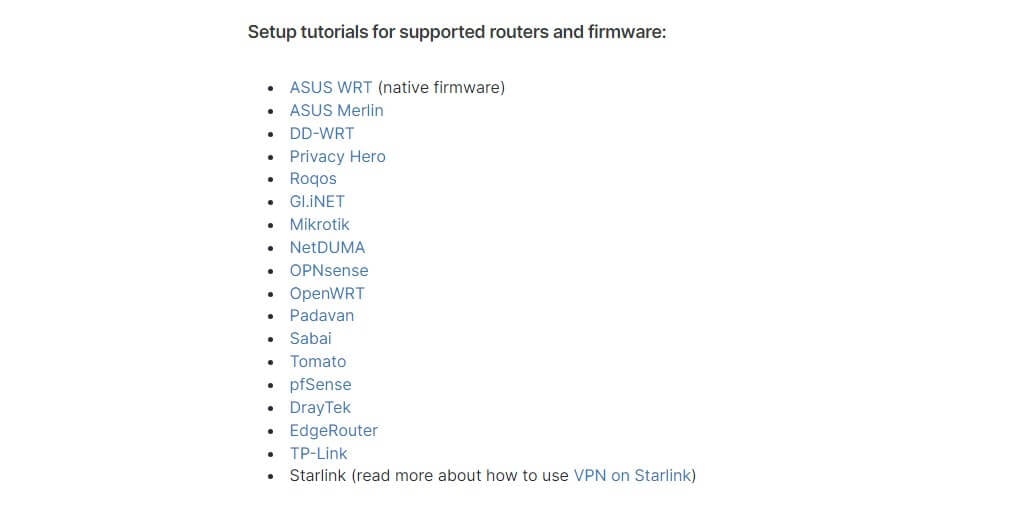
Some manufacturers like Asus, GL.iNet, and specific Netgear models come with built-in VPN client support. These devices often have a dedicated section in their admin panel where you can simply upload credentials. If your router is on the official compatibility list, your setup process will be significantly faster and safer.
Understand Firmware Flashing Risks
Standard routers often require third-party firmware like DD-WRT, Tomato, or OpenWrt to function with NordVPN. Flashing new firmware replaces your current operating system to enable advanced features.
Warning: This process can void your warranty or permanently damage your device if interrupted. Always back up your current settings and ensure your model number matches the firmware exactly before proceeding.
Access Your Router Admin Panel Successfully
You need to log into your router’s backend to begin the configuration process for your VPN connection.
Locate Your Default Gateway IP
Most routers use 192.168.1.1 or 192.168.0.1 as their default address. You can find your specific gateway by typing ipconfig in the Windows Command Prompt and looking for “Default Gateway.” Mac users can find this under System Settings in the Network TCP/IP details.
Log In With Administrator Credentials
Enter your username and password when the browser prompts you. Common defaults are often “admin” for both fields, though you should use your custom credentials if you changed them previously. If you cannot remember your login, you may need to hold the physical reset button on the router for ten seconds to restore factory settings.
Download NordVPN Configuration Files
Your router cannot download these files automatically, so you must retrieve them from the NordVPN website on your computer first.
Select Server and Protocol
Log into your NordVPN account and choose a server location that suits your needs, such as the US or UK. You must also select a protocol, with OpenVPN (UDP or TCP) being the standard choice for most routers.
Save Configuration Files Locally
Download the specific .ovpn file that matches your chosen server and protocol. Save this file to an easily accessible folder on your desktop because you will need to copy specific data strings from it later during the setup process.
Configure OpenVPN Client Settings
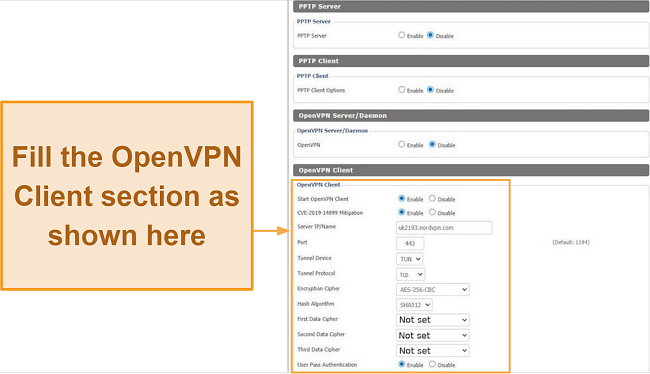
This section applies to routers running custom firmware like DD-WRT or Tomato that support OpenVPN natively.
Enable OpenVPN Client Mode
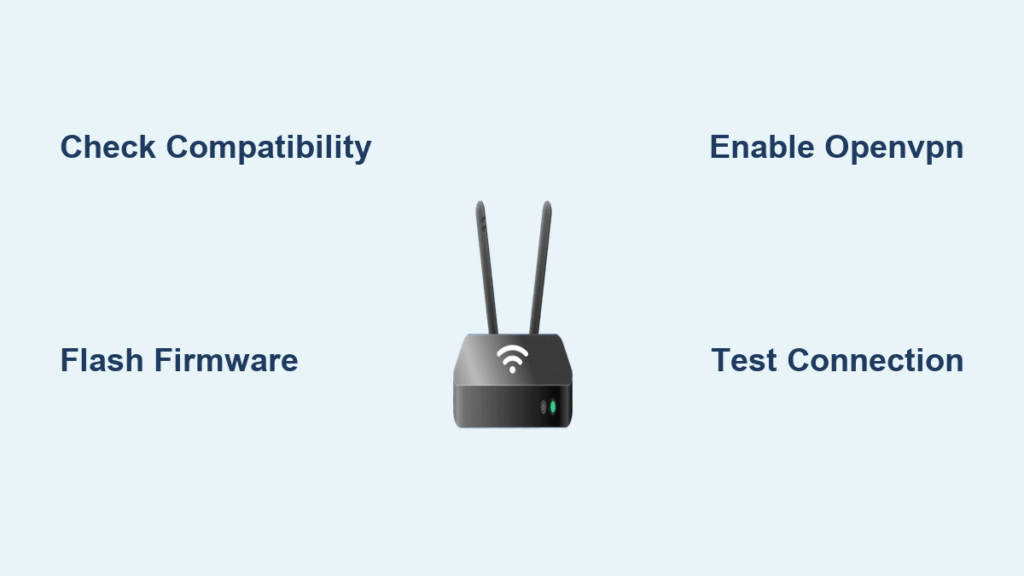
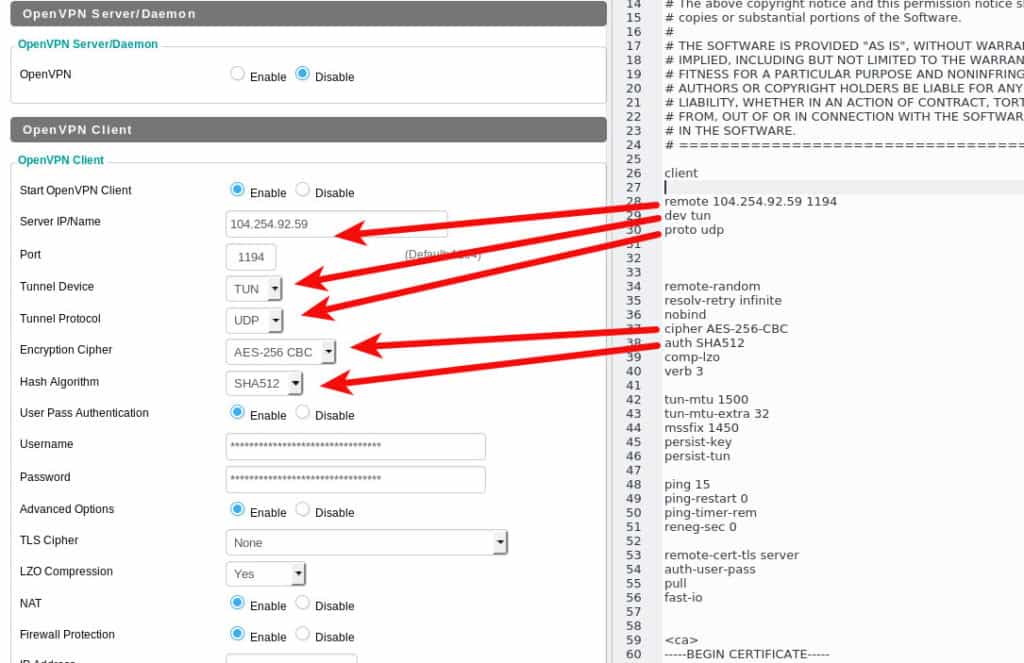
Navigate to the Services or VPN tab in your router admin panel and set the OpenVPN Client to Enabled. You will now see several fields requiring data from your downloaded .ovpn file.
Fill in the server address found in the <remote> tag and set the port to 1194 for UDP or 443 for TCP. Select TUN for the tunnel device and choose AES-256-CBC as your encryption cipher.
Input Authentication and Certificates
Enable User Pass Authentication and enter your NordVPN service credentials carefully. You must also copy the content from the <tls-auth> block in your config file and paste it into the TLS Key field.
Paste the <ca> certificate content into the CA Certificate field to ensure a secure handshake. Finally, enable the Redirect Internet Traffic option to force all devices through the VPN tunnel.
Set Up WireGuard for Faster Speeds
WireGuard is a modern protocol that offers better performance than OpenVPN if your router firmware supports it.
Generate Required Keys
You must generate a public and private key pair using a command-line tool or a dedicated key generation app. Keep your private key secret and only share the public key within your router configuration.
Enter WireGuard Parameters
Go to the WireGuard section in your router settings and create a new tunnel interface. Paste your private key and the NordVPN server public key into the designated fields.
Set the allowed IPs to 0.0.0.0/0 to ensure all traffic routes through the tunnel. Save your changes and activate the interface to begin encrypting your data with this faster protocol.
Test Your VPN Connection Thoroughly
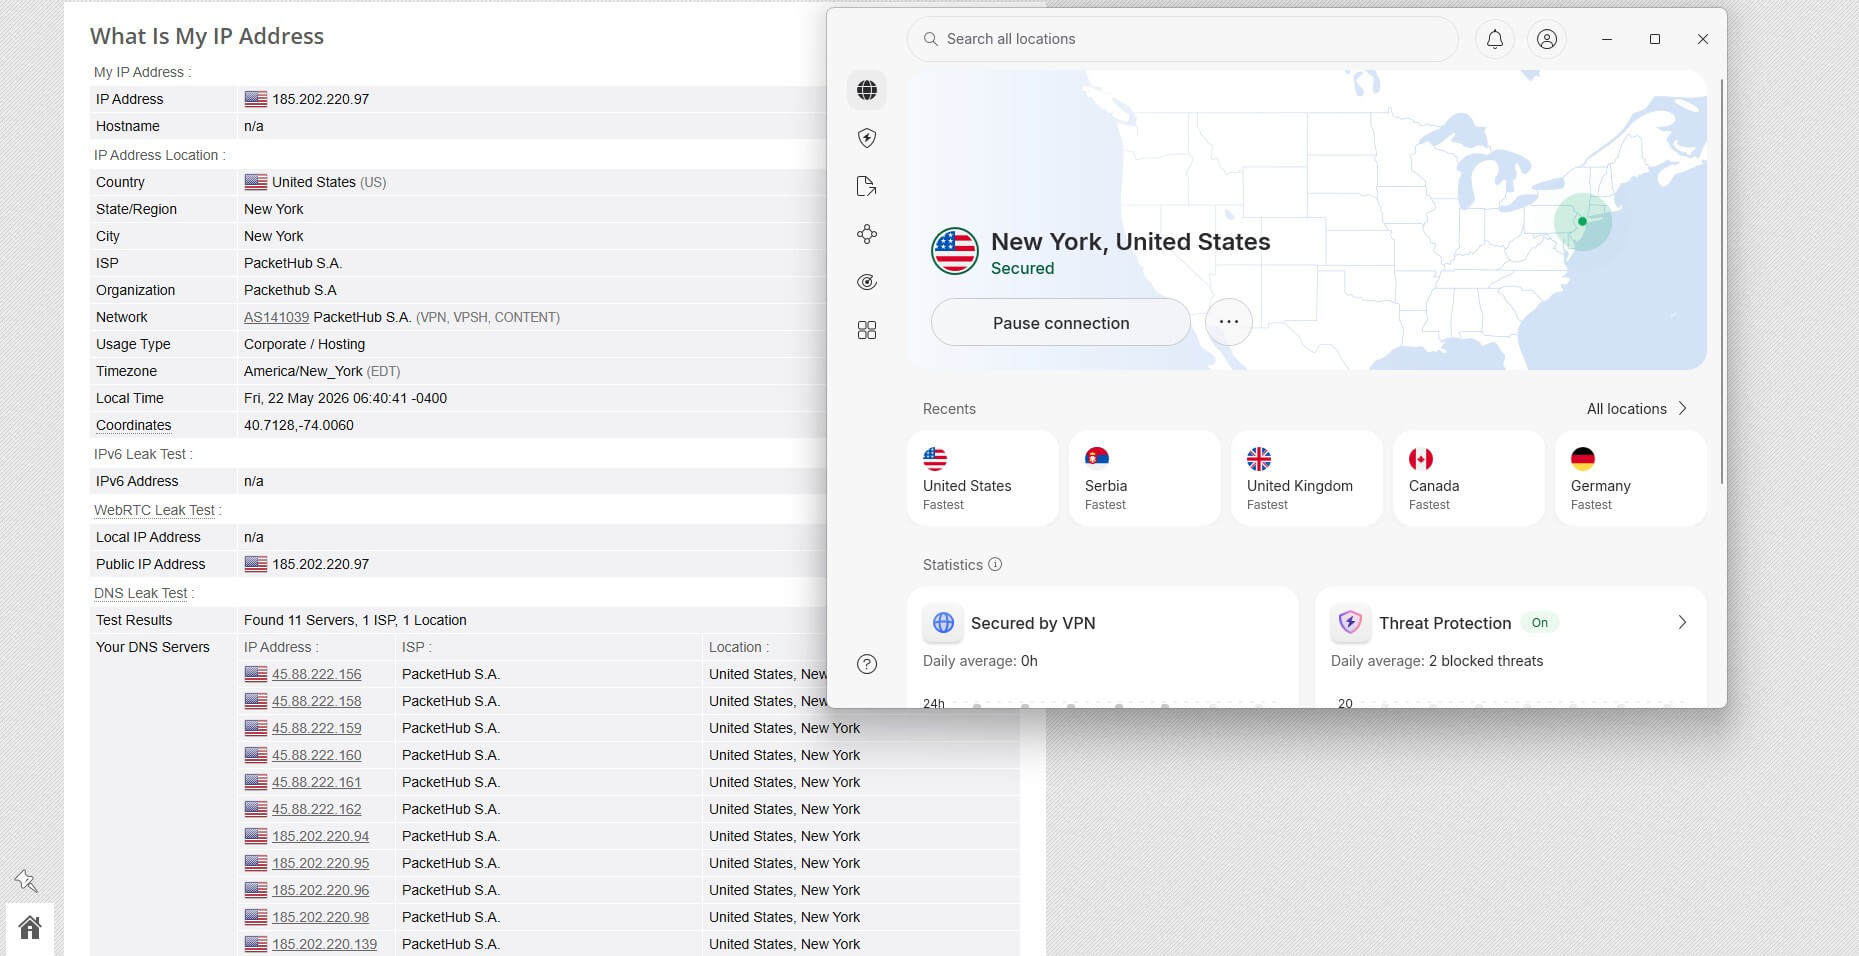
You must verify that your setup is working correctly before relying on it for daily use.
Check for IP and DNS Leaks
Connect a device to your Wi-Fi and visit a leak test website to confirm your identity is hidden. The results should show the IP address of your chosen NordVPN server location rather than your actual ISP location.
If you see your real location or ISP details, disable IPv6 in your router settings and double-check your certificate entries for errors.
Confirm Protection Across Devices
Test multiple devices like your phone, tablet, and smart TV to ensure they all route traffic through the VPN. Try accessing geo-restricted content to verify your virtual location matches your selected server.
Expect a slight drop in speed, typically between 10% and 30%, due to the encryption overhead.
Troubleshoot Common Connection Issues
Even with correct settings, you might encounter connectivity problems that require specific fixes.
Resolve No Internet Access
If your devices lose internet access after enabling the VPN, check that the Redirect Internet Traffic setting is active. Verify that your server address and port numbers match the configuration file exactly.
Try switching from UDP to TCP protocol if your network is restrictive. You may also need to temporarily disable strict firewall settings on the router.
Fix Slow Connection Speeds
Slow speeds often result from choosing a server that is geographically distant from your physical location. Switch to a closer NordVPN server or try the WireGuard protocol for better performance.
Ensure your router is not overheating, as high temperatures can throttle performance. Avoid running a VPN app on your phone while connected to a VPN-enabled router to prevent double encryption slowdowns.
Address Reconnection Failures
If your router fails to reconnect after a reboot, look for a Keep Alive or Auto-Reconnect option in your OpenVPN settings. Some advanced firmware allows you to add a script that retries the connection automatically upon startup.
Maintain and Update Your Router VPN
Regular maintenance ensures your network remains secure and functional over the long term.
Rotate Server Locations Periodically
NordVPN frequently updates server IPs, so your current configuration might become slow or obsolete. Switch to a different server in the same region if you notice performance drops.
Monitor Firmware Security Patches
Check for updates to your custom firmware like DD-WRT or OpenWrt regularly. These updates often include critical security patches that protect your router from new vulnerabilities.
Frequently Asked Questions About Connecting NordVPN to Routers
Can I connect NordVPN to any router?
No, only routers that support OpenVPN or WireGuard clients can connect directly. You may need to flash third-party firmware like DD-WRT onto standard routers to enable this feature.
Will connecting NordVPN to my router slow down my internet?
Yes, you can expect a speed reduction of 10% to 30% due to encryption processes. Using the WireGuard protocol or selecting a server close to your location can help minimize this impact.
Do I need a separate NordVPN subscription for my router?
No, your existing NordVPN subscription works for the router setup. Connecting the router counts as one simultaneous connection, just like installing the app on a phone or laptop.
What happens if my router loses power while flashing firmware?
Interrupting a firmware flash can “brick” your device, rendering it unusable. Always ensure your router has a stable power source and never unplug it during the update process.
Can I still access my local network devices while using NordVPN?
Yes, but you may need to configure split tunneling or specific routing rules. Without these settings, some local devices like printers might become inaccessible while the VPN is active.
Key Takeaways for Connecting NordVPN to Your Router
Securing your entire home network starts with verifying your router compatibility and carefully following the configuration steps. By flashing firmware if necessary and correctly entering your OpenVPN or WireGuard settings, you protect every connected device instantly.
Regularly test your connection for leaks and update your firmware to maintain optimal security and speed. Take action today by checking your router model against the compatibility list to begin your journey toward total network privacy.