
Struggling with Wi-Fi dead zones often leads homeowners to attempt a Google mesh router setup for seamless whole-home coverage. These systems eliminate weak signals by creating a unified network that blankets your entire property in high-speed internet.
This guide details every phase of the Google mesh router setup process from verifying hardware compatibility to optimizing satellite placement. You will learn how to configure your primary unit, expand your network with additional points, and troubleshoot common connection issues effectively.
Verify Google Mesh Router Compatibility Rules

Mixing incompatible Google hardware generations prevents your mesh network from forming correctly. You must confirm your specific device models work together before unboxing or purchasing additional units.
Identify Your Router Generation
Google offers three distinct hardware generations with specific technical capabilities.
* Google Wifi (1st Gen): Uses Wi-Fi 5 technology and functions as either a router or a point.
* Nest Wifi (2nd Gen): Features Wi-Fi 5 technology and includes a smart speaker in the point units.
* Nest Wifi Pro: Supports Wi-Fi 6E with a dedicated 6 GHz band and Thread border router capabilities.
Understand Critical Mixing Restrictions
You can combine Google Wifi points with Nest Wifi routers and points into a single system. However, Nest Wifi Pro devices operate on a completely different protocol tier.
Nest Wifi Pro units cannot mesh with older Google Wifi or Nest Wifi devices. They only work with other Nest Wifi Pro routers. Attempting to mix these generations results in isolated networks rather than an expanded mesh.
Check Regional Purchase Requirements
All units in your mesh network should be purchased in the same country where you intend to use them. Wireless regulations vary by region, and using imported devices may cause connectivity failures.
Regional mismatches can also void your eligibility for customer support. Check the model number on the device label to ensure it matches your location before starting your Google mesh router setup.
Prepare Essential Tools and Software Requirements
Successful installation requires specific hardware components and updated mobile software. Gathering these items beforehand prevents interruptions during the configuration process.
Required Hardware Components
You need an active modem from your Internet Service Provider that is already connected to the internet. The setup requires the primary router unit and the included Ethernet cable to connect the WAN port to your modem.
Ensure you have power adapters for every unit you plan to install. Optional satellite points help extend coverage to larger homes or areas with thick walls.
Update Mobile Device Software
Your smartphone acts as the control center for the entire network. Android devices must run version 9.0 or later to support the setup process.
iOS devices require version 17.0 or later for full functionality. You must download the latest version of the Google Home app since the legacy Google Wifi app is no longer the primary tool.
Configure Mobile Network Permissions
iOS users must disable any active Virtual Private Network (VPN) during setup to allow local network discovery. You also need to grant the Google Home app permission to access your local network in your phone settings.
This permission is critical for enabling Thread features on Nest Wifi Pro devices. Temporarily disabling aggressive firewall or security software on your phone may also help if discovery fails.
Optimize Router Placement for Maximum Signal
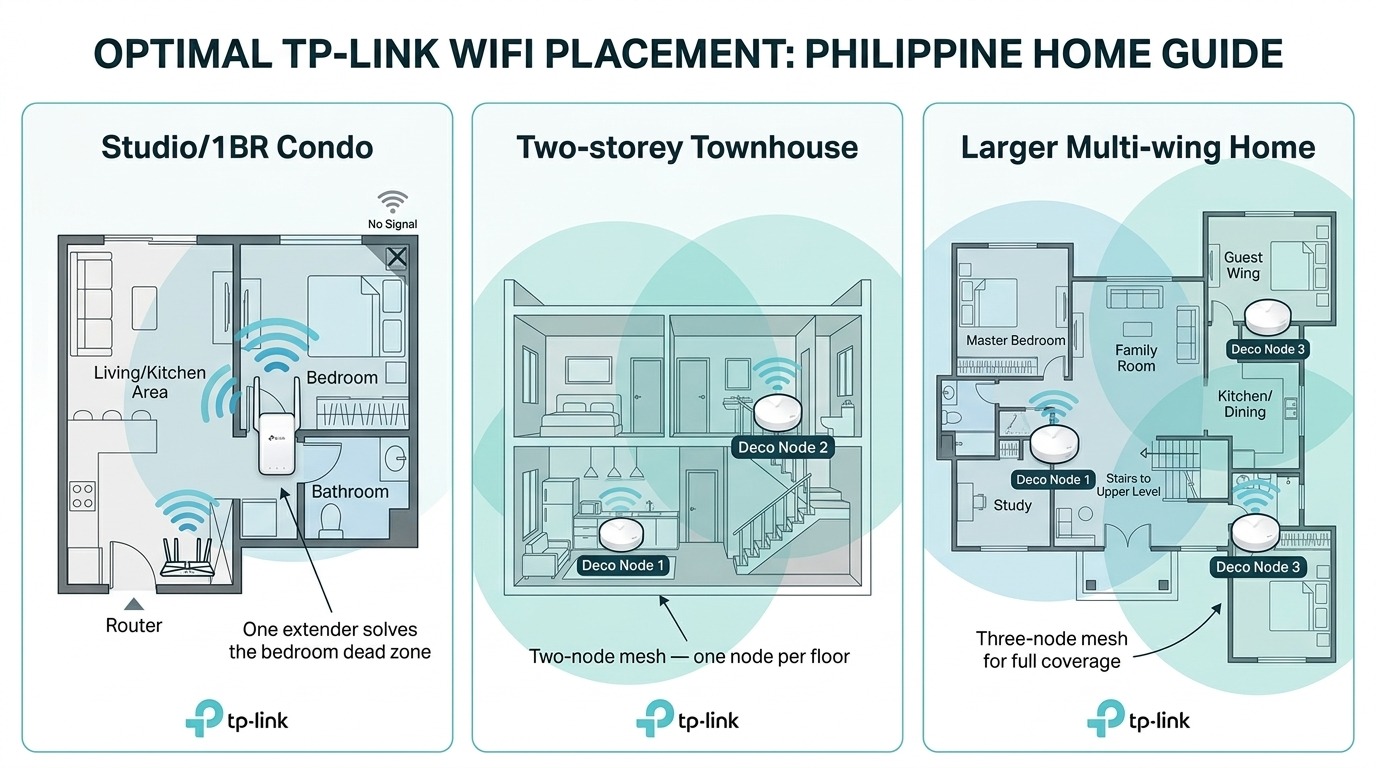
Physical location significantly impacts the performance and stability of your mesh network. Proper placement ensures strong communication between nodes and minimizes signal interference.
Position the Primary Router Correctly
Place your primary router in an open area like a shelf, desk, or TV stand. Keep it near your modem to facilitate a clean Ethernet connection without stretching cables excessively.
Avoid enclosing the device behind metal objects, mirrors, or inside cabinets. Keep the router at least three to six feet away from microwaves, cordless phones, and large appliances that emit electromagnetic interference.
Strategically Place Satellite Points
Install additional points no more than two rooms apart from the nearest active node. For best results, place a new point halfway between your main router and the area with poor signal.
Distribute points evenly throughout your home rather than clustering them in one location. Avoid placing points in basements or behind refrigerators unless absolutely necessary for coverage.
Pro Tip: Use a wired backhaul connection if your home has pre-installed Ethernet ports. Connecting points via Ethernet boosts performance and reduces wireless congestion significantly.
Execute Primary Google Mesh Router Setup
Follow these sequential steps to bring your main router online and broadcast your new Wi-Fi network.
Connect Hardware Physically
- Power off your modem completely.
- Connect one end of the Ethernet cable to the modem LAN port.
- Plug the other end into the WAN port on your Google router.
- Connect the power adapter to the router and plug it into a wall outlet.
- Wait approximately 60 seconds for the device to boot up.
Check the light indicator on top of the unit. Google Wifi and Nest Wifi Pro pulse blue when ready, while standard Nest Wifi pulses white. Perform a factory reset by holding the button for 10 seconds if the light does not pulse.
Initialize Setup in Google Home App
- Open the Google Home app on your mobile device.
- Tap the Add icon in the top right corner and select Device.
- Choose Google Nest device or scroll to find Wi-Fi under device types.
- Wait for the app to scan and detect your router.
Pair and Configure Your Network
Select your detected device from the list to begin pairing. You can scan the QR code on the bottom of the unit or manually enter the setup code found on the label.
Name your Wi-Fi network and create a strong, unique password. Reusing your old network name and password allows existing smart devices to reconnect automatically without reconfiguration.
Assign the router to a specific room like “Living Room” for easier management. The app will finalize the network creation in two to five minutes, and the light will turn solid white upon success.
Expand Coverage by Adding Mesh Points

Extend your network reach by adding satellite points to eliminate remaining dead zones in your home.
Power Up the New Point
Plug the new unit into a wall outlet in your desired location. Wait for the light to pulse blue or white, indicating it is ready for setup.
Do not connect the Ethernet cable yet unless you are specifically configuring a wired backhaul connection. The device needs to establish a wireless connection first during the initial pairing phase.
Add Device via Google Home App
- Open the Google Home app and tap Add.
- Select Device and then choose Wi-Fi.
- Tap the detected device name when it appears on the screen.
- Scan the QR code or enter the setup code to verify ownership.
Complete Integration and Updates
The app will integrate the new point into your existing mesh network automatically. Firmware updates may download during this process, so do not unplug the device or close the app.
Assign the new point to a specific room such as “Bedroom” or “Basement.” The light will turn solid white once the point is fully online and communicating with the main router.
Validate and Optimize Mesh Network Performance
Verify that your new system is functioning correctly and providing consistent coverage throughout your home.
Run Automatic Mesh Tests
The Google Home app automatically runs a network test after you add new points. This test checks signal strength between nodes and confirms all devices are online.
The app provides specific recommendations if a point is too far from the main router. It may suggest moving the device closer or adding another intermediate point to strengthen the connection.
Utilize Network Insights for Troubleshooting
Access the Network Insights feature in the Google Home app to view detailed diagnostics. This tool displays connected devices, signal strength maps, and potential interference sources.
Use this data to identify weak backhaul connections or bandwidth bottlenecks. Repositioning points based on these insights can significantly improve overall network speed and stability.
Manage and Customize Your Wi-Fi Network
Control your internet experience and secure your network using the built-in management features of the Google Home app.
Change Wi-Fi Credentials and Settings
Navigate to your network settings to edit your SSID or password at any time. Changes apply instantly across all points in your mesh system without requiring individual reconfiguration.
Create a separate Guest Wi-Fi network to protect your primary network security. This allows visitors to access the internet without exposing your personal devices to potential threats.
Configure Parental Controls and Limits
Access the Family Wi-Fi section to manage screen time for specific devices. You can pause Wi-Fi access, schedule bedtime pauses, and filter content based on age groups.
Set usage limits to ensure balanced internet consumption for children. These controls provide peace of mind and help maintain healthy digital habits within your household.
Troubleshoot Common Setup and Connection Issues
Resolve frequent problems quickly using these targeted troubleshooting steps for your Google mesh system.
Fix Device Detection Failures
Restart both your modem and router if the app cannot find your device. Ensure your phone is connected to the correct Wi-Fi network and try switching between 2.4 GHz and 5 GHz bands.
Update your Google Home app and mobile operating system to the latest versions. Disable any active VPNs and perform a factory reset on the router if detection issues persist.
Resolve Slow Speeds or Drops
Reposition points to reduce physical interference from walls or appliances. Use the Network Insights tool to identify congestion and consider enabling wired backhaul for critical areas.
Reboot your entire mesh network monthly through the app to clear cache and refresh connections. Regular maintenance helps maintain optimal performance over time.
Maintain Your Google Mesh System Long Term
Keep your network secure and efficient with minimal ongoing effort through automatic updates and monitoring.
Monitor Automatic Firmware Updates
Google mesh routers update their firmware automatically overnight to ensure security and performance. Do not unplug devices during these updates to prevent firmware corruption.
These updates include critical security patches and new feature enhancements. Your system remains protected against emerging threats without requiring manual intervention.
Track Device Health and Status
View the online or offline status of each node directly in the Google Home app. Monitor uptime and connection stability to catch potential issues before they affect your internet experience.
Contact Google Support if a device fails after multiple resets or if you encounter complex ISP requirements. Professional assistance ensures your Google mesh router setup remains reliable for years.
Frequently Asked Questions About Google Mesh Router Setup
Can I mix Nest Wifi Pro with older Google Wifi models?
No, Nest Wifi Pro devices are incompatible with older Google Wifi and Nest Wifi generations. You can only mesh Nest Wifi Pro units with other Nest Wifi Pro routers due to different Wi-Fi standards.
What mobile requirements do I need for setup?
You need an Android device running version 9.0 or later or an iOS device running version 17.0 or later. The Google Home app must be updated to the latest version for successful installation.
How far apart should I place my mesh points?
Place satellite points no more than two rooms apart from the nearest active node for optimal performance. Positioning them halfway between the main router and dead zones yields the best coverage results.
Why is my router light not pulsing during setup?
Check that the power adapter is connected securely and the outlet is functional. If the light remains dark after two minutes, perform a factory reset by holding the button for 10 seconds.
Do I need to reconnect all my devices after setup?
No, if you reuse your old network name and password, most devices will reconnect automatically. Only devices that were manually forgotten or have cached old credentials may require reconnection.
How often does the system update automatically?
Google mesh routers download and install firmware updates automatically overnight. You do not need to schedule these updates manually, but you should avoid unplugging devices during this time.
Key Takeaways for Successful Google Mesh Router Setup

A successful Google mesh router setup eliminates dead zones and provides seamless connectivity throughout your entire home. Remember that Nest Wifi Pro devices cannot mix with older generations, so verify your hardware compatibility before starting.
Proper placement of your primary router and satellite points is crucial for maximizing signal strength and minimizing interference. Use the Google Home app to monitor network health, run diagnostics, and manage parental controls effectively.
Start with your primary router, verify the connection, and then gradually add points to expand coverage. Follow these steps carefully to enjoy a fast, reliable, and secure home network that meets all your digital needs.



