
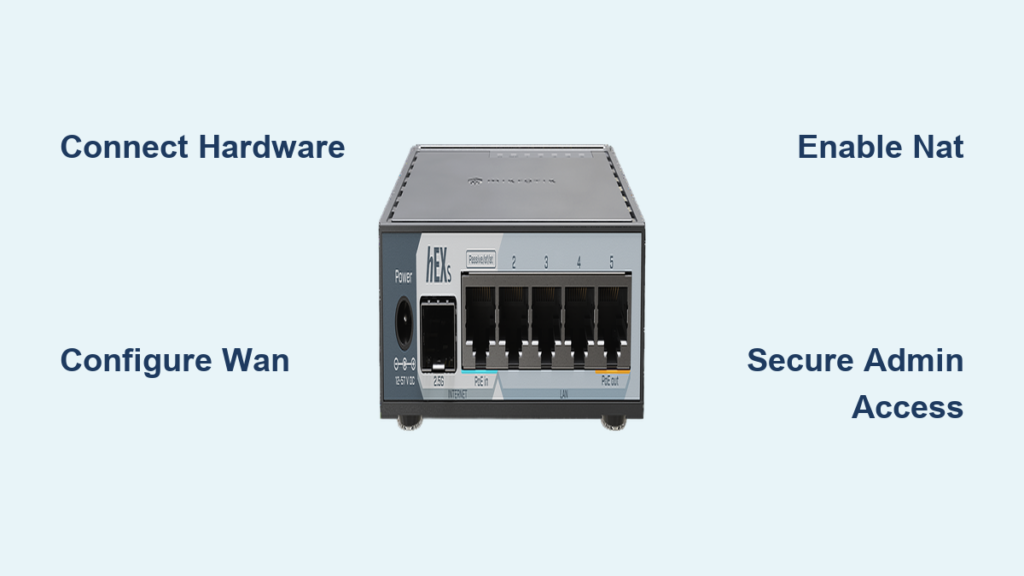
Configuring a new network device often feels daunting, especially when facing the powerful RouterOS interface found on MikroTik hardware. Many users struggle to bridge the gap between physical connection and a fully secure, internet-ready system without making critical security errors.
This guide details exactly how to setup a Mikrotik router using the WinBox tool or command line for total control. You will learn to establish physical connections, configure WAN access, enable NAT, secure administrative ports, and deploy WiFi safely in under an hour.
Connect Hardware and Access RouterOS Interface
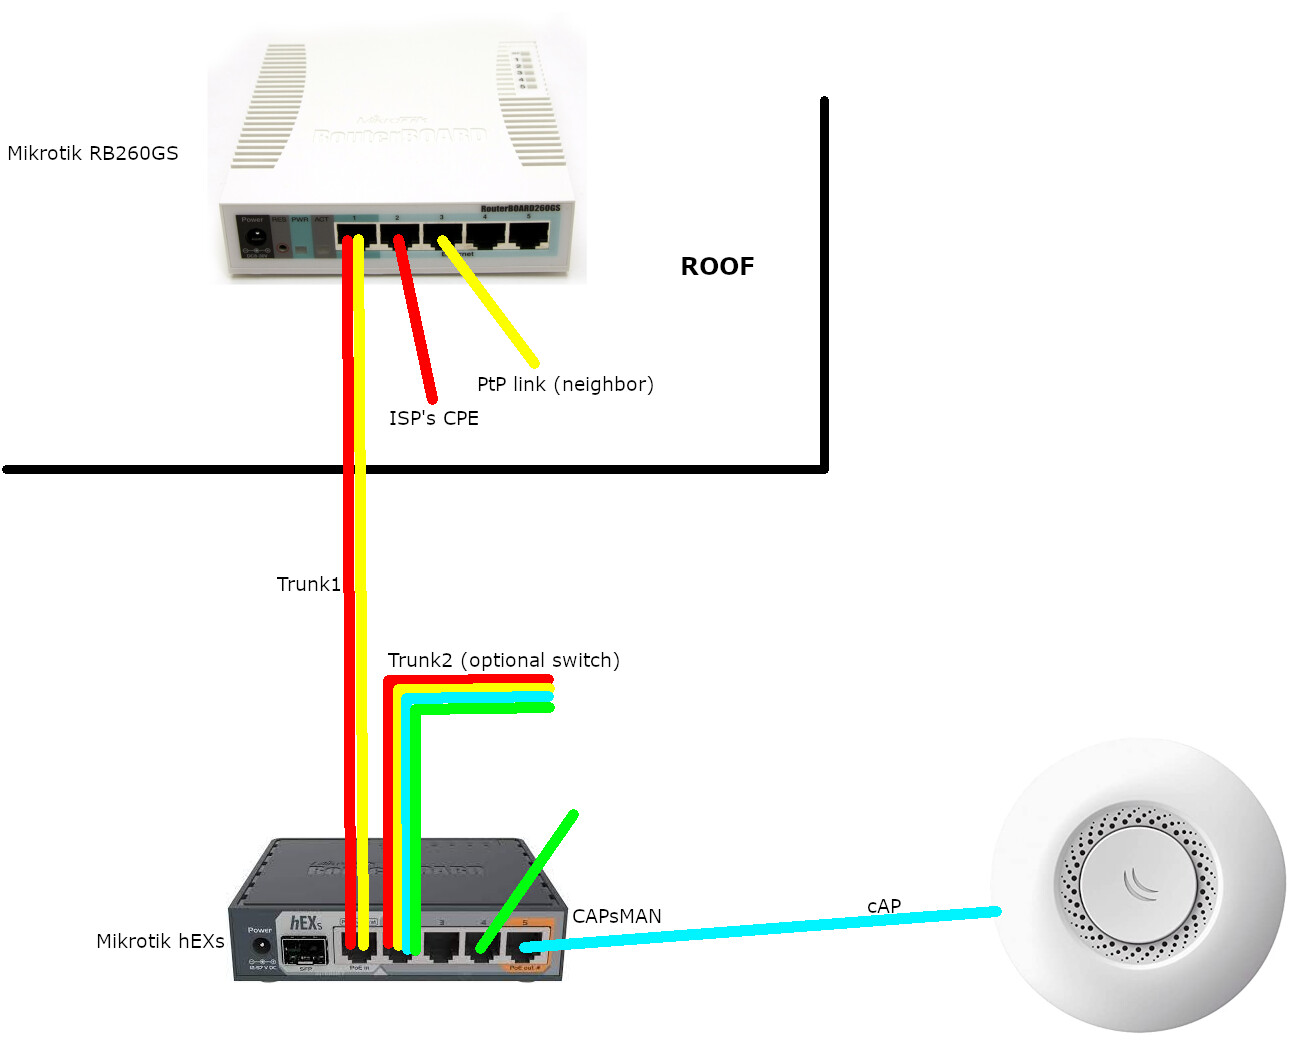
Proper physical wiring forms the foundation of a stable network configuration before any software settings take effect. You must isolate the internet-facing port from your local management computer to prevent conflicts during the initial boot sequence.
Establish Physical Ethernet Links
Start by connecting your ISP modem or upstream internet source directly to the ether1 port on your router. Plug your computer into any other available port, such as ether2 through ether5, to ensure you are on the local side of the network. Power on the device and wait approximately 60 seconds for the system to complete its boot process.
- Connect ISP modem to ether1 (WAN).
- Connect your PC to ether2 or higher (LAN).
- Wait one minute for full system startup.
This specific wiring ensures your computer can communicate with the router while keeping the wide area network port isolated until you are ready to configure it.
Install and Launch WinBox Utility
WinBox serves as the primary graphical interface for managing RouterOS and is highly recommended for new users over the command line. Navigate to the official MikroTik download page and grab the version matching your operating system, which includes Windows, macOS 12+, and Linux.
- Download WinBox from the official site.
- Run the executable file directly without installation.
- Launch the application to begin discovery.
The tool requires no installation and runs immediately, allowing you to discover devices on your local segment instantly.
Discover Device via MAC Address
MikroTik routers broadcast their presence even without a configured IP address, allowing discovery via MAC address. Open WinBox and click the ellipsis button next to the “Connect To” field to open the neighbor discovery window.
- Select the Neighbors tab within the discovery window.
- Locate your device in the list, typically labeled “MikroTik”.
- Double-click the MAC address if the IP shows as 0.0.0.0.
- Enter admin as the username.
- Leave the password field blank or check the sticker on your device.
You are now logged into the RouterOS environment and ready to assess the current configuration state.
Assess and Preserve Default Configuration Settings
When you first connect, the system may prompt you regarding the existing default configuration. This pre-loaded setup includes essential firewall rules and DHCP services that provide a secure baseline for most home and small business networks.
Evaluate Default Setup Options
Beginners should strictly choose to keep the default configuration rather than removing it. The default ruleset includes basic firewall protection, a functioning DHCP server, and initial wireless security settings that would otherwise require manual recreation.
- Keep defaults: Retains security rules and DHCP functionality.
- Remove configuration: Wipes all rules and exposes the device to risk.
Only advanced users with specific requirements should consider wiping the configuration, as this eliminates all protective barriers immediately.
Reset Configuration If Necessary
If the router contains old custom settings or you require a completely clean slate, you can force a reset. Use the terminal command /system reset-configuration no-defaults=yes skip-backup=yes to wipe the device entirely.
Warning: Resetting without defaults removes all security. Only proceed if you are prepared to manually rebuild firewall and access rules from scratch.
Configure IP Addressing and DHCP Services
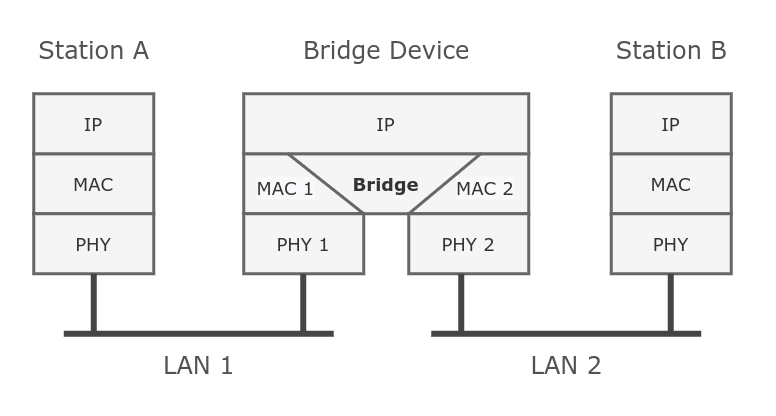
Configuring a bridge interface allows you to treat multiple physical ports as a single logical network segment. This step assigns a local IP address to the router and enables automatic IP distribution to connected clients.
Create Bridge and Assign IP
Create a virtual bridge interface to group your LAN ports together logically. Assign the standard local IP address 192.168.88.1 to this bridge to serve as the gateway for your network.
bash

/interface bridge add name=bridge1

/interface bridge port add interface=ether2 bridge=bridge1

/ip address add address=192.168.88.1/24 interface=bridge1
This configuration ensures that any device connected to the bridged ports resides on the same local network segment.
Setup DHCP Server for Clients
Use the built-in setup wizard to rapidly deploy a DHCP server that assigns addresses to your devices automatically. The wizard guides you through selecting the interface, address space, and gateway with minimal input required.
- Type
ip dhcp-server setupin the terminal. - Select bridge1 as the server interface.
- Accept the default network space
192.168.88.0/24. - Confirm the gateway as
192.168.88.1. - Define the pool range, typically
192.168.88.2to192.168.88.254. - Set DNS servers to the router IP or public DNS like
8.8.8.8. - Accept the default lease time of 1800 seconds.
Your computer should now receive a dynamic IP address, allowing you to reconnect using the new IP address if necessary.
Establish Internet Connectivity via WAN
Getting your router online requires identifying the specific connection type provided by your Internet Service Provider. Most residential connections utilize dynamic addressing, while business links often require static parameters or PPPoE credentials.
Configure Dynamic DHCP Client
Dynamic addressing is the most common method for home users and requires minimal configuration to function. Add a DHCP client to the WAN port (ether1) to automatically request an IP address, DNS servers, and a default route from your ISP.
bash

/ip dhcp-client add disabled=no interface=ether1
Verify the status shows “bound” to confirm the router has successfully obtained an address from the provider.
Setup Static IP or PPPoE
Use static IP configuration if your ISP provided specific network parameters like a fixed IP, gateway, and DNS servers. Alternatively, select PPPoE if your provider supplied a username and password for authentication.
- Static IP: Manually add the IP address, gateway route, and DNS settings.
- PPPoE: Create a PPPoE client interface with your provided credentials.
Ensure you select the correct interface type, as PPPoE connections will create a new virtual interface (e.g., pppoe-out1) that becomes your actual WAN port.
Verify External Connectivity
Test your internet connection by pinging a known external IP address to confirm routing is functional. Use the ping tool to target 8.8.8.8 and then attempt to ping a domain name like google.com to verify DNS resolution.
bash

/ping 8.8.8.8

/ping google.com
Successful replies indicate your router can reach the internet and resolve domain names correctly.
Enable NAT and Port Forwarding Rules
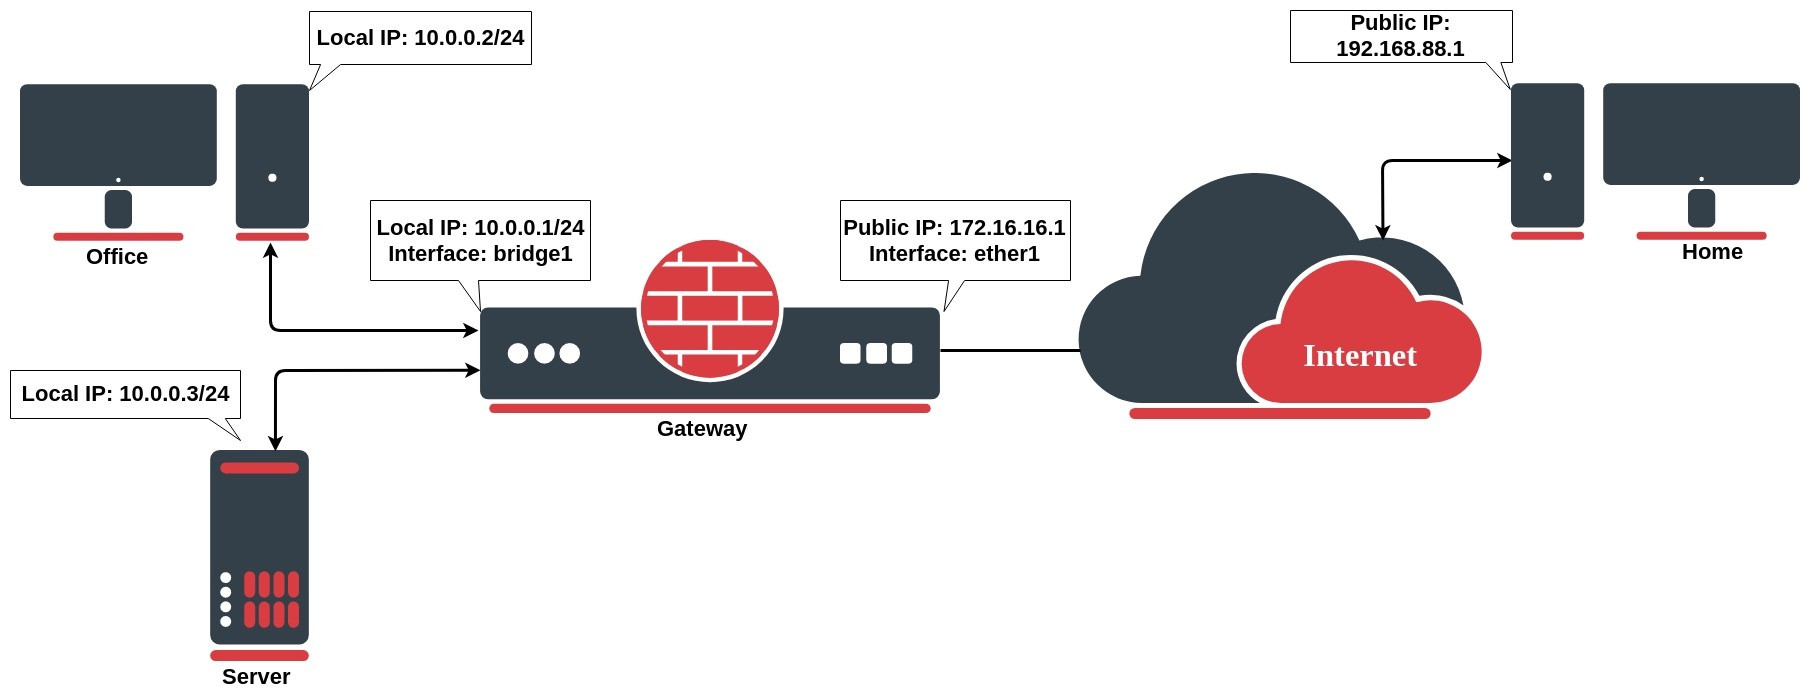
Network Address Translation (NAT) allows multiple local devices to share the single public IP address provided by your ISP. Without this rule, your local devices cannot communicate with the internet because private addresses are not routable globally.
Configure Source NAT Masquerade
Apply a masquerade rule to the firewall NAT table to translate outgoing traffic from your local network to the public IP. This rule dynamically changes the source address of packets leaving through the WAN interface.
bash

/ip firewall nat add chain=srcnat out-interface=ether1 action=masquerade
If you are using PPPoE or LTE, replace ether1 with the specific interface name used for your WAN connection.
Setup Destination NAT for Services
Port forwarding allows external users to access specific services on your local network, such as remote desktop or web servers. Create a destination NAT rule to redirect incoming traffic on a specific port to the internal IP address of the target device.
- Identify the required port (e.g., TCP 3389 for RDP).
- Add a
dstnatrule matching the port and protocol. - Specify the internal IP address to receive the traffic.
Remember that strict firewall rules may block this traffic unless you explicitly allow it in the forward chain.
Secure Router Administration and Services
Securing your router is critical because an exposed device can be compromised within minutes of connecting to the internet. You must change default credentials and restrict management access to trusted interfaces only.
Change Default Administrator Credentials
The default admin account often has no password, leaving your network completely open to anyone on the local segment. Generate a strong password containing at least 12 characters with mixed case, numbers, and symbols.
bash

/user set 0 password="YourStrongPasswordHere"
For maximum security, create a new administrative user, assign full group privileges, and remove the default admin account entirely after verifying access.
Restrict Management Access Interfaces
Limit where the router accepts management connections by disabling services on the WAN interface. Create an interface list named “LAN” and configure the MAC server and WinBox server to only allow connections from this list.
- Create an interface list named LAN.
- Add your bridge or local ports to the LAN list.
- Set the MAC server allowed list to LAN.
- Set the WinBox MAC server allowed list to LAN.
This prevents anyone connecting to the internet port from attempting to discover or access your router management tools.
Disable Unused Services and Protocols
Reduce your attack surface by disabling any administrative services you do not actively use, such as Telnet, FTP, or the web server. Change default ports for essential services like SSH to avoid automated brute-force attacks.
- Disable unused services:
/ip service disable telnet,ftp,www - Change SSH port:
/ip service set ssh port=2200 - Disable remote DNS requests if not needed.
These steps significantly reduce the likelihood of successful automated attacks against your device.
Deploy Wireless Network and Security Profiles

Wireless configuration requires setting up a security profile before enabling the radio interface to ensure clients connect securely. This process involves defining encryption standards and linking the wireless interface to your local bridge.
Create WPA2 Security Profile
Define a new security profile that enforces WPA2-PSK authentication to protect wireless traffic. Avoid using WPA alone unless you have legacy devices that cannot support newer standards, and never use the same key for both protocols.
bash

/interface wireless security-profiles add name=myProfile authentication-types=wpa2-psk mode=dynamic-keys
This profile ensures that only clients with the correct pre-shared key can associate with your access point.
Enable Wireless Interface and Bridge
Activate the wireless radio and assign it to the same bridge as your wired LAN ports. This configuration places wireless clients on the same network segment as wired devices, allowing them to receive IP addresses from your DHCP server.
- Enable the wireless interface (e.g.,
wlan1). - Set the SSID, country code, and band settings.
- Assign the previously created security profile.
- Add the wireless interface to bridge1.
Wireless clients can now connect, obtain an IP, and access the internet through your configured NAT rules.
Implement Client Protection Firewall Rules
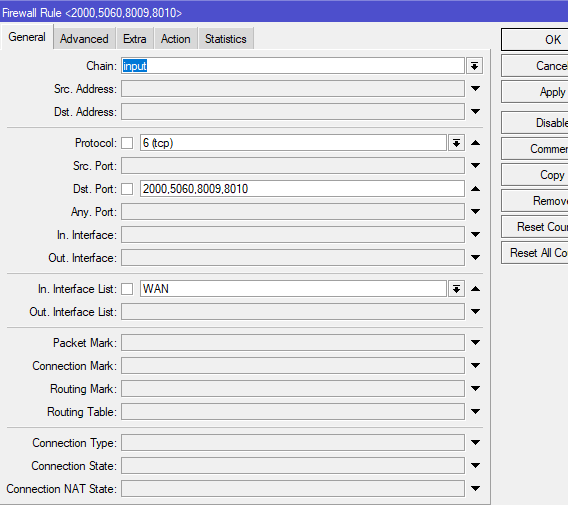
Protecting clients on your local network requires specific firewall filter rules that control traffic flowing between the WAN and LAN. These rules prevent unauthorized external access while allowing legitimate outbound traffic.
Configure Forward Chain Rules
Apply fast-track rules to improve performance for established connections while dropping invalid packets immediately. Add a specific rule to drop new connection attempts originating from the WAN interface unless they match a destination NAT rule.
bash

/ip firewall filter add chain=forward action=drop connection-state=new connection-nat-state=!dstnat in-interface=ether1
This rule acts as a critical barrier, preventing direct access to your internal devices from the public internet.
Block Unwanted Website Access
You can restrict access to specific websites by redirecting HTTP traffic to the internal proxy server. Enable the proxy service and create access list entries to deny traffic to specific domains or categories.
- Redirect HTTP port 80 to proxy port 8080.
- Enable the proxy service.
- Add deny rules for specific hostnames.
This method provides basic content filtering suitable for simple enforcement policies.
Frequently Asked Questions About Mikrotik Router Setup
What is the default IP address for a Mikrotik router?
Most Mikrotik routers use 192.168.88.1 as the default IP address with the username admin and no password. However, you can also connect via MAC address using WinBox if the IP has been changed or is unknown.
How do I reset my Mikrotik router to factory settings?
You can reset the device by holding the physical reset button while powering on until the LED flashes, or by running /system reset-configuration in the terminal. Be aware this removes all custom configurations and security rules.
Why is my Mikrotik router not providing internet access?
Check that you have configured a DHCP client on the WAN port and added a NAT masquerade rule. Without the NAT rule, local devices cannot communicate with the internet even if the WAN link is active.
Is WinBox safe to use for router configuration?
Yes, WinBox is the official graphical tool provided by MikroTik and is safe when downloaded from the official website. It is recommended over web interfaces for initial setup due to its robust neighbor discovery features.
How do I change the WiFi password on my Mikrotik router?
Navigate to the Wireless menu, select the Security Profiles tab, and edit your profile to update the WPA2 pre-shared key. Ensure you apply the changes and reconnect your devices using the new password.
Key Takeaways for Setting Up Your Mikrotik Router
Successfully learning how to setup a Mikrotik router involves carefully connecting hardware, configuring NAT for internet sharing, and rigorously securing administrative access. By keeping default firewall rules, changing default passwords, and restricting management interfaces to the LAN, you create a robust network foundation. Always verify your internet connectivity with ping tests and ensure your wireless clients are protected with WPA2 encryption before deploying the network.
Start by connecting your hardware and launching WinBox to assess your current configuration state. Follow the steps above to establish internet access and secure your device against common threats today.



