
You just unboxed a new printer or perhaps you are trying to upgrade an old USB model to work wirelessly. The goal is simple: you want to print from any device in your house without dealing with messy cables. But figuring out exactly how to connect printer to router can feel confusing with so many different methods available.
This guide walks you through every reliable connection method including wired Ethernet, manual Wi-Fi setup, and converting legacy USB printers. You will learn step-by-step instructions to avoid common pitfalls like 5GHz band incompatibility. By the end, your printer will be ready for use with laptops, phones, and tablets without needing a host computer.
Choose the Best Wired Ethernet Connection Method
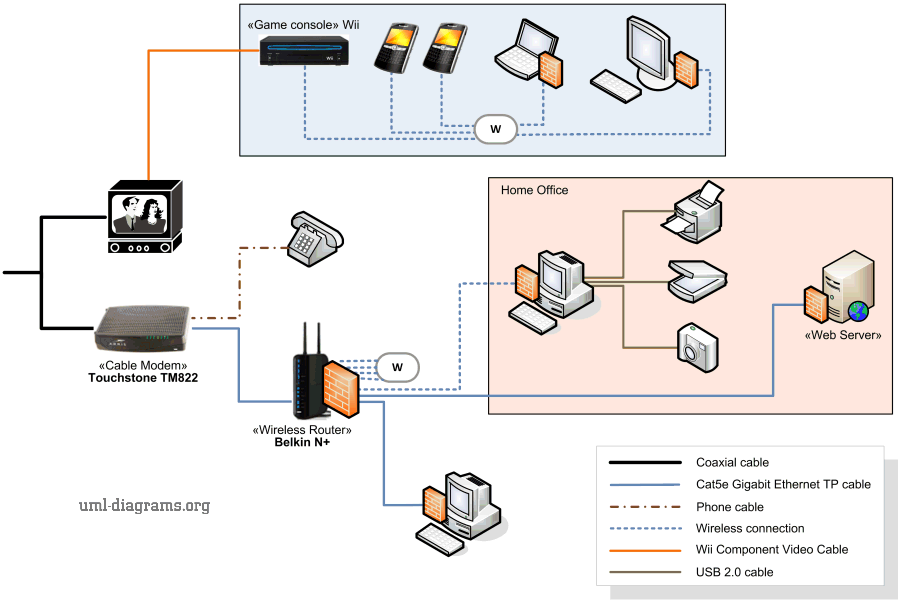
A wired connection offers the most stable performance for high-volume printing tasks. This method eliminates wireless interference and provides consistent data transfer speeds for large documents.
Plug In the Ethernet Cable Correctly
Locate the Ethernet port on the back panel of your printer. Use a CAT5e or higher cable to connect one end to the printer and the other to an open LAN port on your router.
Check that the link lights on both devices illuminate immediately. This visual cue confirms that physical connectivity is active and ready for configuration.
Confirm Network Settings on Device
Access the control panel on your printer to verify the connection status. Navigate to Network Settings and then select Network Status to view current details.
Look for a status reading that says Wired, Ethernet, or LAN Connection Active. If the screen shows “Not Connected,” try a different cable or router port.
Test Printing Over Your Network
Open Settings on your computer and go to Devices followed by Printers & scanners. Click Add a printer to begin the search process.
Your printer should appear automatically as a network device. If it does not, select “The printer that I want is not listed” and choose to add it by IP address using the number found in your Network Status menu.
Perform Manual Wi-Fi Setup on 2.4GHz Band
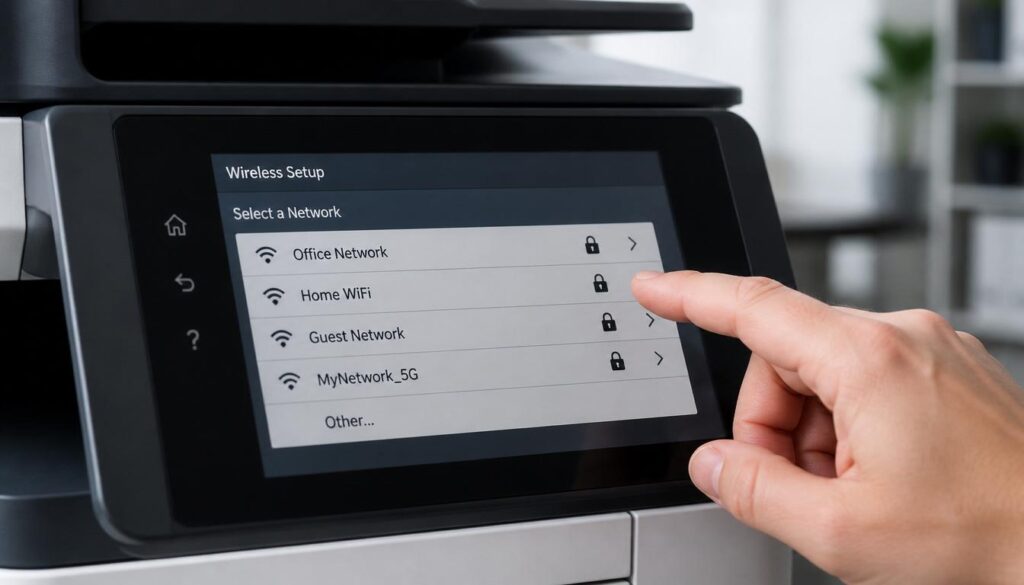
Most printers strictly require a 2.4GHz Wi-Fi network to function properly. Many modern routers broadcast both 2.4GHz and 5GHz signals, so you must ensure you select the correct frequency.
Start Wi-Fi Setup on Printer Interface
Press the Network or Wireless button on your printer control panel. Go to Setup and then select Wi-Fi Setup Wizard.
Choose Connect to a Wi-Fi Network from the list. Select No if the printer asks to use current settings to force a fresh scan for all available networks.
Select the Correct Network Name
Review the list of available networks displayed on your printer screen. Identify your specific Wi-Fi SSID from the options provided.
If your router uses separate names for different bands, such as “HomeNetwork_2G,” pick the version labeled for 2.4GHz. Avoid connecting to any network name that indicates 5GHz only.
Enter Wi-Fi Password Carefully
Use the on-screen keyboard to type your wireless password exactly as it appears. Pay close attention to uppercase and lowercase letters.
Double-check special characters like @, !, or _ since mistyped passwords are the leading cause of connection failures. Hidden characters on the screen mean you must type slowly and accurately.
Verify Connection Success Status
Wait for the printer display to show a Setup Complete message. Check Network Status again to ensure it displays Wi-Fi with a strong signal indicator.
Print a network configuration page to confirm the printer has received a valid IP address. This step ensures your device is fully ready for wireless printing tasks.
Use WPS for Fast Wireless Setup
WPS allows you to connect your printer without typing complex passwords. This method works only if both your router and printer support the feature.
Initiate WPS Mode on Printer
Navigate to Network on your printer and select Wi-Fi Setup. Choose Push Button WPS from the available options.
Select No if prompted to use existing network settings. This ensures the printer enters pairing mode ready to detect your router signal.
Press Router WPS Button Quickly
Locate the WPS button on your physical router within two minutes. This is usually a small button marked with a circular arrow icon.
Press the button firmly and watch for the WPS LED to start blinking. This indicates the router is actively searching for devices to pair.
Confirm Wi-Fi Connection Established
Wait approximately 10 to 30 seconds for the process to finish. The printer screen will display a message stating Wi-Fi connection has been established.
Security Tip: WPS has known security vulnerabilities. Log into your router settings after setup and disable WPS to prevent unauthorized access.
Set Up Wi-Fi Direct Without a Router
Wi-Fi Direct creates a direct connection between your device and printer. Use this method when you cannot access a router or need emergency printing capabilities.
Enable Wi-Fi Direct on Printer
Go to Network and select Wi-Fi Direct Setup. Choose Connection Setup to activate the feature.
The printer will generate its own hotspot with a name like EPSON_XP820_ABC1. Write down the password displayed on the screen for later use.
Connect Device to Printer Network
Disconnect your phone or laptop from your home Wi-Fi network. Open your Wi-Fi settings and look for the printer SSID you noted earlier.
Select the printer network and enter the password when prompted. Your device is now connected directly to the printer for immediate printing.
Warning: Your device loses internet access while connected to Wi-Fi Direct. You must switch back to your home network to browse online again.
Connect USB Printer to Router via Print Server
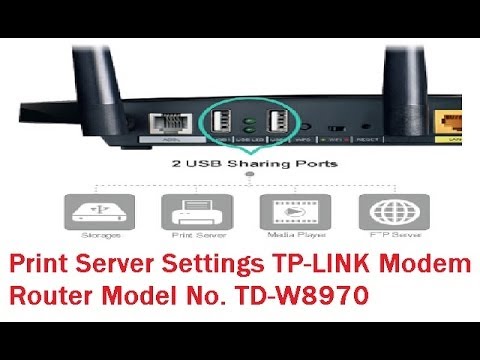
You can turn an old USB-only printer into a network device if your router supports print server functionality. This extends the life of legacy hardware significantly.
Check Router USB and Print Server Support
Verify that your router has a USB port and supports print server features. Models like the TP-Link TD-W8970 explicitly mention this capability.
Ensure you can access USB Settings in your router admin panel. You may also need to install a specific USB Print Controller Utility from the manufacturer.
Install Printer Driver via USB First
Connect your printer to a computer using a USB cable before attempting network setup. Install the full driver using the manufacturer software package.
Print a test page to confirm the operating system recognizes the hardware. This step ensures the printer functions correctly before sharing it over the network.
Enable Print Server in Router Admin
Open a browser and type 192.168.0.1 or 192.168.1.1 to access your router. Log in with your admin credentials, often admin for both username and password.
Navigate to USB Settings and find Print Server. Click Start or Enable and wait for the status to show Active or Ready.
Connect Printer to Router USB Port
Power off your printer completely before proceeding. Plug the USB cable from the printer directly into the router USB port.
Power on the printer and wait 30 seconds for detection. The router should now recognize the device as a shared network resource.
Install USB Print Controller Utility
Download the USB Print Controller Utility from your router manufacturer website. Install this software on every computer that needs to access the printer.
Launch the utility and your printer should appear in the list. Click Auto Connect for Printing to establish the link and send a test page.
Enable Scanning Over Network for MFP
Multi-function printers can often scan over the network once connected via a print server. This adds significant convenience to your workflow.
Connect for Scanning in Utility
Open the USB Print Controller Utility on your computer. Click the option labeled Connect for Scanning to enable the feature.
Use native tools like Windows Fax and Scan or manufacturer apps like HP Smart to initiate scans. Note that scanning support varies by printer model.
Set Up Mobile Printing with Print Share
Mobile devices require specific apps to print to USB-to-router setups. The Print Share app bridges this gap effectively.
Install Print Share App on Device
Download Print Share from the Google Play Store or Apple App Store. Ensure your mobile device connects to the same Wi-Fi network as your router.
Open the app to begin the configuration process. The interface is designed for quick setup on both Android and iOS platforms.
Add Printer in App Interface
Tap Select Printer within the app and choose Nearby WiFi. Select your detected printer from the list provided.
Tap Install Driver to let the app download the correct files automatically. This step configures your phone to communicate with the specific printer model.
Print from Any Application
Open a photo, PDF, or document on your mobile device. Tap Share or the three-dot menu and select Print.
Choose your configured printer from the list. Your job sends immediately to the printer without needing a computer.
Fix Common Connection Problems
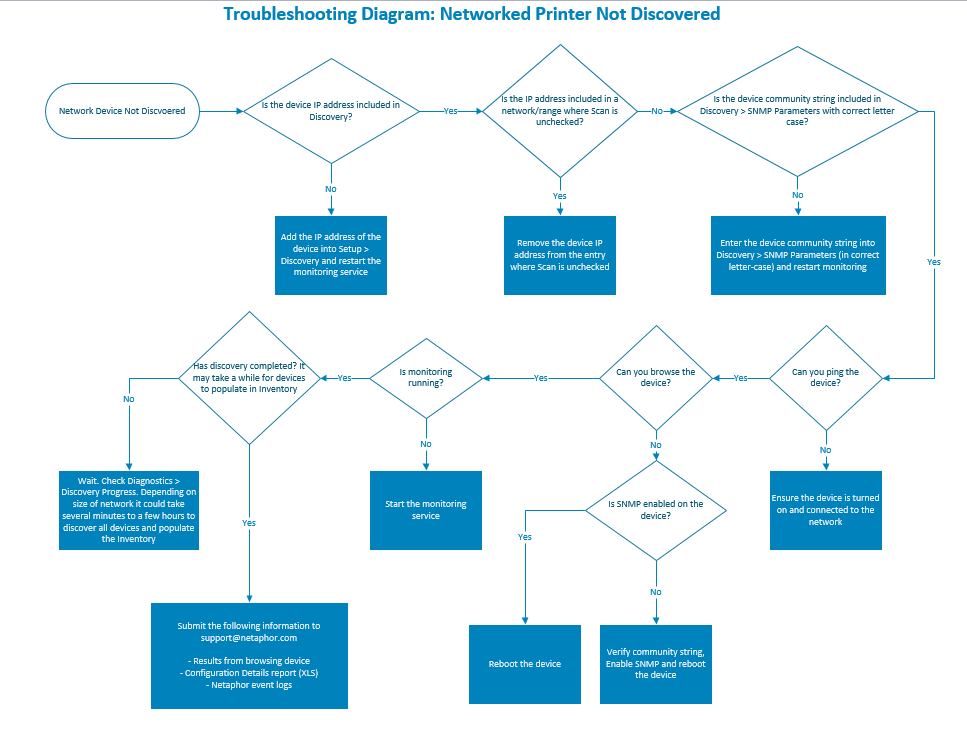
Connection issues often stem from simple configuration errors. Follow these steps to resolve the most frequent problems users encounter.
Printer Not Found on Network
Quick Fix: Restart both your router and printer. Wait two minutes before attempting to reconnect.
Advanced Check: Log into your router admin page to confirm Print Server is active. Ensure MAC filtering is not blocking your printer device.
Wi-Fi Setup Fails Repeatedly
Likely Causes: Wrong password, 5GHz network selection, or hidden SSID settings.
Solutions: Re-enter your password slowly and carefully. Ensure you select the 2.4GHz network only. Temporarily enable SSID broadcast if your network is hidden.
Slow Printing Over USB-to-Router
Cause: Network congestion or poor signal quality affecting data transfer.
Fix: Move the router closer to the printer if possible. Ensure the router uses the 2.4GHz band and limit heavy streaming during large print jobs.
Mobile App Cannot Detect Printer
Steps: Update the Print Share app to the latest version. Reboot your phone and router to clear temporary glitches.
Confirm your phone and printer are on the same subnet. Reinstall the app and re-add the printer if detection fails again.
Optimize and Maintain Your Setup
Regular maintenance ensures your network printer remains reliable and secure. Follow these best practices for long-term performance.
Update Firmware Regularly
Visit your printer manufacturer website periodically. Download and install the latest firmware to fix bugs and improve Wi-Fi stability.
These updates often patch security flaws that could expose your network. Keeping firmware current is essential for safe operation.
Secure Your Network Printing
If you used WPS for setup, log into your router immediately. Go to Wireless Settings and disable WPS to prevent remote hacking attempts.
This simple step significantly improves your network security posture. Never leave WPS enabled permanently on your router.
Keep Software Updated
Ensure your USB Print Controller Utility and Print Share app stay current. Update printer drivers whenever new versions become available.
These updates maintain compatibility with new operating systems like iOS 18 or Windows 11. Outdated software often causes connection drops.
Improve Wi-Fi Signal Strength
Avoid placing your printer inside metal cabinets or behind thick concrete walls. Keep the device at least 5 to 6 feet away from microwaves or cordless phones.
Consider installing a Wi-Fi extender if signal strength remains weak. Strong signals ensure consistent printing performance.
Frequently Asked Questions About Connecting Printers to Routers
Why will my printer not connect to my 5GHz Wi-Fi network?
Most printers only support 2.4GHz frequencies due to hardware limitations. You must select the 2.4GHz version of your network name during setup. Connecting to a 5GHz-only network will result in failure.
Can I connect an old USB printer to my router wirelessly?
Yes, if your router has a USB port and supports print server functionality. You will need to install specific utility software on your computer to bridge the connection effectively.
Does Wi-Fi Direct allow internet access while printing?
No, your device loses internet access when connected via Wi-Fi Direct. You must manually switch back to your home network to browse the web after printing.
How do I find my router IP address for setup?
Common default addresses include 192.168.0.1 or 192.168.1.1. Check your router manual or the label on the device bottom for specific login details.
Is WPS safe to leave enabled on my router?
No, WPS has known security vulnerabilities that hackers can exploit. Enable it only for initial setup and disable it immediately afterward for protection.
What app do I need for mobile printing to a USB printer?
Download the Print Share app from your device app store. This application allows Android and iOS devices to print to USB-connected printers via the router.
Key Takeaways for Connecting Your Printer to Router
Connecting your printer successfully depends on choosing the right method for your hardware. Wired Ethernet offers maximum stability while Wi-Fi provides flexibility for most home users. Remember that legacy USB printers can join your network if your router supports print server features.
Always prioritize security by disabling WPS after setup and keeping firmware updated. Most connection failures stem from selecting the wrong Wi-Fi band or entering incorrect passwords. Take time to verify your 2.4GHz network settings before beginning the process.
Start by checking your router capabilities and printer specifications today. Follow the specific steps for your chosen method to establish a reliable printing environment. Your entire household will soon enjoy seamless wireless printing from any device.



