
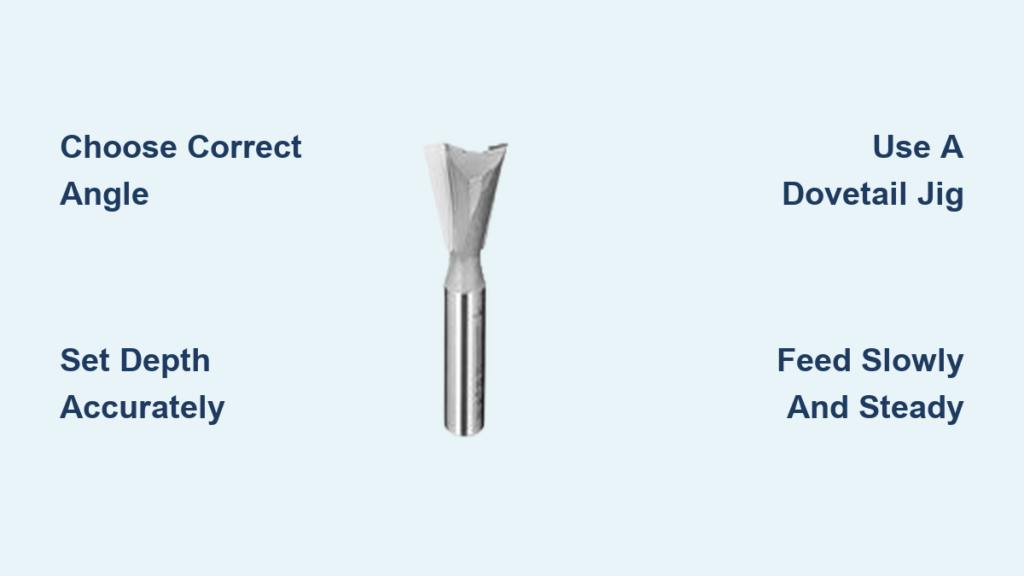
You have the perfect dovetail router bit ready, yet your last attempt resulted in gaps or burnt wood edges. Many woodworkers struggle with alignment and feed rates when learning how to use a dovetail router bit effectively. Without precise setup, even high-quality tools produce loose joints that compromise your project’s strength.
This guide details every step to cut flawless dovetails using a router table or handheld setup. You will learn to select correct angles, set safe depths, and execute clean cuts for drawers and furniture. Follow these proven methods to avoid common errors and achieve professional results immediately.
Choose the Right Dovetail Bit Angle and Size

Selecting the correct cutter is the foundation of a successful joint. The angle and diameter directly impact the visual style and structural integrity of your work.
Match Bit Angle to Your Project Style
Dovetail bits typically come in 7°, 8°, 10°, or 14° angles. The 14° angle is the industry standard for through-dovetails on drawer fronts because it offers excellent mechanical strength. Use a 7° bit for fine cabinetry where you want a more subtle, elegant appearance. Always ensure your layout lines or jig system matches your chosen bit angle exactly. Mixing angles causes tails and pins to misalign completely.
Select Cutting Diameter for Stock Thickness
Your material thickness dictates the required cutting diameter. For standard ¾” hardwood drawer sides, a ½” or 11/16″ cutter provides the best balance of strength and aesthetics. Check the maximum cutting depth specification on smaller bits to ensure they penetrate thick stock fully. Larger diameters remove more material per pass but demand higher router horsepower. Verify your tool has at least 2 HP for full-depth cuts in hard maple or oak.
Decide Between Single and Double Flutes
Single-flute bits excel at chip evacuation, reducing heat buildup during deep cuts in hardwoods. Double-flute options deliver a smoother surface finish on softwoods and plywood but generate more friction. For the best results when learning how to use a dovetail router bit, choose single-flute carbide-tipped models. They stay sharper longer and handle the rigors of repeated use better than high-speed steel alternatives.
Set Up Your Router for Safe Operation
Proper installation prevents accidents and ensures clean cuts. Never skip safety checks before powering on your tool.
Secure the Bit in the Collet Correctly
Unplug the router before installing any bit. Wipe the collet and bit shank with a lint-free cloth to remove dust. Insert the shank at least ¾ of the way into the collet for maximum grip. Tighten the nut firmly using two wrenches, one to hold the shaft and the other to turn the nut. A loose bit creates dangerous vibration and ruins cut quality.
Adjust Depth Using Test Cuts
Depth settings vary by joint type. For through-dovetails, set the bit to cut slightly deeper than half your stock thickness, such as 0.40″ for ¾” wood. For half-blind dovetails, match the depth to your pin board thickness, usually between ¼” and 3/8″. Always verify depth on a scrap piece first. Measure from the router base to the bit tip rather than trusting the built-in scale.
Verify Rotation and Feed Direction
Router bits rotate clockwise when viewed from above. When using a router table, feed the workpiece against the rotation, moving right to left along the fence. If using a handheld router with a jig, follow the specific path indicated by the jig manufacturer. Feeding with the rotation causes tear-out and can pull the tool from your grasp violently.
Use a Dovetail Jig for Maximum Accuracy
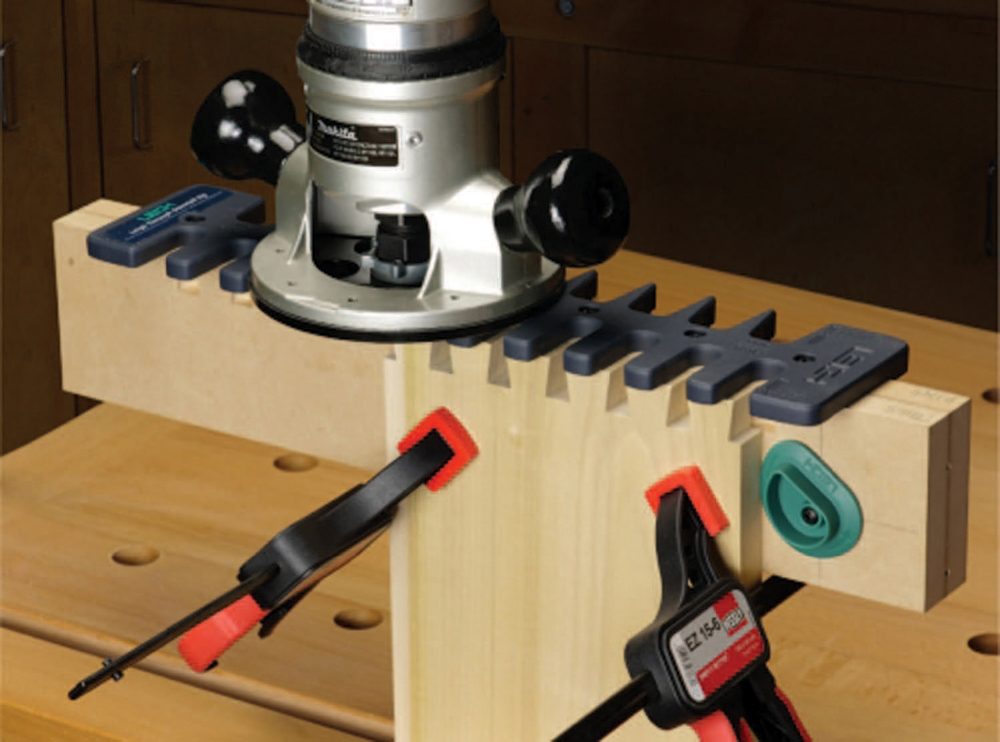
Jigs simplify the complex geometry of dovetail joints. They ensure consistent spacing and perfect alignment between pins and tails.
Align Pins and Tails Precisely
Most systems like Porter-Cable or Leigh allow you to cut both parts sequentially. Clamp the tail board first and set the stop block to prevent overhang. Align the bit center with the fence markings on the jig. Ensure both ends of your board sit flush against the clamps to avoid skewed joints that won’t close properly.
Lock Workpieces Firmly in Place
Loose stock shifts during cutting, ruining the entire joint. Use the jig clamps to secure the wood without warping the material. Place sacrificial backer boards behind thin stock to prevent blowout on the exit side. Perform a wiggle test before cutting. If the board moves side-to-side, reclamp it immediately.
Follow the Correct Cutting Sequence
Start with shallow passes to establish the cut path. In hard woods, take two or three progressive passes to reach full depth. Let the bit do the work without forcing it. After cutting one side, flip or rotate the board as instructed to cut the mating part. Label each piece clearly, such as “Front Left,” to maintain orientation throughout the process.
Cut Through-Dovetails Step by Step

Through-dovetails show end grain on both sides, creating a classic look. Precision in marking and cutting defines the final fit.
Prepare and Mark Your Stock
Cut all pieces to their final dimensions before starting. Label which boards will become pins and which will be tails. Use a marking gauge to scribe a shoulder line on all four edges of the pin board. This line indicates exactly how far the tails should extend. Mark centerlines for each tail on the tail board using a layout template.
Make the First Tail Cut
Mount the tail board securely in your jig. Position the first station over the spinning bit. Lower the bit slowly into the wood rather than plunging at full depth instantly. Move the router or carriage smoothly through the cut. Repeat this for every tail section before switching to the pin board.
Fit the Joint Dry Before Gluing
Assemble the boards without applying any adhesive. Tap them gently with a rubber mallet if needed. A perfect fit slides together with light hand pressure and shows no visible gaps. Sand the tail cheeks slightly if the fit is too tight. Check your depth settings if the joint feels too loose.
Cut Half-Blind Dovetails Accurately

Half-blind dovetails hide end grain on the front face, making them ideal for drawer fronts.
Mark Shoulder and Pin Locations
On the drawer side, mark a shoulder line across the end grain, typically ¼” from the front edge. Use a dovetail gauge to mark tail angles on the drawer front. These lines guide your bit placement and ensure the joint remains hidden from the front view.
Clamp with Front Edge Flush
Place the drawer front in the jig with its front edge aligned to the pin block. This alignment ensures the tails stop short, creating the blind effect. Clamp the piece securely. The bit must only cut into the end grain and not break through the visible front face.
Test Depth on Scrap Material
Set the bit depth to cut exactly to the shoulder line. Going too deep breaks through the front and ruins the piece. Test your settings on a scrap of identical thickness. The drawer side should sit flat against the front with no gaps. Adjust depth incrementally until perfect.
Maintain Bit Performance and Longevity
Proper care extends the life of your tools and ensures consistent results.
Clean Resin Buildup Regularly
Wood pitch accumulates on flutes, causing friction and burning. Clean bits after every few hours using a commercial router bit cleaner or acetone with a brass brush. Avoid steel brushes as they damage carbide edges. A clean bit runs cooler and cuts more precisely.
Sharpen or Replace Dull Bits
A dull bit tears wood fibers instead of shearing them cleanly. Look for fuzzy edges, smoke, or excessive strain on the router motor. Have carbide bits resharpened by a professional service. Replace the bit entirely if the cutting edge shows chips or cracks.
Store Bits in Protective Cases
Keep organized in a foam-lined case to prevent damage. Moisture causes corrosion on steel shanks. Label each bit by angle and diameter for quick identification. Never throw bits loosely into a drawer where they can collide and chip.
Avoid Common Dovetail Routing Mistakes
Learning how to use a dovetail router bit involves avoiding these frequent errors.
Forcing the Router Too Fast
Pushing too hard causes burning and chatter. Let the bit RPM do the cutting work. Feed at a steady pace of roughly 2–3 inches per second in hardwood. Slow down immediately if you hear screaming or see smoke.
Ignoring Grain Direction
Cutting against the grain increases tear-out risks. Start routing tails on the side where grain runs toward the waste area. Support the back edge of pin cuts with a backer board to prevent splintering on exit.
Skipping Test Assemblies
Never assume your first cut is perfect. Always dry-fit joints before applying glue. Check for squareness and alignment. If one tail fits tight and another loose, your jig may be misaligned or your stock thickness varies.
Pro Tip: Label every piece and cut in sequence. Dovetail joints are precise but unforgiving, so mixing up left and right sides ruins hours of work.
Frequently Asked Questions About Dovetail Router Bits
What angle dovetail bit should I use for drawers?
Use a 14° bit for standard drawer construction as it provides the best strength and traditional look. Choose a 7° or 8° bit only if you desire a more delicate, decorative appearance for fine furniture pieces.
Can I cut dovetails without a jig?
While possible, cutting dovetails freehand requires advanced skill and custom templates. For consistent results, especially when learning how to use a dovetail router bit, a dedicated jig is highly recommended to ensure accurate spacing and alignment.
Why are my dovetail joints burning?
Burning usually results from a dull bit, resin buildup, or feeding the router too slowly. Clean your bit thoroughly, check for sharpness, and maintain a steady, moderate feed rate to prevent friction heat.
How deep should I set my dovetail router bit?
For through-dovetails, set the depth slightly deeper than half your stock thickness. For half-blind dovetails, match the depth exactly to the thickness of the pin board to ensure a flush fit without breaking through.
Do I need a powerful router for dovetails?
Yes, a router with at least 2 HP is recommended for full-depth cuts in hardwoods. Lower power tools may stall or burn the wood if asked to remove too much material in a single pass.
Key Takeaways for Using a Dovetail Router Bit
Mastering how to use a dovetail router bit transforms your woodworking projects with strong, beautiful joints. Success depends on selecting the correct angle, setting precise depths, and maintaining a steady feed rate. Always prioritize safety by securing workpieces and wearing proper protection.
Start with scrap wood to test your setup before cutting final pieces. With patience and practice, you will produce dovetails that fit perfectly without gaps or forcing. Grab your router and jig to begin crafting professional-grade furniture today.



