
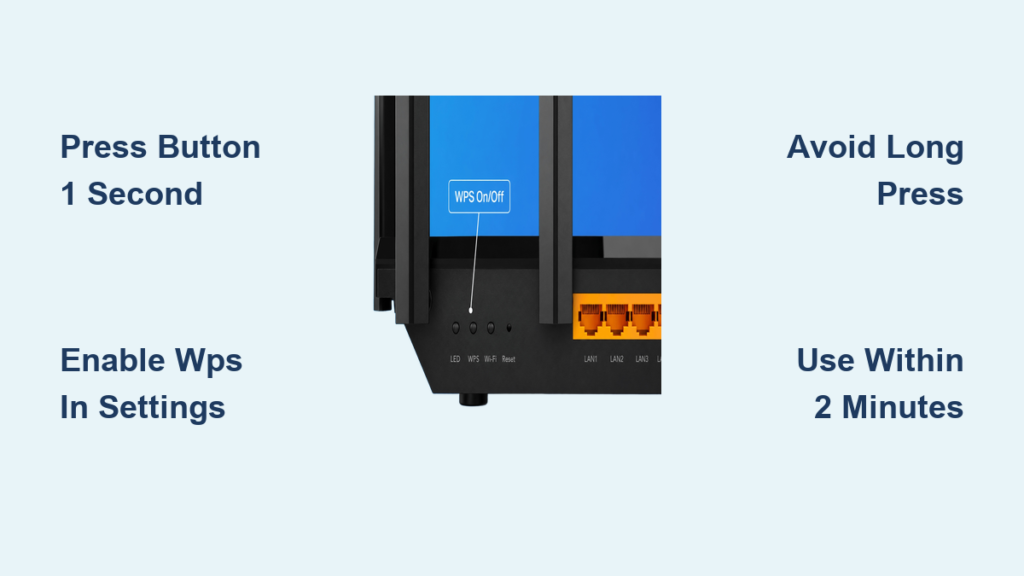
Connecting new gadgets to your home network often feels like a chore involving long passwords and tiny remote keyboards. You can skip the hassle entirely by using router WPS mode to link compatible devices with a single button press. This feature automates the secure handshake between your router and gadgets like smart TVs or printers without typing a single character.
This guide walks you through the exact steps to activate WPS safely and avoid common pitfalls that disable your wireless signal. You will learn which devices support this feature, how to fix connection timeouts, and why holding the button too long can cut off your entire network.
How WPS Technology Simplifies Device Pairing
Wi-Fi Protected Setup (WPS) is a built-in standard designed to automate the connection process between your router and wireless clients. Instead of manually entering complex credentials, the system uses an encrypted handshake to verify devices instantly.
The Push Button Configuration Method
This approach requires physical access to your hardware but offers the fastest setup time. You simply press the WPS button on your router and then select the connect option on your device. The router broadcasts a temporary signal that allows the client to join securely using WPA or WPA2 encryption.
The PIN Code Authentication Method
You can also pair devices by entering an eight-digit code found on your router label. This method works well when the router is out of reach or stored in a cabinet. Your device sends this code to the router, which verifies it and grants access without needing a physical button press during the handshake.
Compatible Devices and Critical Limitations
Not every gadget supports this quick-connect feature, and assuming otherwise leads to frustration. Understanding which hardware works helps you decide when to use WPS versus manual entry.
Hardware That Supports WPS
- Mainstream Routers: Most models from TP-Link, Netgear, and ASUS include a dedicated button.
- Android Mobile Devices: Many phones and tablets allow connection via Wi-Fi settings.
- Legacy Smart TVs: Models running older firmware often have built-in support.
- Peripherals: Printers, Blu-ray players, and USB adapters frequently include this option.
Devices That Do Not Support WPS
- All Apple iOS Devices: iPhones and iPads never supported this feature due to security policies.
- Android 8.0 and Newer: Google removed WPS functionality from Android TV starting with version 8.0 Oreo.
- WEP Networks: Routers using outdated WEP encryption cannot utilize WPS protocols.
Pro Tip: If your Android TV lacks the WPS option in network settings, check your software version. Upgrades to Android 8.0 or higher permanently remove this capability.
Step-by-Step Push Button Connection Guide
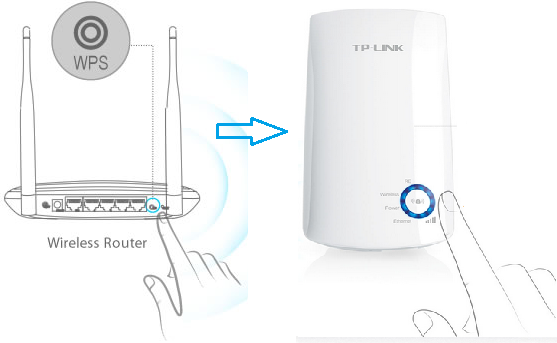
The physical button method is the most reliable way to connect if you can reach your router. Follow these precise steps to ensure success within the required timeframe.
Initiate the Request on Your Device
Navigate to the network settings on your TV, printer, or tablet. Select the WPS or Push Button option to start the search timer. Your device will now look for a router broadcasting a pairing signal for the next two minutes.
Press the Router Button Correctly
Locate the button labeled WPS on your router hardware. Press and release it firmly after exactly one second.
- Do not hold the button down for more than five seconds.
- Holding it longer disables the wireless radio on many TP-Link models.
- The WPS LED should begin blinking to indicate discovery mode.
Verify Successful Pairing
Watch the indicator light on your router and the screen on your device. The LED will stay solid for about five minutes once the connection succeeds. Your device screen will display a “Connected” or “Success” message confirming network access.
Connecting Devices Using WPS PIN Codes

Use the PIN method when your router is inaccessible or you prefer not to walk to the device location. This approach relies on an eight-digit numeric code unique to your hardware.
Locate Your Unique PIN
Check the sticker on the bottom or back of your router for the default PIN. Alternatively, log into your router web interface and navigate to Advanced > Wireless > WPS to view or regenerate this number.
Enter the Code on Your Client
Select the PIN entry option in your device network menu. Type the eight-digit code exactly as it appears on your router label. Click connect to send the authentication request to the router.
Confirm Automatic Handshake
The router validates the code and establishes the link without further input. This process usually completes within 30 seconds if the code is correct and the wireless function is active.
Managing WPS Settings in Router Interface
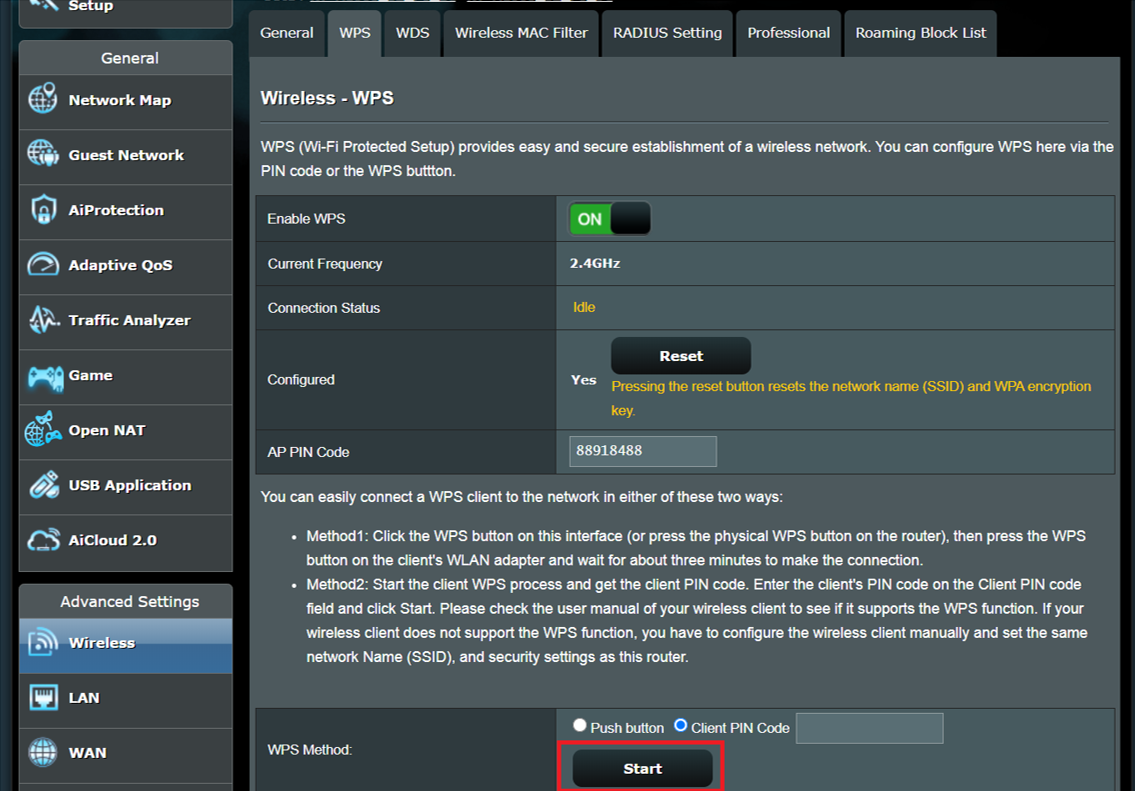
You have full control over this feature through your router administrative panel. Adjusting these settings helps balance convenience with network security.
Enable or Disable Global WPS
Log into your router at 192.168.0.1 or 192.168.1.1 using your admin credentials. Go to System Tools > System Parameters > WPS to find the master switch. Checking the box enables both button and PIN methods, while unchecking it blocks all WPS attempts.
Regenerate Your Security PIN
Change your default PIN regularly to prevent unauthorized access attempts. Navigate to Advanced > Wireless > WPS and click the regenerate button. The system creates a new code immediately, rendering the old one invalid.
Verify Wireless Prerequisites
Ensure your wireless function is turned on before attempting any configuration. WPS will not work if the radio is off or if your encryption type is set to WEP. Switch to WPA2 or WPA3 to enable compatibility.
Troubleshooting Common WPS Connection Failures
Connection attempts sometimes fail due to timing errors or configuration conflicts. Use these diagnostic steps to resolve the most frequent issues.
No Response From Router
- Check if WPS is enabled in system parameters.
- Ensure the wireless function is active.
- Verify you pressed the button for only one second.
- Move the device closer to the router to improve signal strength.
WPS LED Fails to Blink
The router is not entering discovery mode. This often happens if the button press was too short or if the wireless radio is disabled. Try pressing the button more firmly or reboot the router to reset the hardware state.
Missing WPS Option on Android TV
Your television likely runs Android 8.0 or a newer version. Google removed this feature from the operating system, so no workaround exists. You must enter your Wi-Fi password manually using the on-screen keyboard.
Connection Timeout Errors
The system has a strict 120-second window for pairing. If you do not press the router button within two minutes of starting the request on your device, the session expires. Restart the process and act quickly to stay within the time limit.
Critical Safety Warnings for WPS Usage
Misusing the physical button can cause significant network disruptions. Understanding these risks prevents accidental outages and security gaps.
Avoid Disabling Your Wireless Network
Holding the WPS button for more than five seconds on TP-Link routers triggers a safety feature that shuts off Wi-Fi. All connected devices lose internet access until you re-enable the wireless function via a wired connection or reset the device. Always tap the button briefly.
Understand PIN Security Risks
The eight-digit PIN can be vulnerable to brute-force attacks if left enabled constantly. Disable WPS in your router settings when you are not actively adding new devices. Re-enable it only when needed to minimize your network attack surface.
Best Practices for Security
- Keep router firmware updated to patch known vulnerabilities.
- Use the push button method whenever possible since it requires physical access.
- Disable WPS globally if you do not use it frequently.
Final Tips for Reliable WPS Performance
Mastering router WPS mode requires attention to timing and device compatibility. Always start the process on your client device before pressing the router button to maximize the success window. Keep your devices within close range during the handshake to avoid signal interference.
Remember that holding the button too long causes outages, so use a quick tap rather than a long press. Disable the feature in your settings when not in use to maintain a secure network environment. By following these steps, you can connect your smart home gadgets quickly without compromising safety.
Frequently Asked Questions About Router WPS Mode
Can I use WPS with my iPhone or iPad?
No, Apple devices do not support WPS functionality. You must enter your Wi-Fi password manually in the iOS settings menu to connect these devices to your network.
Why did my Wi-Fi stop working after pressing the WPS button?
You likely held the button for more than five seconds. On many routers, this action disables the wireless radio. You must log in via a wired connection to re-enable the wireless function.
Does WPS work on Android TVs running version 8.0?
No, Google removed WPS support starting with Android 8.0 Oreo. If your TV updated to this version or higher, the option disappears from the network menu permanently.
How long do I have to press the WPS button?
Press the button for exactly one second. This short duration initiates pairing mode without triggering the safety feature that disables your wireless network.
What happens if I miss the two-minute connection window?
The pairing session expires, and you must restart the process on your device. Initiate the request on your client gadget again and press the router button immediately.
Key Takeaways for Secure Router WPS Mode Usage
Using router WPS mode offers a convenient way to connect devices without typing passwords, but it requires strict adherence to timing rules. Remember to press the button for only one second to avoid disabling your wireless network. Always verify that your devices support this feature, as iOS and newer Android TVs do not.
Disable WPS in your router settings when you are not actively pairing new hardware to maintain optimal security. By balancing convenience with these safety precautions, you can manage your home network efficiently.



