
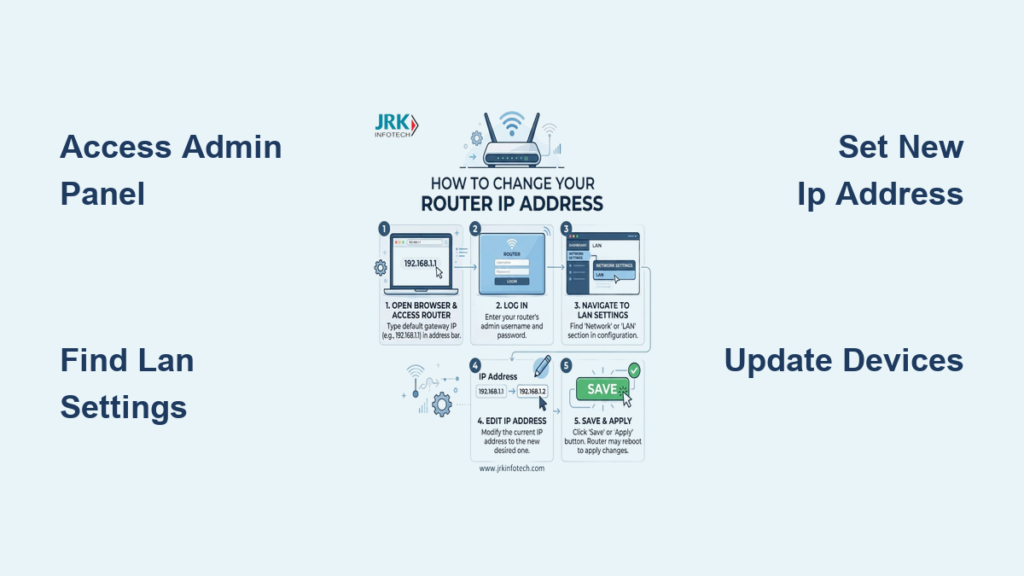
Your home network hits a snag when two devices fight for the same address, often requiring you to change router IP settings to restore stability. This common issue causes dropped connections and prevents new devices from joining your Wi-Fi until you resolve the gateway conflict.
This guide explains exactly how to change router IP addresses on major brands like TP-Link, Netgear, and Asus without losing access. You will learn to locate LAN settings, select a safe new address, and update your devices to ensure a smooth transition.
Access Router Admin Panel Safely
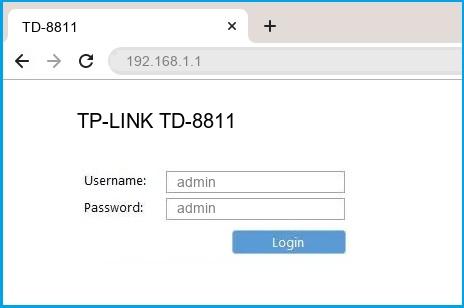
You must log into the web interface before making any network changes. This secure portal allows you to manage all configuration settings for your local area network.
Find Current Router IP Address
Identify the existing gateway address to begin the process. On Windows, open Command Prompt and type ipconfig to see the Default Gateway value.
Mac users should navigate to System Settings > Network, select their Wi-Fi connection, click Details, and view the Router field. Many routers also display this default address on a sticker located on the bottom or back of the device.
Log In to Router Interface
Type the current IP address into your web browser address bar and press Enter. A login screen will appear asking for a username and password.
Common default credentials include:
* Username: admin
* Password: admin or password
Check your specific router manual if these defaults fail. Use an Ethernet cable for this step if possible since Wi-Fi may disconnect during the update.
Locate LAN or Network Settings
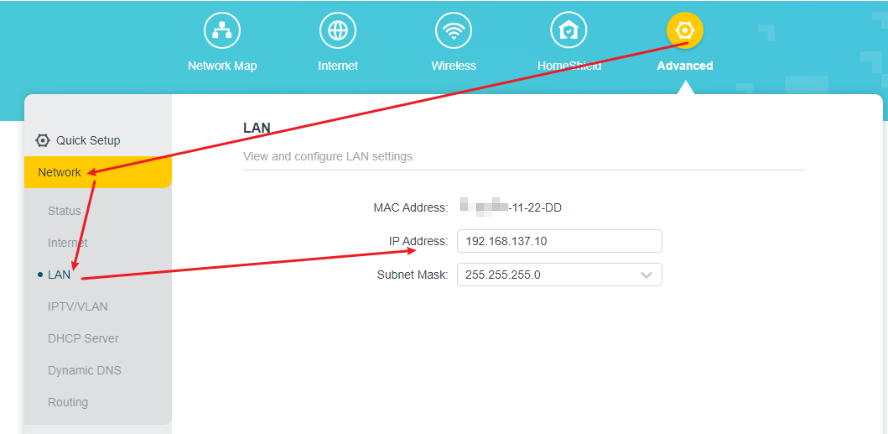
The address you need to modify is the LAN IP, which identifies your router within your local network. Finding the correct menu ensures you change the right parameter.
Navigate to LAN Configuration
Search your router dashboard for tabs labeled LAN Setup, Network Settings, or Local Network. These options usually sit under Advanced Settings or Setup menus.
Specific paths for popular brands include:
* TP-Link: Network > LAN
* Netgear: Advanced > Network > LAN Setup
* Asus: LAN > LAN IP Address
* Linksys: Router Settings > Local Network
This page displays your current IP address and the subnet mask, which is typically 255.255.255.0.
Understand IP Address Rules
Select a new address that falls within private ranges like 192.168.x.x or 10.x.x.x. The new number must not match any other device currently on your network.
Follow these guidelines for success:
* End the address in .1 or .254 for consistency
* Avoid using 127.0.0.1 as it is a loopback address
* Ensure the new IP matches your intended subnet structure
* Stay away from public IP addresses for internal use
Choosing an invalid address will prevent your network from functioning correctly.
Change Router IP Step by Step
Execute the change carefully to avoid locking yourself out of the system. The router will reboot automatically after you save the new configuration.
Enter New IP and Subnet
Locate the IP Address field within your LAN settings menu. Replace the existing numbers with your desired address, such as changing 192.168.1.1 to 192.168.10.1.
Keep the Subnet Mask set to 255.255.255.0 unless you have specific networking requirements. Click Save or Apply to initiate the change. Your connection will drop immediately as the router restarts with the new identity.
Reconnect Using New IP
Wait about one minute for the router to fully reboot. Open your browser and type the new IP address into the address bar to regain access.
You may need to refresh your device network settings to recognize the new gateway. Windows users can run ipconfig /release followed by ipconfig /renew in Command Prompt. Mac users can run sudo ipconfig set en0 DHCP to force a renewal.
Prevent Common Connection Issues
Temporary outages often occur when modifying core network settings. Understanding potential pitfalls helps you maintain a stable internet connection throughout the process.
Avoid IP Conflicts
An IP conflict arises when two devices attempt to use the same address simultaneously. This situation causes severe lag or complete loss of internet access for affected devices.
Prevent these issues by following these steps:
* Choose an IP outside your DHCP assignment range
* Set the router to .1 or .254 if DHCP starts at .100
* Update your DHCP pool settings to match the new subnet
* Reboot all connected devices if conflict alerts appear
Proper planning ensures your router address remains unique within the network.
Handle Lost Admin Access
You might lose access if your computer retains the old network configuration. Connect via Ethernet cable to ensure a stable physical link to the router.
Try releasing and renewing your IP address again if the page does not load. Perform a factory reset by holding the reset button for 10 seconds if you cannot recover access. You will need to reconfigure your network from scratch after a reset.
Update Connected Devices if Needed

Most modern devices automatically detect the new gateway address through DHCP. Some specialized equipment may require manual updates to reconnect successfully.
Devices That May Need Manual Fix
Static IP configurations on certain hardware prevent automatic updates. Smart TVs, security cameras, and network printers often fall into this category.
Fix connection issues on these devices by:
1. Accessing the device network settings menu
2. Changing the gateway field to the new router IP
3. Saving changes and restarting the device
Rebooting these devices often forces them to request fresh network information automatically.
Adjust DHCP Settings
Update the DHCP server range to align with your new router address. This step ensures new devices receive correct network parameters upon joining.
Navigate to LAN or DHCP settings in your admin panel. Set the IP pool to match the new subnet, such as 192.168.10.100 to 192.168.10.199. Save the settings and restart the DHCP service to apply changes.
Secure Your Router After Change
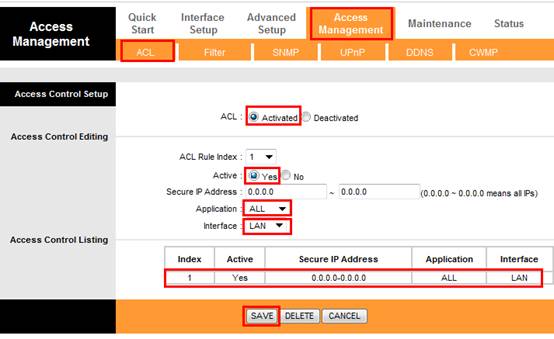
Changing your IP address provides an excellent opportunity to enhance overall network security. Take extra steps to protect your admin panel from unauthorized access.
Change Default Login Credentials
Default passwords are widely known and pose a significant security risk. Update your login credentials immediately after changing the IP address.
Go to Administration or System settings to create a new password. Use a strong, unique combination of letters, numbers, and symbols. This simple step prevents outsiders from altering your network settings.
Disable Remote Management
Remote management features allow access to your router from outside your home network. Disable this feature unless you specifically need it for work or monitoring.
Look for settings named Remote Access, Remote Management, or Web Access from WAN. Set these options to Disabled to block external connection attempts. This action significantly reduces your attack surface against hackers.
When Not to Change Router IP
Certain scenarios make changing the router IP inadvisable or unnecessary. Evaluate your specific situation before proceeding with modifications.
ISP-Provided Equipment
Internet Service Providers often lock down rental routers to prevent configuration errors. Attempting to change settings on these devices may violate your service agreement.
Potential consequences include:
* Triggering automatic service outages
* Voiding technical support eligibility
* Causing firmware conflicts with provider systems
Contact your ISP support team before modifying any settings on their equipment.
Mesh Systems and Gateways
Mesh Wi-Fi systems rely on specific IP configurations to maintain node synchronization. Changing the primary node IP can disrupt the entire mesh network.
Systems like Google Nest or Eero manage settings through mobile apps rather than web interfaces. Altering the IP manually may break app connectivity and automatic updates. Stick to default settings unless you have advanced networking needs.
Frequently Asked Questions About Changing Router IP
Will changing my router IP affect my internet speed?
Changing the IP address itself does not increase or decrease internet speed. It simply reorganizes how devices communicate within your local network. Performance issues usually stem from signal strength or bandwidth limits.
Do I need to reconnect all my devices after the change?
Most devices using DHCP will reconnect automatically within a minute. Devices with static IP settings will need manual updates to their gateway address. Rebooting affected devices often resolves remaining connection issues.
Can I use any number for my new router IP address?
You must use a private IP range like 192.168.x.x or 10.x.x.x. The address cannot conflict with other devices or fall outside your subnet mask. Avoid using public IP addresses for internal network configuration.
What happens if I forget the new router IP address?
You will lose access to the admin panel until you recover the address. Check the command prompt on a connected computer or reset the router to factory defaults. The default IP will be restored after a reset.
Is it safe to change the router IP address?
Yes, it is safe when you follow the correct steps and choose a valid address. The main risk involves losing temporary access if you select an incompatible IP. Always have a way to reset the device if errors occur.
Key Takeaways for Changing Your Router IP
Knowing how to change router IP settings gives you full control over your home network structure. Follow the steps to log in, locate LAN settings, and apply a valid new address carefully.
Always update your DHCP range and reconnect devices to maintain seamless internet access. Secure your new configuration by changing default passwords and disabling remote management features.



