
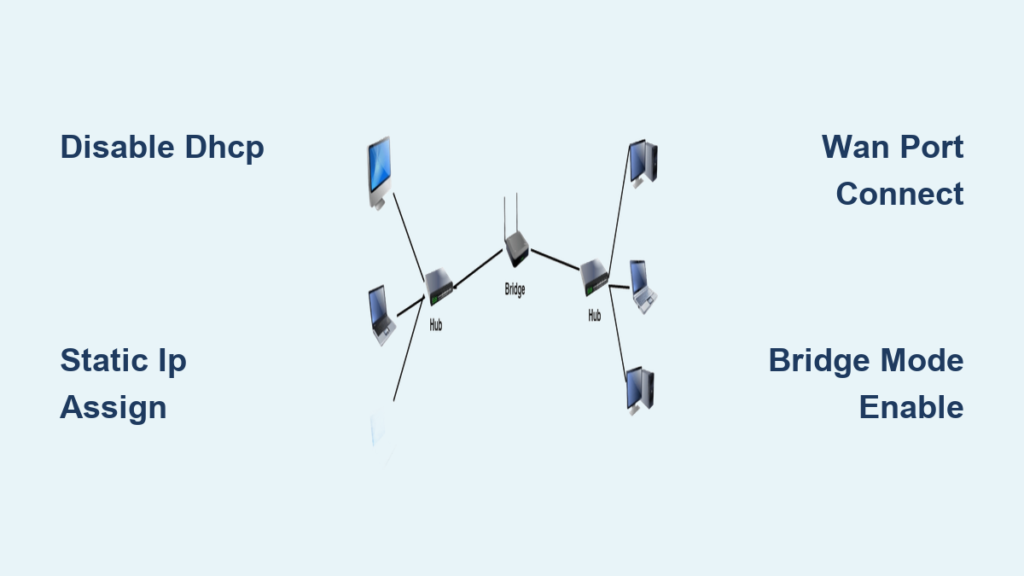
Your internet feels slow because your ISP’s modem-router combo creates a double NAT bottleneck that blocks gaming and file sharing. Bridging your router disables these conflicting routing functions so your primary device manages all traffic efficiently.
This guide explains exactly how to bridge a router to fix connectivity issues or extend Wi-Fi to a detached garage without expensive cabling. You will learn to disable DHCP, assign static IPs, and align wireless bridges for a unified high-speed network.
Enable Bridge Mode to Disable NAT and DHCP
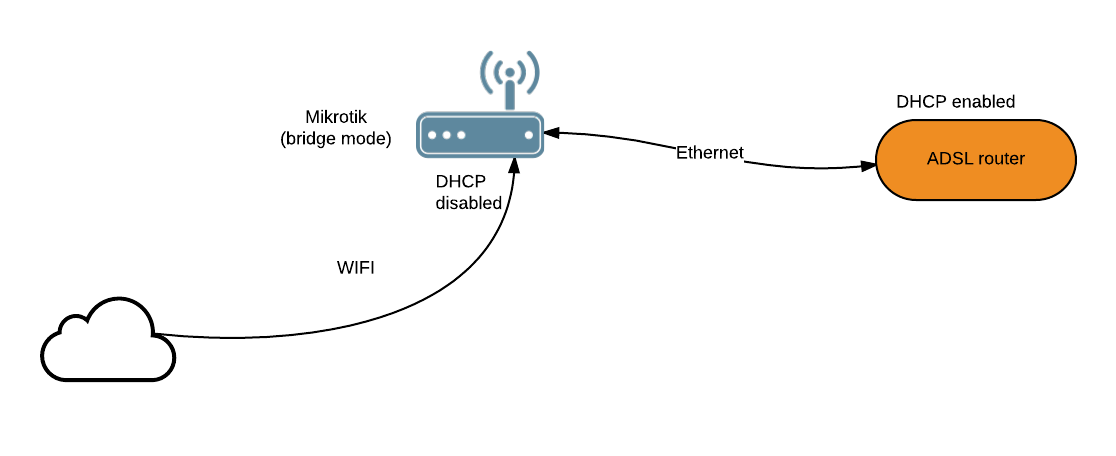
Bridge mode transforms your secondary router into a transparent pass-through device by turning off NAT, firewall, and DHCP services. This setup is essential when placing a high-performance router behind an ISP gateway to prevent double NAT errors.
Without this configuration, both devices attempt to manage network traffic, causing port forwarding failures and blocking local device discovery. Your main router must handle all IP assignments while the bridged unit forwards data untouched to keep every device on the same subnet.
Disable the DHCP Server on Secondary Units
Turning off the DHCP server on your bridged router is the most critical step to prevent IP address conflicts. If both routers assign addresses, your devices receive conflicting information leading to intermittent connection drops or total network failure.
- Log into the admin panel of the router you intend to bridge.
- Navigate to LAN Settings and locate the DHCP Server option.
- Select Disable to stop the device from issuing IP addresses.
- Save your changes and reboot the unit to apply the new settings.
Connect a laptop to the bridged router and run ipconfig to verify the default gateway matches your main router. If the gateway address belongs to the bridged unit, the DHCP server is still active and requires further attention.
Warning: Never allow more than one DHCP server to operate on the same network segment.
Assign a Static IP Address for Management
Your bridged router still needs a unique IP address for you to access its settings later. Assign a static address that sits within your main network subnet but remains outside the DHCP pool of your primary router.
Example Configuration:
* Main Router IP: 192.168.1.1
* DHCP Pool Range: 192.168.1.100 to 192.168.1.200
* Bridged Router IP: 192.168.1.2
Enter these details manually under the LAN Setup menu ensuring the subnet mask matches your main router exactly. This prevents address conflicts and guarantees you can reach the device interface anytime.
Connect ISP Modem to Personal Router
Replace your limited ISP gateway with a superior personal router by bridging the modem first. This converts the ISP unit into a pure modem, passing the public IP directly to your router for full control over security and QoS.
Activate Bridge Mode on ISP Hardware
Most ISPs enable bridge mode through their online customer portal or require a technician visit to activate. For self-managed units, access the device interface at 192.168.1.1 or 192.168.0.1 to find the setting.
- Open a browser and enter the gateway IP address of the ISP device.
- Go to Advanced settings then Connection Settings or Broadband.
- Select Bridge Mode and confirm the change to restart the device.
Note: Bridging often disables Wi-Fi and extra LAN ports on the ISP unit unless it supports a hybrid bridge plus access point mode.
Link Your Main Router via WAN Port
Connect the Ethernet cable from the LAN port of the bridged ISP modem directly to the WAN port of your personal router. Power cycle both devices starting with the modem to establish a clean handshake.
Your personal router now handles PPPoE login, firewall protection, and DHCP duties for the entire network. You regain full functionality including custom DNS, parental controls, and ad-blocking features that fail behind double NAT setups.
Extend Network Wirelessly Between Buildings
A wireless bridge connects distant structures like sheds or workshops without trenching expensive Ethernet cables. With clear line of sight, dedicated bridge units can transmit data effectively from 100 to over 1000 feet.
Select Dedicated Outdoor Bridge Hardware

Use purpose-built wireless bridge kits designed for long-range stability rather than standard home routers. Popular options include the Ubiquiti NanoStation, MikroTik SXT series, or TP-Link CPE units.
These devices offer distinct advantages for outdoor use:
* High-gain directional antennas for focused signal transmission
* Power over Ethernet (PoE) support for simplified cabling
* Weatherproof enclosures rated IP65 or higher for outdoor durability
A DIY setup typically costs between $200 and $300 compared to professional cabling quotes exceeding $2000.
Mount and Align Bridge Units Precisely
Install the first bridge unit at your main building near a window or roof edge pointing toward the remote structure. Mount the second unit at the remote location facing the first unit directly for optimal signal strength.
- Secure both units using UV-resistant brackets or metal straps.
- Use a smartphone compass app to align the antennas visually.
- Ensure no trees, walls, or metal objects block the direct path.
Use PoE injectors to deliver both power and data to each outdoor unit over a single Ethernet cable.
Synchronize Wireless Bridge Connections
Many bridge units feature a push-button sync function to pair devices quickly without complex configuration. Press the sync button on both units within 60 seconds to initiate the pairing process.
Wait for the link light to turn solid indicating a successful connection. If synchronization fails, manually set both devices to the same fixed channel like 5 GHz Channel 149. Verify the synchronization password matches the value listed for that specific channel in your manual.
Configure NETGEAR Router as Bridge

NETGEAR routers including RAX, R, and XR series support native bridge mode for easy integration. Follow these specific steps to configure your NETGEAR device as a wireless bridge.
Access the NETGEAR Admin Interface
Connect your computer to the NETGEAR router via Wi-Fi or Ethernet cable. Open a web browser and type routerlogin.net or 192.168.1.1 in the address bar.
Log in using your administrator credentials. If the page does not load, try incognito mode or clear your browser cache to resolve loading errors.
Enable Wireless Bridge Settings
Navigate to ADVANCED then Advanced Setup and select Wireless Bridge. Check the box labeled Enable Bridge Mode to begin configuration.
Click Setup Bridge Mode Wireless Settings and enter the following details from your main network:
* Target SSID name
* Security mode (WPA2 or WPA3)
* Wi-Fi password
Click Apply twice to save settings and reboot the router. The device will now connect to your main network and provide LAN access to downstream devices.
Avoid Common Bridging Mistakes
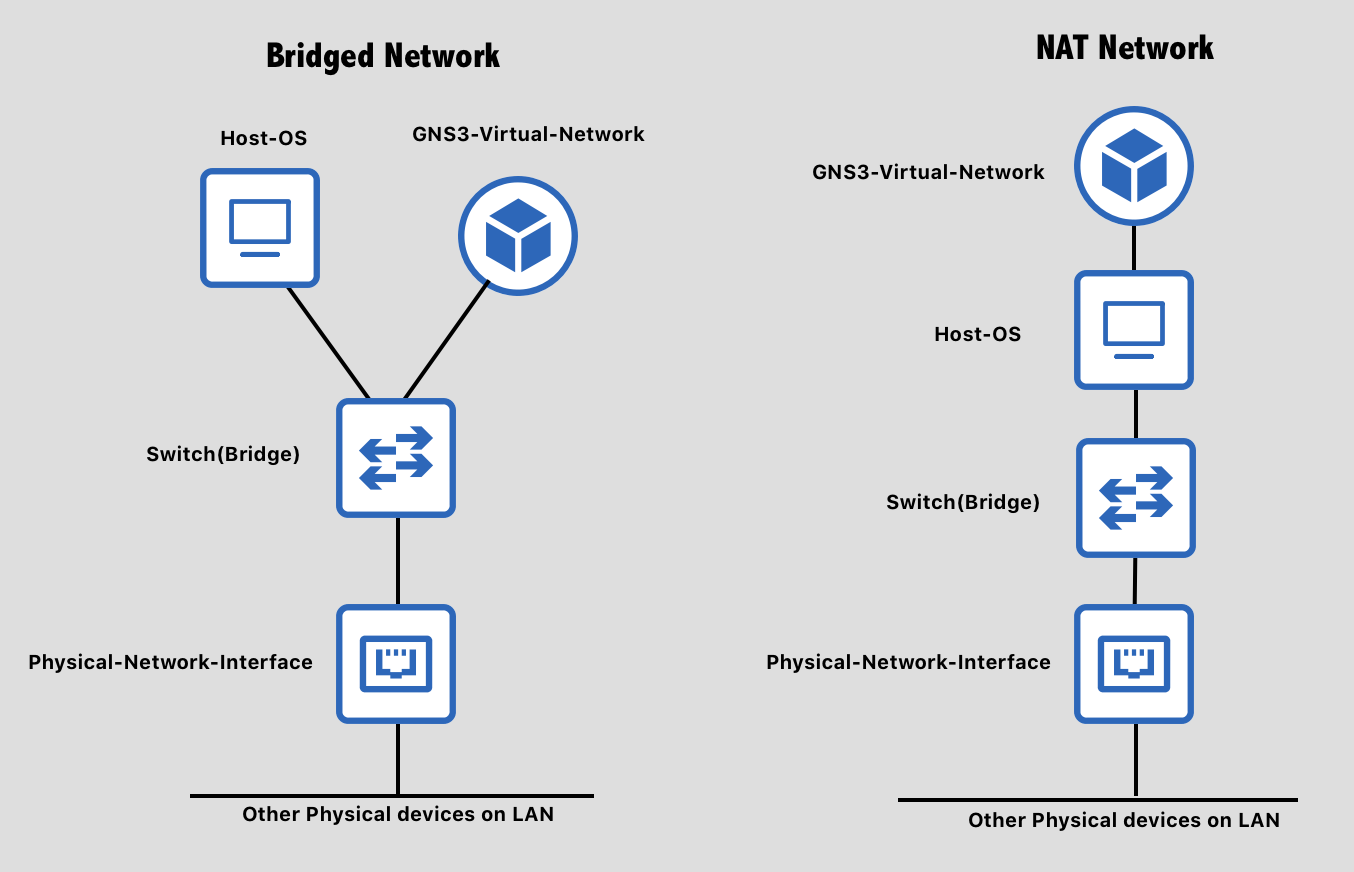
Small configuration errors can break your entire network connectivity. Prevent these frequent issues by double-checking your setup against common pitfalls.
Prevent Double NAT Errors
Double NAT occurs when two routers perform address translation simultaneously causing gaming lobbies to fail and port forwarding to break. Ensure only your main router handles routing tasks while the secondary device operates in pure pass-through mode.
Verify your setup by checking that the bridged device has NAT disabled and DHCP turned off. Use command prompt tools to confirm all devices receive IP addresses from the single main gateway.
Distinguish Between Repeater and Bridge Modes
Many users confuse repeater mode with bridge mode leading to unexpected network behavior. A repeater amplifies Wi-Fi signals but often maintains its own NAT layer and DHCP server.
A true bridge disables routing functions entirely to maintain a single subnet. Use bridge mode for seamless integration where devices need to see each other for printing or casting.
Verify Physical Port Connections
Incorrect cabling is a leading cause of connectivity failure in bridged networks. Always connect the ISP modem LAN port to your main router WAN port for standard replacement setups.
When using a secondary router strictly as an access point, connect the main router LAN port to the secondary router LAN port. Consult your specific device manual as some modern routers auto-detect port roles.
Optimize with Custom Firmware
Flash custom firmware like DD-WRT or OpenWrt if your router lacks native bridge mode features. This unlocks advanced capabilities such as VLAN support and detailed bandwidth monitoring.
Flash DD-WRT for Advanced Control
Custom firmware enables bridge mode on unsupported hardware and adds powerful network management tools. Check the DD-WRT database for your specific model compatibility before proceeding.
- Download the correct firmware file for your router model.
- Upload the file via the router administration panel.
- Reset the device and reconfigure your bridge settings.
Warning: Interrupting a firmware flash or using the wrong file can permanently brick your router.
Integrate Pi-hole for Network-Wide Ad Blocking
Enhance your bridged network by installing Pi-hole on a Raspberry Pi to block ads at the DNS level. Set the Pi-hole IP as your primary DNS server in the main router DHCP settings.
This configuration blocks approximately 70% of ads across all connected devices without installing software on each client. Combine this with browser extensions for comprehensive coverage.
Troubleshoot Bridge Connectivity Issues
Diagnose and fix common bridge failures quickly using these targeted troubleshooting steps.
Fix Devices Losing Internet Access
If a device connects but shows no internet, check if the bridged router is still running DHCP services. Confirm the device receives an IP from the main router by checking network details.
Restart your network in the correct order: main router first, then the bridged device, and finally client devices. This ensures proper handshake sequencing and IP assignment.
Resolve IP Address Conflicts
Symptoms of IP conflicts include devices kicking off the network or slow speeds. Assign a unique static IP to your bridged router outside the main DHCP pool to resolve this.
Reduce the DHCP pool size on your main router to create a larger buffer for static assignments. Check router logs for specific IP conflict alerts to identify offending devices.
Restore Access to Router Interface
If you cannot reach the router admin page, try accessing it via incognito mode with extensions disabled. Flush your DNS cache using ipconfig /flushdns in the command prompt.
Ensure your computer is on the same subnet as the router. Perform a hard reset by holding the reset button for 10 seconds if login credentials are lost.
Restart Devices in Correct Order
Multi-device bridge setups require a specific restart sequence to establish connections properly. Follow this protocol to ensure stable links.
- Power on the Main Router and wait 60 seconds.
- Power on the Secondary Bridge Device and wait 60 seconds.
- Power on any Tertiary Access Points or client devices.
This sequence allows the bridge to reconnect cleanly before clients attempt to obtain IP addresses.
Maintain Long-Term Bridge Performance
Protect your investment by maintaining outdoor units and keeping firmware updated regularly.
Protect Outdoor Units from Elements
Ensure non-IP65 units are housed in weatherproof enclosures to prevent water damage. Seal all Ethernet cable entry points with silicone or create drip loops to stop water ingress.
Avoid mounting units behind glass or metal surfaces as these materials block wireless signals significantly.
Update Firmware Regularly
Check manufacturer websites monthly for security patches and bug fixes. Subscribe to release forums if using custom firmware like DD-WRT to stay informed of stable updates.
Always back up your configuration settings before applying any firmware updates to prevent data loss.
Frequently Asked Questions About Bridging Routers
What happens if I enable DHCP on both routers?
Enabling DHCP on both devices causes IP address conflicts where devices receive incorrect gateway information. This leads to intermittent connectivity loss and prevents devices from accessing the internet or local resources.
Can I use any router for a wireless bridge?
Most modern routers support some form of bridge or access point mode but check your specific model specifications. Older or carrier-locked routers may require custom firmware like DD-WRT to enable full bridging capabilities.
Does bridging a router improve internet speed?
Bridging eliminates double NAT which can improve gaming performance and port forwarding reliability. It does not increase your base ISP speed but allows your hardware to operate at its full potential without bottlenecks.
How far can a wireless bridge transmit data?
Dedicated outdoor bridge units can transmit data effectively from 100 to over 1000 feet with clear line of sight. Obstacles like trees or buildings significantly reduce this range so alignment is critical.
Do I lose Wi-Fi on my ISP modem when bridging?
Yes, enabling bridge mode on an ISP modem-router combo typically disables its Wi-Fi and extra LAN ports. You must use your personal router to provide wireless coverage for your network.
What is the difference between bridge mode and AP mode?
Bridge mode connects two network segments at the data link layer while AP mode connects wireless clients to a wired network. In home networking contexts they often achieve similar results by disabling NAT and DHCP.
Key Takeaways for How to Bridge a Router
Bridging your router eliminates double NAT issues and creates a unified network for better performance and security. Remember to always disable DHCP on secondary devices and assign them static IPs within your main subnet.
Proper alignment of outdoor units and correct restart sequencing ensure stable long-range connections. Take action today by logging into your router settings to verify your DHCP configuration and optimize your network topology.



